A Tiny Garden With a Big Personality
A fairy garden is a miniature landscaped space filled with tiny plants, handmade or store-bought accessories, and a whole lot of charm. You can build one in a cracked teacup, an old wooden crate, or a forgotten corner of your backyard. The best part? You do not need a green thumb or a big budget to pull it off.
I got into fairy gardens almost by accident. A broken terracotta pot, some leftover succulents, and a tiny wooden bridge I found at a craft store, and suddenly I had a conversation piece on my porch that everyone wanted to photograph. That little accident turned into a full-blown obsession, and I have been building these miniature worlds ever since.
What makes fairy gardens so appealing is how personal they are. Every single one looks different because every builder brings their own style, materials, and imagination to the table. Whether you love a mossy woodland vibe or a beachy coastal theme, there is a fairy garden idea that fits your aesthetic perfectly.
Why DIY Fairy Gardens Are Worth Every Minute
Building your own fairy garden from scratch is so much more satisfying than buying a pre-made kit. You get full control over the theme, the plants, the scale, and the tiny details that make it feel alive. Plus, it is a genuinely fun weekend project that the whole family can join in on.
DIY versions also cost a fraction of what you would spend at a garden center. Most of the best fairy garden containers are things you already have at home, old boots, wooden boxes, galvanized tubs, or even a hollowed-out tree stump. The accessories can be handmade from polymer clay, painted rocks, twigs, and acorn caps.
There is also something deeply calming about the process. Arranging tiny plants, placing miniature furniture, and adding little pathways made from pebbles feels almost meditative. It is one of those projects where the making is just as enjoyable as the finished result.
15 DIY Fairy Garden Ideas to Build Right Now
1. Broken Pot Fairy Garden
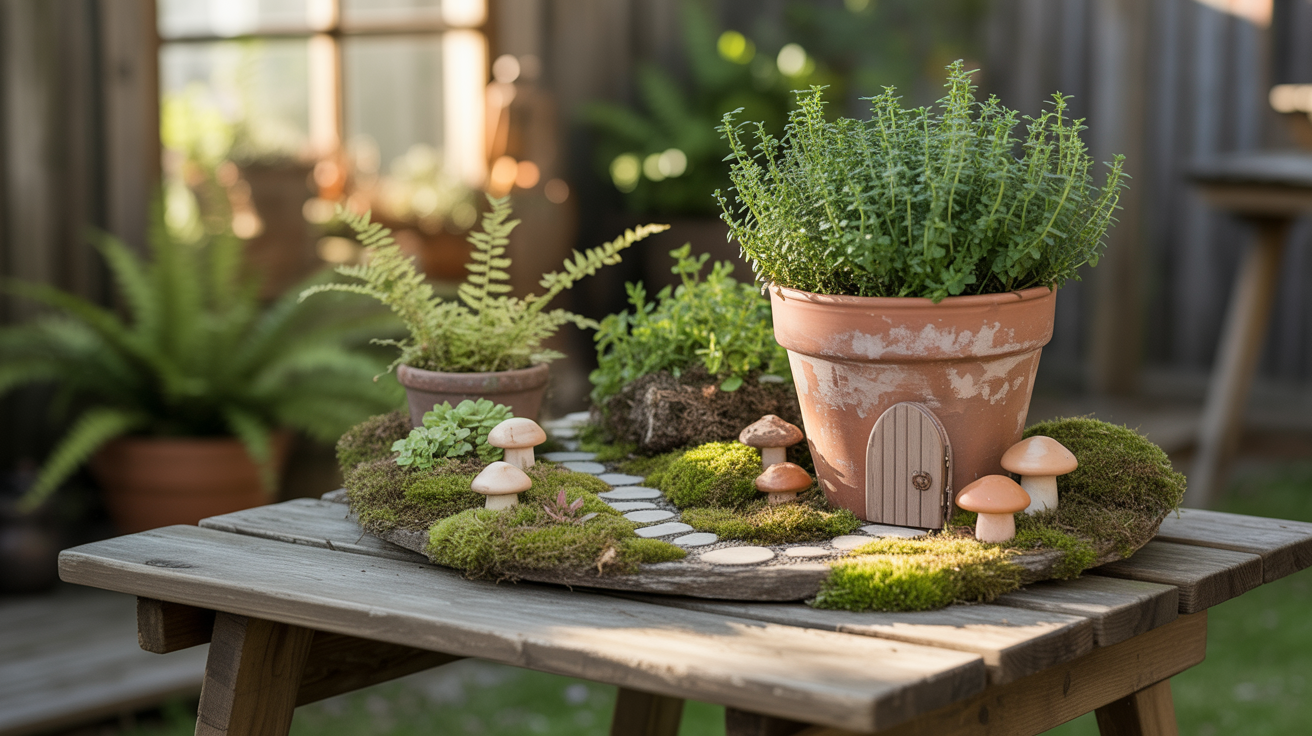
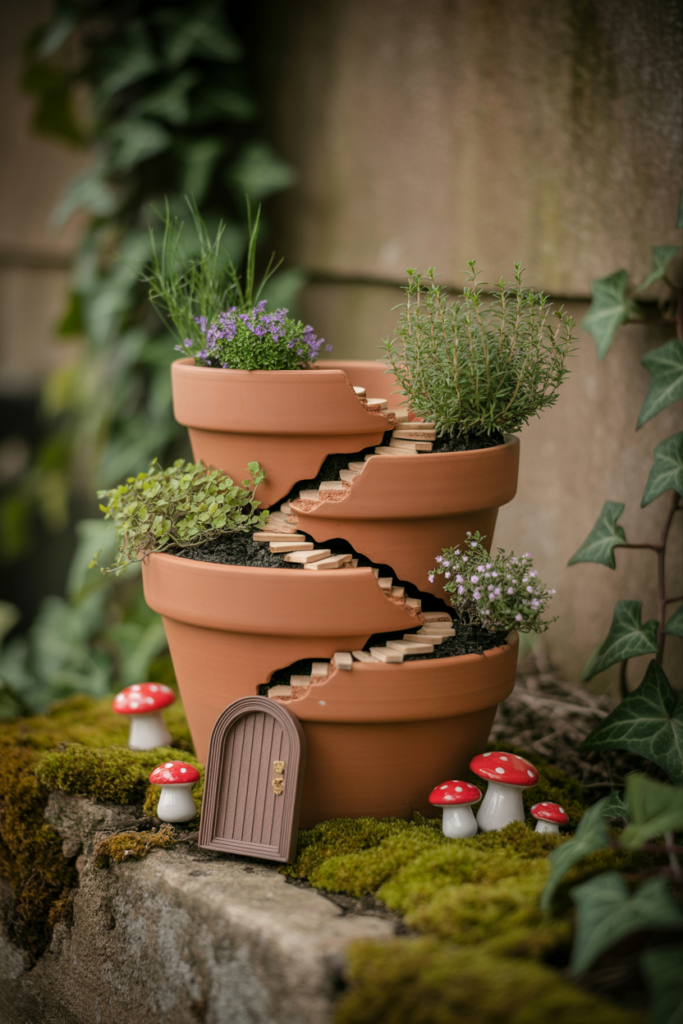
A cracked or chipped terracotta pot is honestly the perfect fairy garden container. Instead of throwing it away, stack the broken pieces like tiered shelves and tuck tiny plants into each level. Add a winding pebble path, a miniature door, and a few ceramic mushrooms to complete the look.
This style works beautifully with creeping thyme, baby tears, or mini mondo grass. These low-growing plants spill naturally over the broken edges and give the whole thing a wild, overgrown feel. I placed mine near a shaded garden wall, and it looks like something straight out of an old folklore illustration.
The broken pot style is also incredibly forgiving for beginners. You are working with a small, contained space, so plant placement is easy, and maintenance is minimal.
2. Wooden Crate Fairy Village
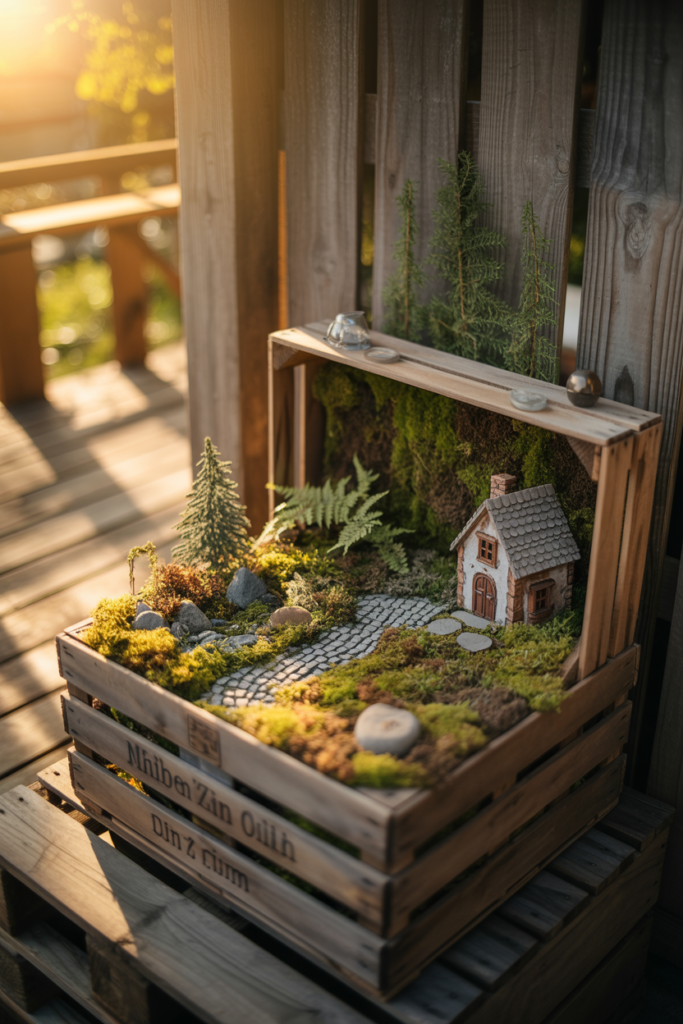
A simple wooden crate from a craft store or a fruit market can become a full fairy village with a little planning. Divide the interior into zones: a tiny forest area with moss and ferns, a cottage clearing with miniature furniture, and a stone pathway running through the middle. Layer in different heights using small rocks or upturned pots under the soil.
Wooden crates age beautifully outdoors. After a season or two, the wood gets a weathered, rustic look that makes the whole fairy village feel ancient and storied. I lightly burned the edges of mine with a torch for that extra-worn-in effect.
Use slow-growing plants like dwarf conifers, miniature hostas, or creeping Jenny. These keep the scale looking realistic without overtaking the space every few weeks.
3. Teacup Fairy Garden for Indoor Spaces
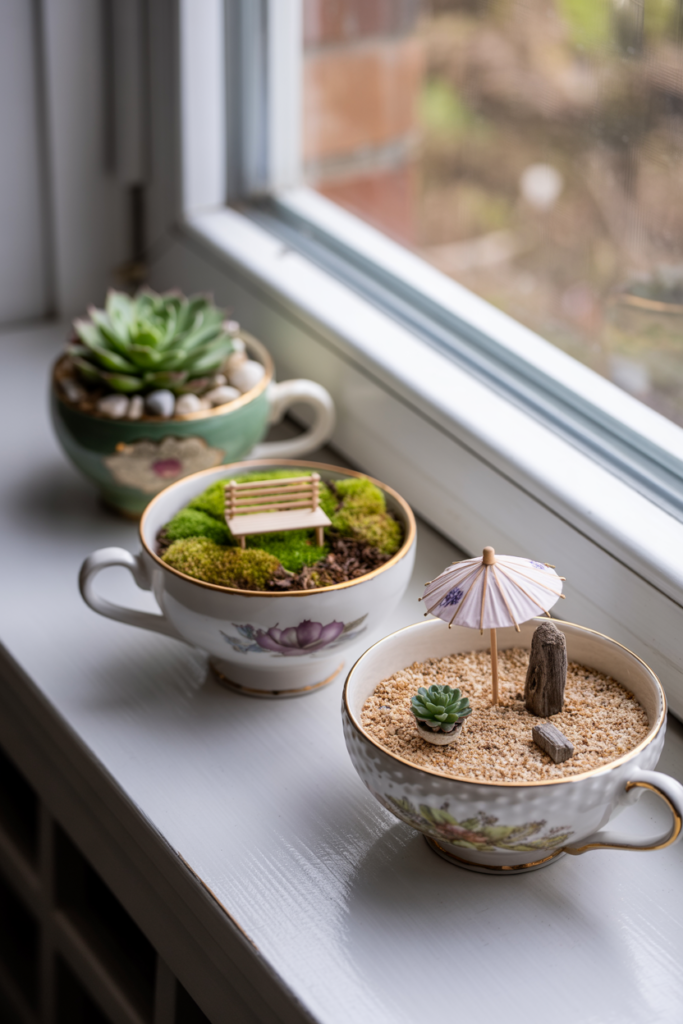
A teacup fairy garden is one of the most charming indoor options you can make in under an hour. Pick an oversized vintage teacup or a mismatched set from a thrift store and fill it with a layer of pebbles for drainage, then potting mix, then a tiny plant. Add a miniature bench, a polymer clay toadstool, and a small piece of driftwood for texture.
Succulents and air plants work best here because they stay small and do not need much water. I lined three mismatched teacups along my kitchen windowsill and used a thin layer of decorative sand in one to create a fairy beach scene. It sounds ridiculous, but it looks absolutely delightful.
Teacup gardens also make thoughtful, handmade gifts. Wrap one in a bit of brown paper and twine, and it is the kind of present that people actually keep on their desks for years.
4. Moss and Stone Woodland Fairy Garden
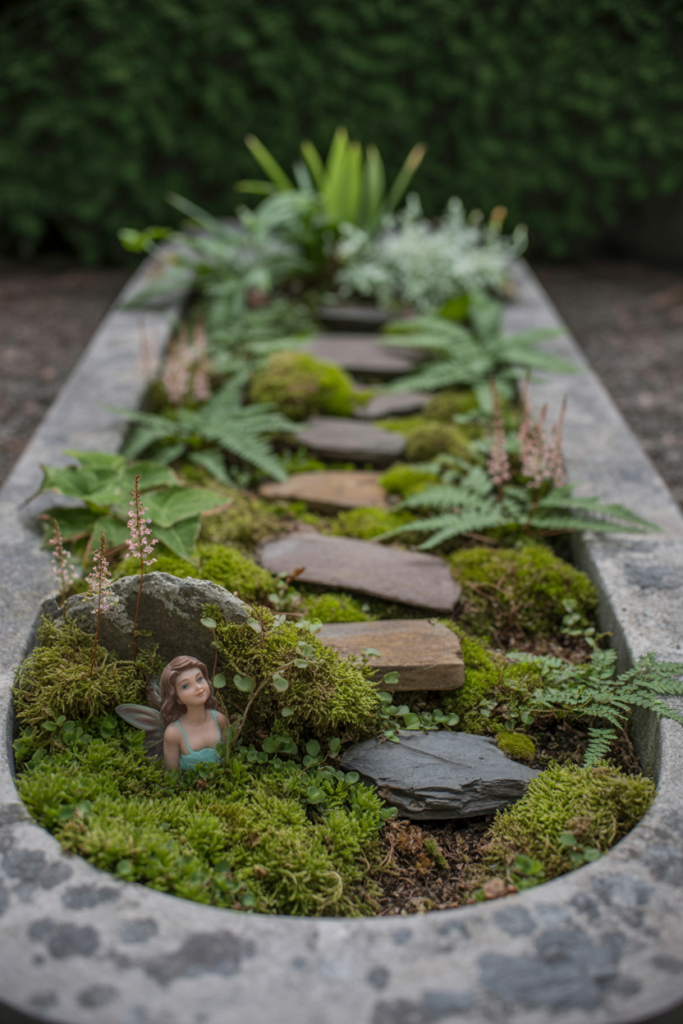
If you love a dark, moody, forest aesthetic, a moss and stone woodland fairy garden is the one for you. Start with a wide, shallow container like a stone trough or a large bonsai pot. Cover the base with a mix of sheet moss and clump moss, then add flat stones as pathways and a few rough-edged rocks as boulders.
Tuck in tiny ferns, club moss, and miniature astilbe for that lush, wild undergrowth look. A small resin fairy figurine peeking out from behind a mossy rock adds the finishing touch without looking overdone. The whole thing should feel like you stumbled across it in a quiet forest.
Mist the moss lightly every couple of days and keep it in indirect light. Sheet moss is surprisingly hardy and keeps its color beautifully when you give it the right conditions.
5. Fairy Garden in an Old Wheelbarrow
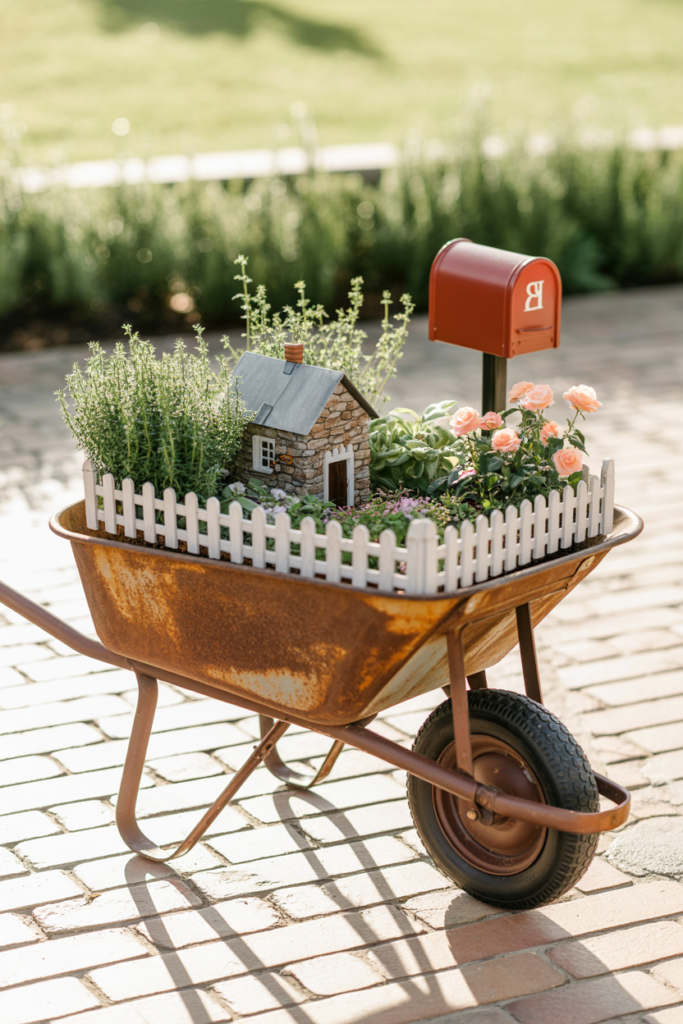
An old wheelbarrow is one of those containers that just works for a fairy garden. It has built-in drainage, good depth for plant roots, and a rustic charm that fits almost any garden style. Fill it with soil, add a layer of small pebbles at the bottom, and start building your miniature world upward.
I used a rusted wheelbarrow I found at a flea market and built a countryside fairy scene inside it. A tiny stone cottage, a mailbox made from a bottle cap, a small wooden fence, and a mix of creeping thyme and miniature roses. It sat on my back patio all summer and got more compliments than anything else in the garden.
The wheelbarrow also makes it easy to move your fairy garden around. You can wheel it into a shaded spot during summer heat waves or bring it closer to the house when the weather turns cold.
6. Fairy Garden Inside a Tree Stump
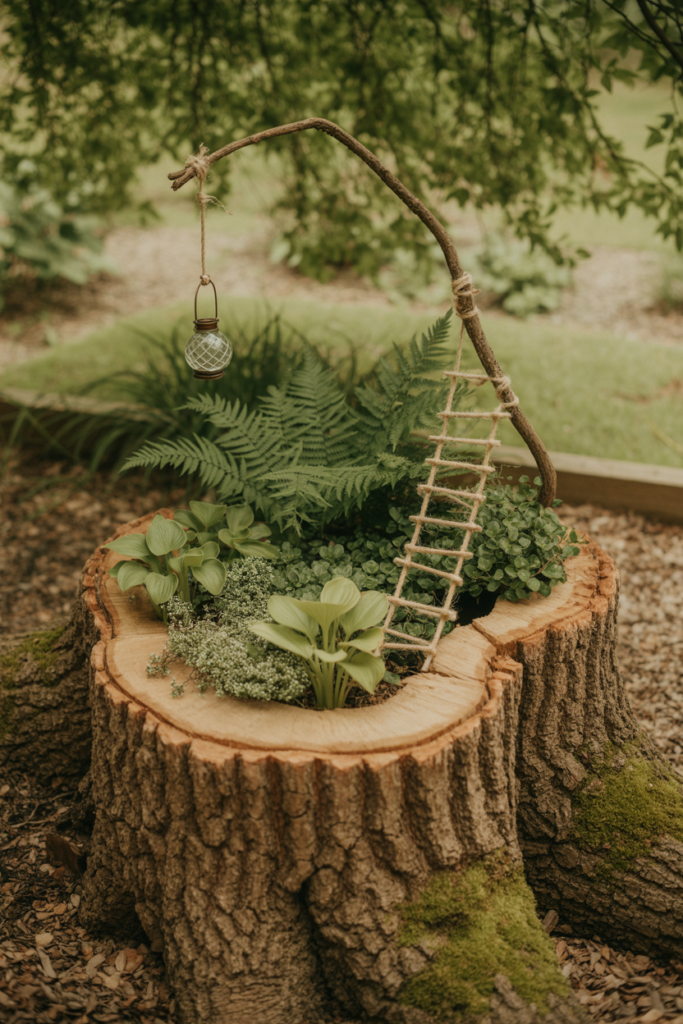
A hollowed-out tree stump is one of the most natural fairy garden containers you will ever find. If you have a stump in your yard, scoop out the center, fill it with good-quality potting mix, and let the rough bark walls do all the decorating for you. The result looks like a fairy actually chose to move in.
I planted a mix of miniature ferns, baby hostas, and creeping thyme inside an old oak stump in my backyard. Added a tiny rope ladder draped over the edge and a small lantern made from a wire-wrapped glass bead. Honestly, it looks better than most things I have spent real money on.
Stumps also retain moisture well, which means your plants stay hydrated longer between watering sessions. Just make sure the stump has some natural drainage at the base or drill a few holes to prevent waterlogging.
7. Fairy Garden in a Vintage Suitcase
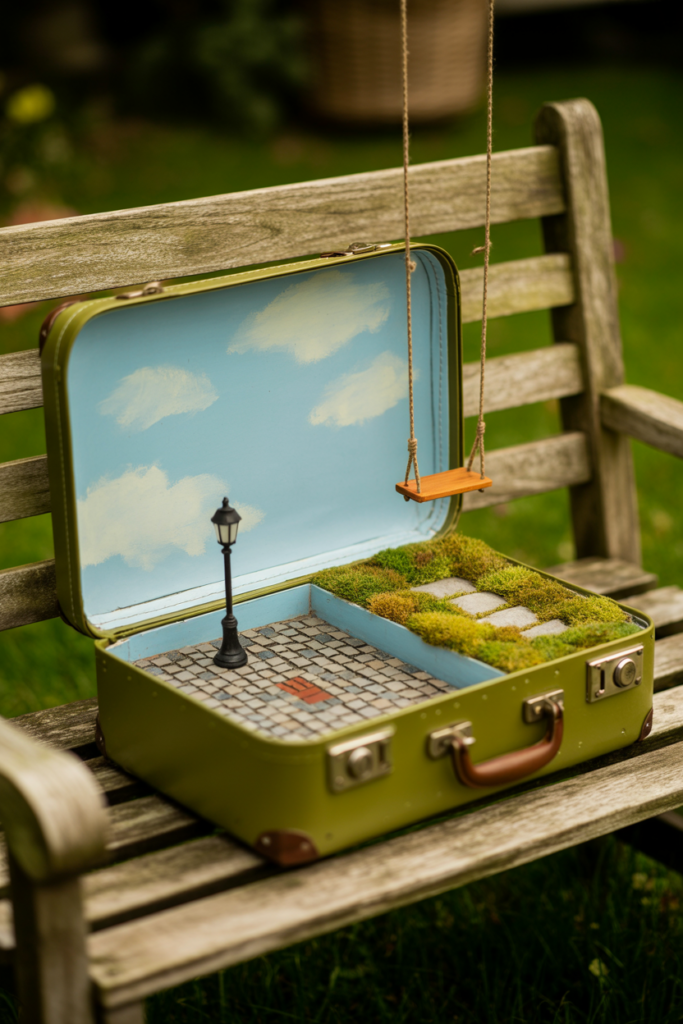
A vintage suitcase fairy garden is the kind of idea that makes people stop mid-conversation to ask where you got it. Find an old hard-sided suitcase at a thrift store, line the inside with plastic sheeting, add drainage pebbles, then fill with potting soil. Prop it open at an angle and build your miniature scene inside.
The rectangular shape gives you a lot of creative freedom. I split mine into two sections, one side with a tiny cobblestone square made from mosaic tiles and the other with a soft moss lawn and a miniature wooden swing. The open lid acts as a natural backdrop you can paint or decorate however you like.
Keep this one in a covered outdoor spot or bring it indoors near a bright window. The suitcase material does not handle heavy rain as well as terracotta or stone containers do.
8. Fairy Garden With a DIY Miniature Pond
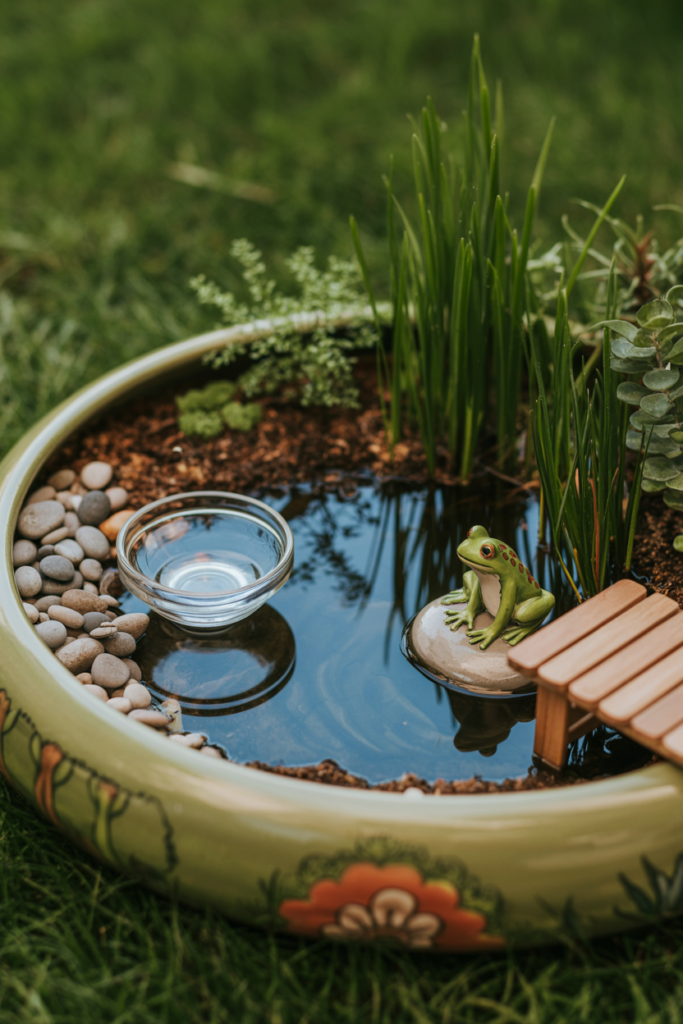
Adding a tiny pond to your fairy garden takes the whole thing to a completely different level. Use a small glass bowl, a jar lid, or even a bottle cap buried flush with the soil surface to create the illusion of water. Fill it with clear resin or simply leave it with a little real water and a few pebbles at the bottom.
Surround the pond with moisture-loving plants like baby tears or miniature sedges. Add a tiny frog figurine on a rock nearby and a small wooden dock made from popsicle sticks. I built one of these for a shaded corner of my garden, and the detail level genuinely surprised even me.
Clear casting resin is the easiest way to make a permanent pond that never dries out or grows algae. Pour it into your chosen vessel, let it cure fully, and it holds that glassy, still-water look indefinitely.
9. Succulent Fairy Garden for Low-Maintenance Lovers
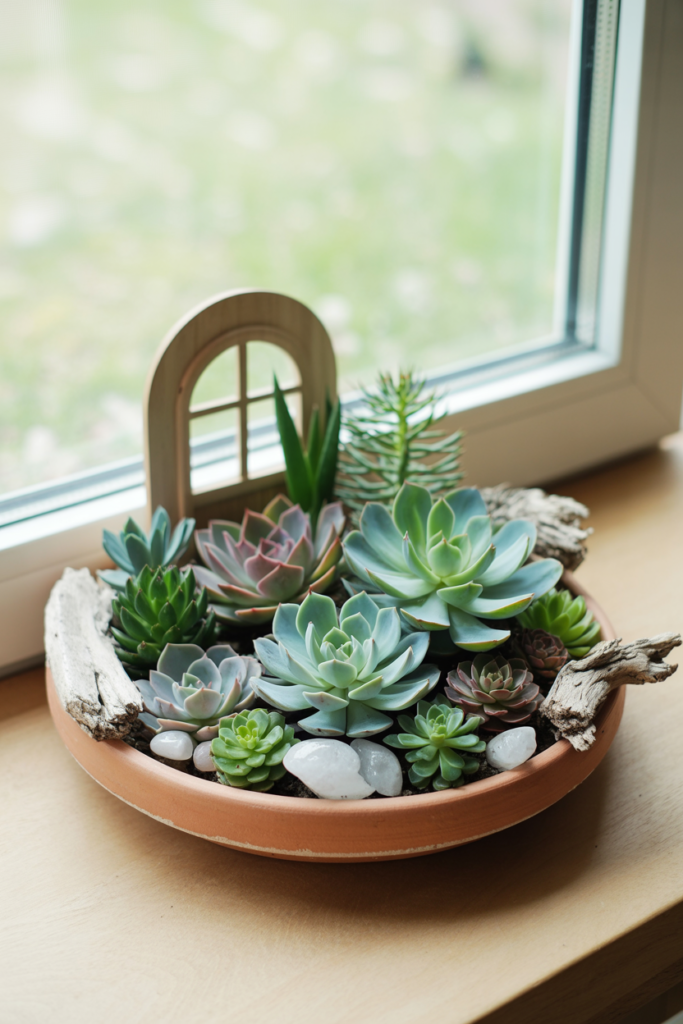
If you want a fairy garden that practically takes care of itself, succulents are your best friends. They stay compact, come in amazing colors and textures, and only need watering every week or two. A wide, shallow terracotta dish or a wooden serving board works perfectly as the base.
Arrange a mix of echeveria, haworthia, and sedum varieties by height and color for a naturally layered look. Tuck in small quartz crystals, tiny driftwood pieces, and a miniature door leaning against the tallest succulent. The crystals catch the light beautifully and give the whole scene a slightly magical, ethereal quality.
I keep my succulent fairy garden on a sunny windowsill indoors, and it has survived two winters without a single complaint. Low maintenance does not have to mean low charm, and this idea proves that completely.
10. Fairy Garden Using Repurposed Kitchen Items
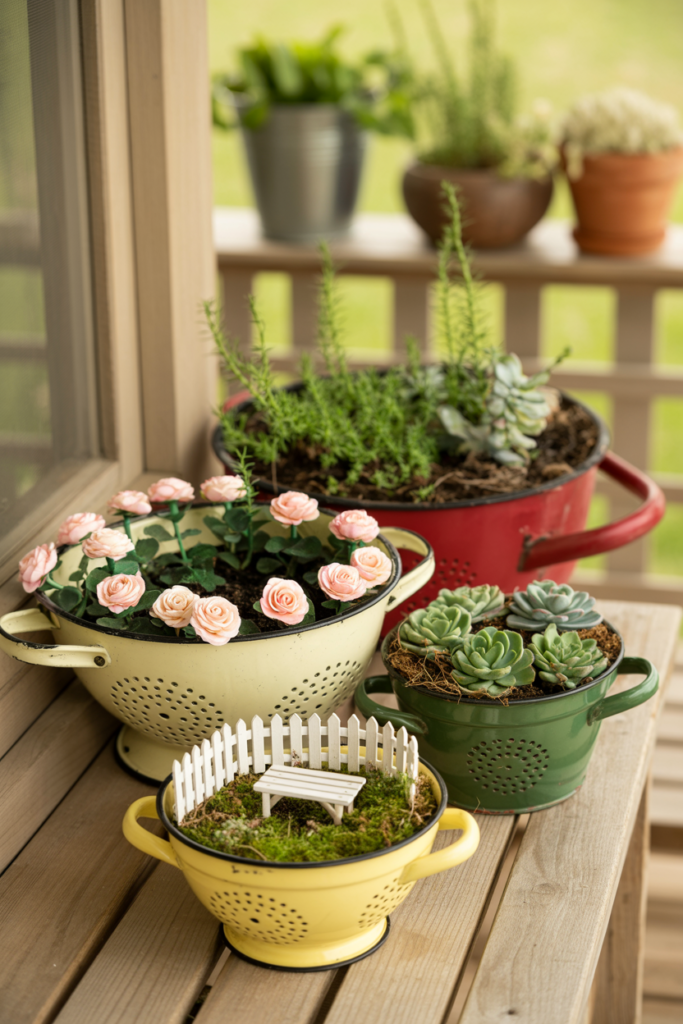
Repurposed kitchen items make some of the most creative and budget-friendly fairy garden containers out there. A colander with its built-in drainage holes, an old soup pot, a wire fruit basket lined with coconut fiber, or even a large mixing bowl can all become the base of a charming miniature garden. The unexpected container is half the fun.
I turned an old enamel colander into a cottage garden fairy scene with climbing miniature roses along the rim and a tiny white picket fence made from craft sticks. The holes in the colander meant zero drainage issues, which is honestly a problem that plagues a lot of other container choices. Sometimes the most practical solution is also the prettiest one.
Mix and match textures by combining different kitchen items in one display. A cluster of three enamel pots in different sizes, each with its own tiny theme, looks like a little fairy neighborhood on a porch shelf.
11. Fairy Garden With Homemade Clay Accessories
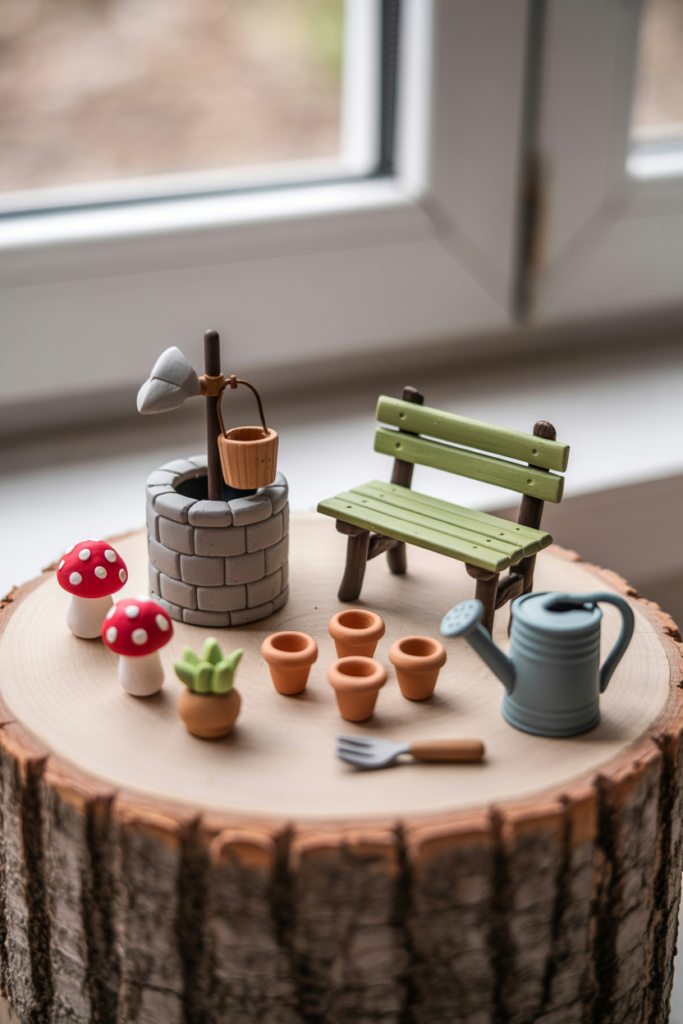
Making your own fairy garden accessories from air-dry clay or polymer clay is one of the most rewarding parts of this whole hobby. You can shape tiny mushrooms, miniature cottages, stone wells, flower pots, and garden tools in an afternoon. Paint them with acrylic craft paints and seal with a matte varnish to protect them outdoors.
The handmade quality adds something you simply cannot buy in a kit. Slightly imperfect little mushrooms look far more charming than perfectly molded plastic ones. I made a set of tiny toadstools with polka dots for my woodland garden, and they are still my favorite accessories after three years.
Air-dry clay works well for indoor gardens, but for outdoor ones, polymer clay is the better choice. It bakes hard in a regular oven and holds up much better against rain and temperature changes.
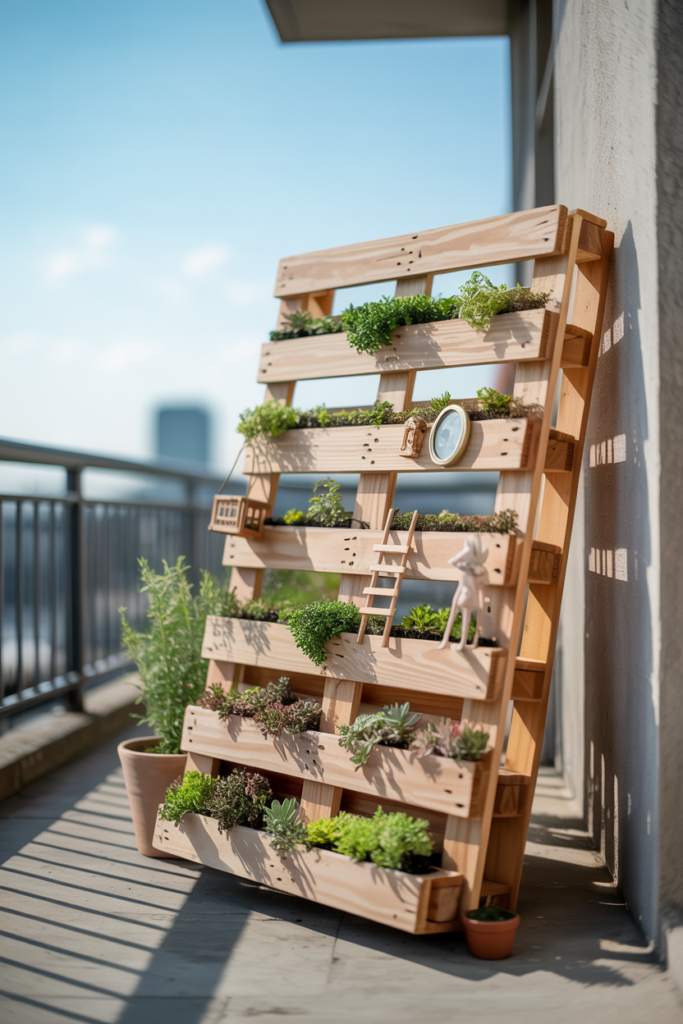
12. Fairy Garden on a Wooden Pallet
A wooden pallet leaned upright against a wall or fence becomes a vertical fairy garden with surprisingly little effort. Stuff the slats with landscape fabric to hold soil in place, fill each row with potting mix, and plant low-growing herbs, succulents, or trailing plants in each pocket. Then add your fairy accessories along the front face of the pallet.
Vertical fairy gardens are a great solution for small outdoor spaces like balconies and narrow side yards. I built one on my apartment balcony using a half-pallet, and it completely transformed what was previously a pretty uninspiring concrete wall situation. Sometimes constraints lead to the most creative outcomes.
Seal the pallet wood with an outdoor wood preservative before you start planting. Untreated wood breaks down quickly when it stays damp from regular watering, and you want this to last more than one season.
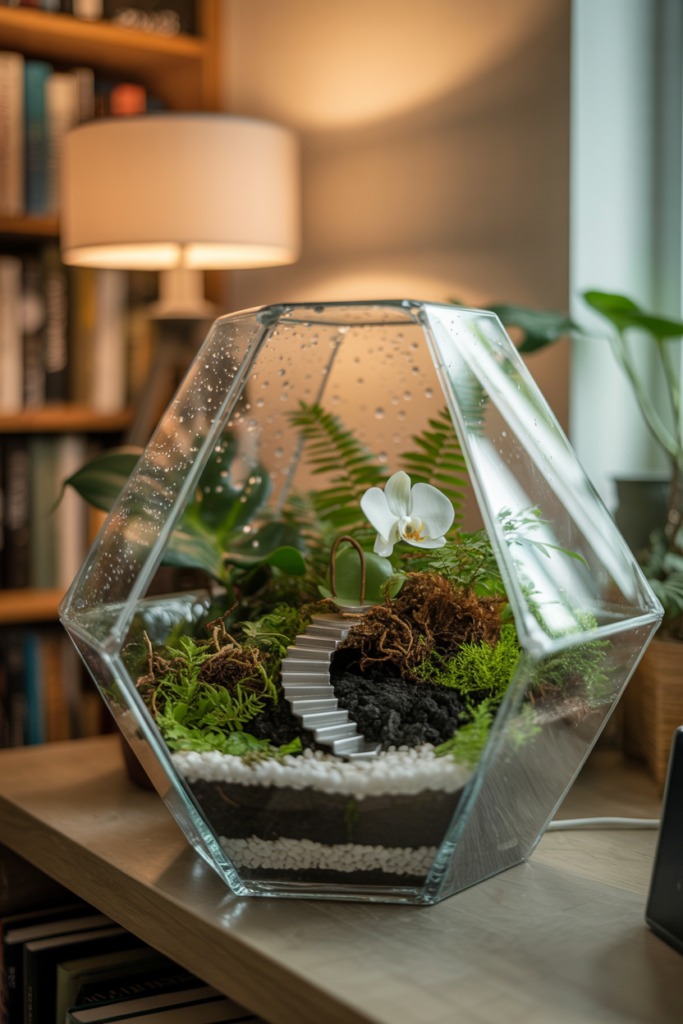
13. Fairy Garden Inside a Glass Terrarium
A glass terrarium fairy garden sits beautifully indoors and works like a little self-contained ecosystem. Use a large open or lidded glass container and layer it with gravel, activated charcoal, and then potting mix. Plant small ferns, moss, and miniature orchids for a lush tropical look, or go desert-style with sand and succulents.
The glass walls let you see the layering, which adds a whole extra visual element to the design. I added a tiny spiral staircase figurine winding up through the center of mine and positioned the plants around it so it looked like a fairy tower garden. It sits on my bookshelf and gets more attention than the books.
Closed terrariums need very little watering because moisture recycles inside the glass. Open terrariums dry out faster, so check the soil every few days and water accordingly.
14. Fairy Garden With a Miniature Working Fountain
A miniature solar-powered fountain pump tucked into a fairy garden creates actual moving water, which is about as magical as it gets. Use a wide, waterproof container as your base and build the fountain at the center using stacked flat stones with the pump hidden underneath. Surround it with moisture-loving plants and small pebble pathways.
Solar pumps are inexpensive and widely available online. The tiny ones made for tabletop water features work perfectly for this purpose. I built a fairy fountain garden in a large glazed ceramic bowl and placed it on my patio table. The soft sound of moving water makes sitting outside feel like a completely different experience.
Position the solar panel where it gets direct sun for at least six hours a day. The pump runs quietly and automatically whenever there is enough light, so there is genuinely very little to manage once it is set up.

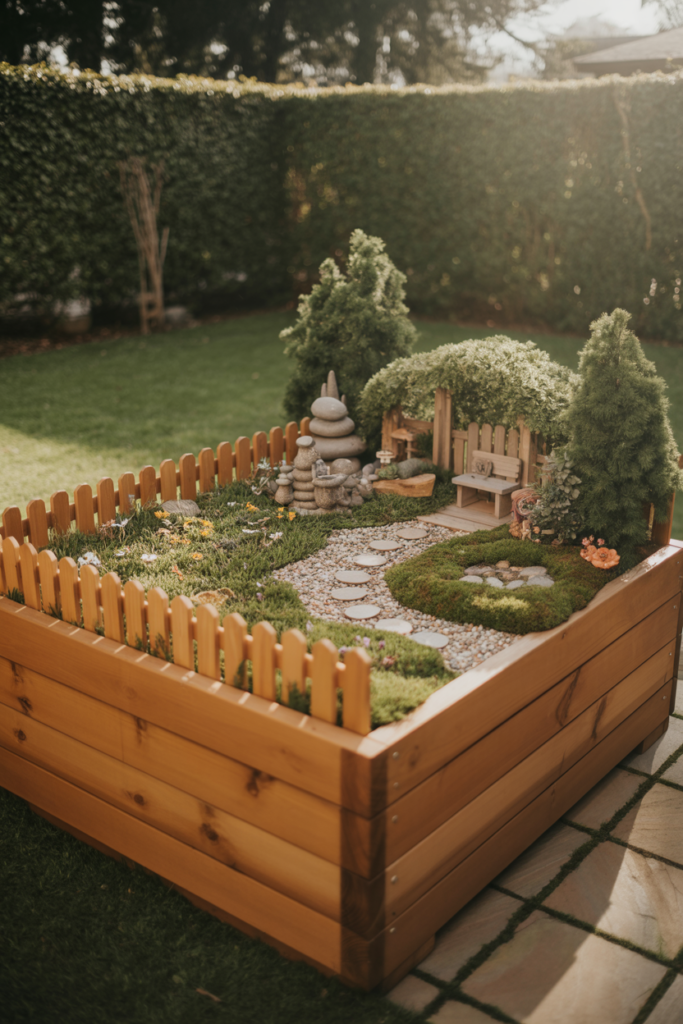
15. Fairy Garden in a Raised Wooden Planter Box
A raised wooden planter box gives you the most room to build a truly detailed and layered fairy garden scene. You can create zones within the box, a tiny meadow area, a forest corner, a stone cottage clearing, and a winding path connecting all of them. The height of a raised planter also puts your fairy world at a comfortable viewing level instead of down at ground level.
I built a large cedar planter box specifically for a four-season fairy garden. I swap out the plants and accessories as the seasons change, winter greenery and tiny lanterns in December, wildflowers and butterflies in spring. It has become one of my favorite ongoing projects because it never stays the same for long.
Cedar and redwood are the best wood choices for outdoor planters because they resist rot naturally. Line the inside with landscape fabric before filling with soil to extend the life of the wood even further.
Best DIY Fairy Garden Ideas at a Glance
| Fairy Garden Idea | Best For | Difficulty Level | Ideal Location |
| Broken Pot | Beginners | Easy | Outdoor, shaded |
| Wooden Crate | Rustic style lovers | Easy | Outdoor patio |
| Teacup Garden | Indoor spaces | Very Easy | Windowsill |
| Moss and Stone | Forest aesthetic fans | Medium | Shaded outdoor |
| Old Wheelbarrow | Large displays | Easy | Backyard patio |
| Tree Stump | Natural garden settings | Medium | Garden bed |
| Vintage Suitcase | Statement pieces | Medium | Covered outdoor |
| Miniature Pond | Detail-oriented builders | Medium | Shaded corner |
| Succulent Garden | Low maintenance | Very Easy | Sunny windowsill |
| Kitchen Items | Budget builders | Easy | Porch or patio |
| Clay Accessories | Creative crafters | Medium | Any setting |
| Wooden Pallet | Small spaces | Medium | Balcony or fence |
| Glass Terrarium | Indoor displays | Medium | Bookshelf or table |
| Working Fountain | Water feature lovers | Hard | Outdoor patio table |
| Raised Planter Box | Detailed scenes | Medium | Garden or patio |
Simple Tips to Make Your Fairy Garden Look More Realistic
Scale is everything in a fairy garden. The moment your accessories are too large or too small relative to your plants, the illusion breaks completely. Stick to one scale throughout, and your garden will always look more intentional and polished.
Layering different plant heights adds depth and makes a small container feel much larger than it actually is. Use tall plants at the back, medium ones in the middle, and low creeping plants at the front or edges. This simple trick works in every single fairy garden style, from woodland to coastal to cottage.
Weathering your accessories also makes a huge difference. Lightly dry-brush miniature furniture with white or gray paint to make it look aged. Dust a little cinnamon or fine sand onto clay accessories before sealing them. These small details are what separate a good fairy garden from a truly convincing one.
Bring Your Fairy Garden to Life, One Tiny Detail at a Time
Building a DIY fairy garden is one of those projects that gives back far more than you put in. A few plants, some creative containers, and a handful of handmade accessories are genuinely all you need to create something that looks completely magical. The ideas in this article cover every skill level, budget, and space size, so there is truly no reason to wait.
The best fairy gardens are the ones that reflect the person who built them. Do not stress too much about making it perfect. A slightly wonky clay mushroom or a moss patch that grows a little unevenly just adds to the charm. Perfection is overrated in miniature gardening, and honestly, in most things.
Start with one idea that excites you the most, gather your materials, and spend an afternoon building. Once you place that first tiny doorway or lay down that first pebble path, you will completely understand why so many people find this hobby so hard to put down.
Conclusion
DIY fairy gardens are one of the most creative, flexible, and genuinely enjoyable home and garden projects you can take on. Whether you choose a broken terracotta pot, a glass terrarium, a vintage suitcase, or a raised planter box, every idea on this list can be built with everyday materials and a little imagination.
The key takeaways from this article are simple. Use the right container for your space, choose plants that stay small and match your light conditions, and add handmade or weathered accessories to give your fairy garden a realistic and personal feel. A miniature pond, a solar fountain, or a set of hand-sculpted clay toadstools can take any of these ideas from nice to genuinely special.
Fairy gardens also grow with you. You can add to them, restyle them with the seasons, and keep building on the same container for years. That ongoing creative relationship with a tiny planted world is something that never really gets old, no matter how many you end up making.
Frequently Asked Questions
What is the easiest DIY fairy garden for a complete beginner?
A teacup fairy garden is the easiest starting point for beginners. You only need a large teacup, a small plant like a succulent, a few pebbles, and one or two tiny accessories. The whole thing comes together in under an hour and requires almost no gardening experience.
What plants work best in a fairy garden?
The best plants for fairy gardens are ones that stay naturally small and grow slowly. Creeping thyme, baby tears, miniature hostas, succulents, club moss, and dwarf ferns are all excellent choices. Always match your plant selection to your light conditions, sunny spot or shaded corner, before you buy anything.
Can I build a fairy garden indoors?
Yes, indoor fairy gardens work beautifully in glass terrariums, teacups, shallow bowls, and wooden trays. Succulents, air plants, and small ferns are the best indoor plant choices. Place your indoor fairy garden near a bright window for the best results.
How do I keep my outdoor fairy garden looking good all year?
Swap out seasonal plants and accessories to keep your outdoor fairy garden fresh throughout the year. Use evergreen ground covers like creeping thyme or Irish moss as your base since they hold up well in most climates. Bring delicate accessories indoors during harsh winters to prevent weathering damage.
How much does it cost to build a DIY fairy garden?
A basic DIY fairy garden can cost as little as ten to twenty dollars if you use a container you already own and source accessories from a craft store or make them yourself. More detailed builds with solar fountains, quality plants, and resin ponds can run between fifty and one hundred dollars. The budget is entirely in your hands.
What is the best container for a fairy garden?
The best container depends on your space and style. Terracotta pots, wooden crates, glass terrariums, and raised planter boxes all work well. The most important feature any container needs is good drainage, either built-in holes or a layer of pebbles at the base.
Can kids help build a fairy garden?
Fairy gardens are one of the best craft projects to do with kids. They can help fill the container with soil, place the plants, and arrange the accessories. Let them make their own clay toadstools or paint small rocks to use as stepping stones. It keeps them engaged for hours and gives them something they feel genuinely proud of.