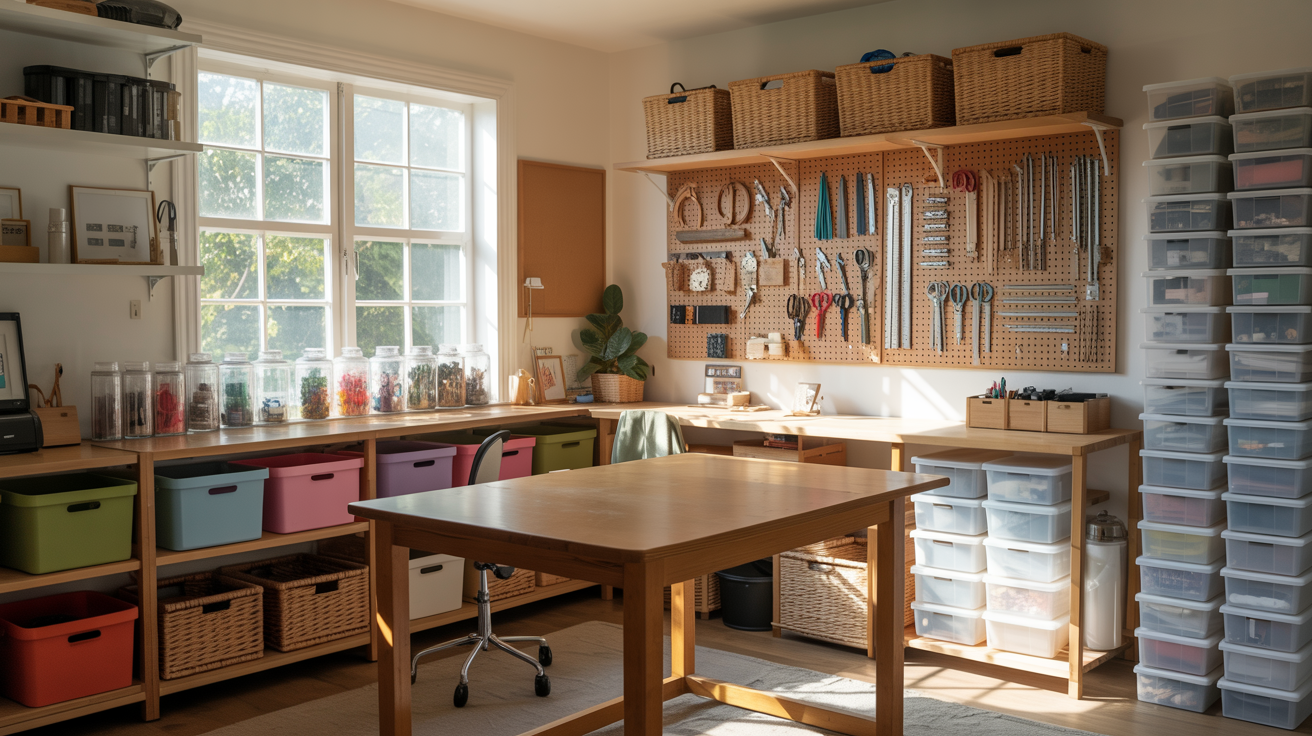
If your craft room looks like a glitter bomb went off next to a yarn explosion, you are not alone. I have been there, standing in the middle of a creative mess, unable to find my scissors for the third time that week. Good craft room storage does not just tidy things up; it actually makes you want to create more.
The right storage system changes everything about how you use your space. When supplies are easy to find and put back, projects move faster, and stress stays low. I noticed a huge shift in my own creative output once I stopped digging through bins and started organizing with intention.
This list covers 15 of the best craft room storage ideas that work for real spaces and real crafters. Whether you have a dedicated room or just a small corner, these ideas will help you build a system that actually sticks. Let’s get into it.
Why a Smart Craft Room Storage System Makes Your Creative Space Work So Much Better
A disorganized craft room does not just look bad; it actively slows you down. Every minute spent searching for a tool is a minute stolen from actually making something. I used to spend more time hunting for supplies than I did crafting, and that gets old fast.
Good storage also protects your materials. Fabric fades when left in open bins, paper warps in humidity, and small embellishments disappear into the void of a junk drawer. A smart organization keeps everything in the right condition so nothing goes to waste.
The best craft storage setups are built around how you actually work, not how a Pinterest board looks. Think about which supplies you reach for most, what takes up the most space, and where your natural workflow starts and ends. Building storage around those habits makes the whole system feel effortless.
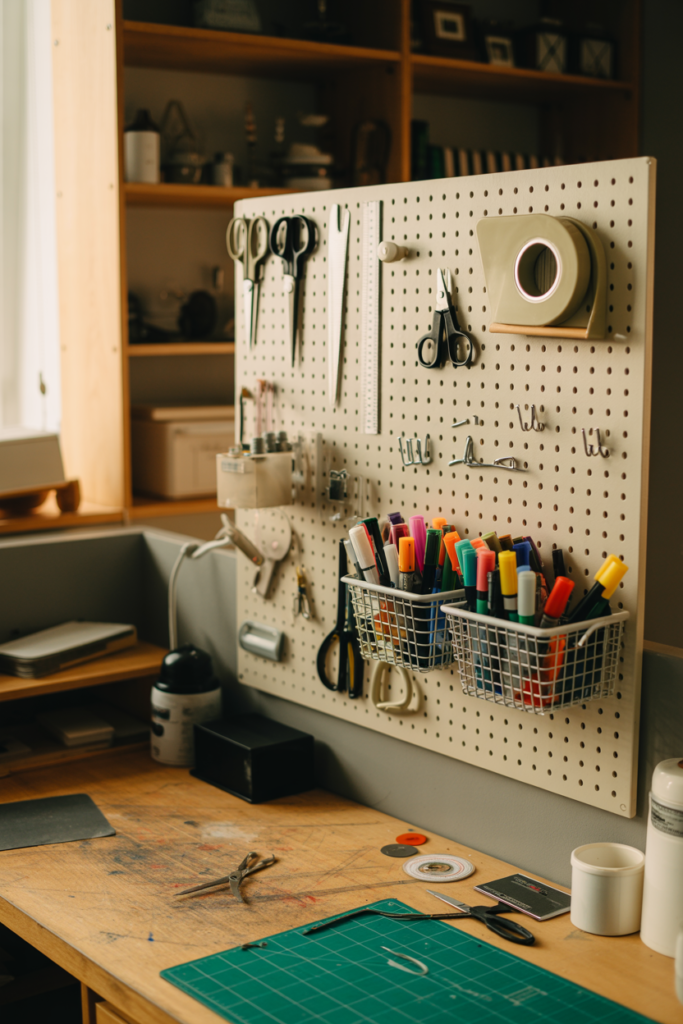
1. Use a Pegboard Wall to Store Tools and Supplies Right Where You Can See Them
A pegboard wall is one of the most flexible storage solutions you can add to a craft room. You can hang scissors, rulers, tape rolls, wire cutters, and small baskets all in one vertical space. I put one up above my main worktable, and it completely changed how I work.
The best part about pegboards is that they grow with your needs. Add hooks, shelves, and bins as your collection expands without drilling new holes every time. Pegboards come in wood, metal, and acrylic, so you can match the style of your room easily.
Keep the tools you use daily at eye level and less-used items toward the edges. A little label maker goes a long way here, too. When everything has a home on the board, cleanup takes about two minutes flat.
2. Install Open Wall Shelving to Display and Organize Your Most-Used Craft Supplies
Open shelves give you fast access to supplies without the frustration of opening and closing cabinet doors constantly. They also let you see exactly what you have, which means fewer accidental duplicate purchases. I cannot count how many extra glue sticks I bought before I could actually see my stock.
Floating shelves work especially well above a desk or along a blank wall. Use matching bins or baskets on each shelf to group similar items together without creating visual clutter. Clear containers are even better since you see the contents at a glance.
Mix shelf heights to fit taller items like ribbon spools or stacked paper packs alongside shorter bins of embellishments. A consistent color palette for your containers keeps the look clear, even when the shelves are fully loaded.
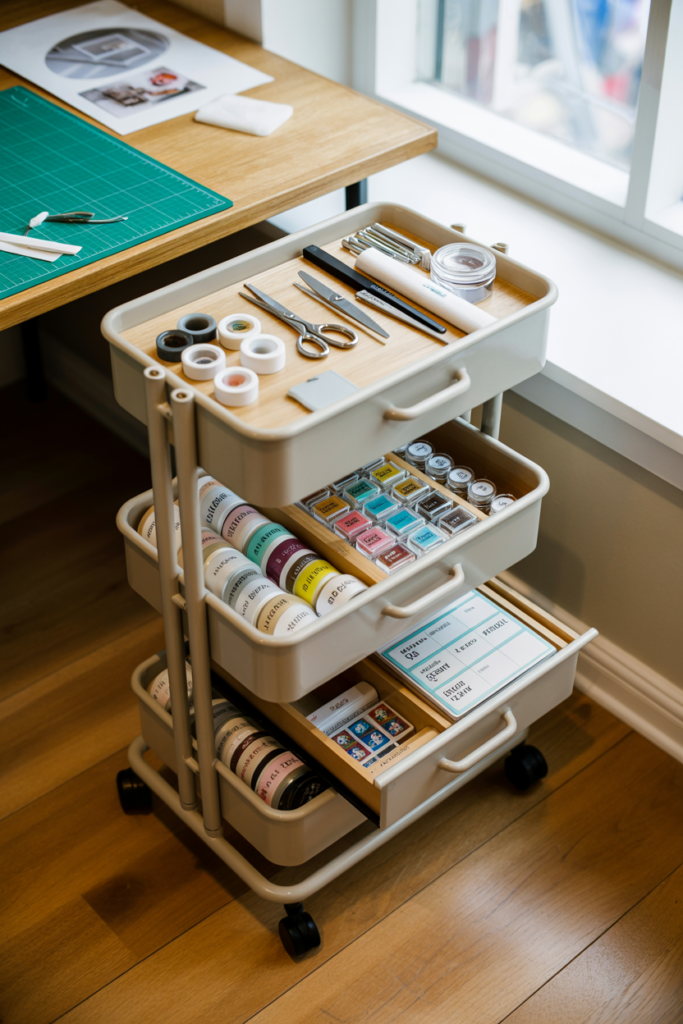
3. Add a Rolling Cart With Drawers to Keep Frequently Used Supplies Mobile and Accessible
A rolling cart is a craft room staple for good reason. It moves with you from your cutting table to your desk to your sewing station without any hassle. I use a three-tier rolling cart beside my worktable, and it holds everything I need for current projects.
The drawer-style carts work better than open shelves for small items like stickers, washi tape, buttons, and embossing powder. Small pieces stay contained instead of rolling off onto the floor. Label each drawer so restocking after a project takes no effort.
Look for carts with locking wheels so it stays put when you need them to. Many crafters use multiple carts, one for paper crafting, one for sewing notions, and one for tools. This kind of category-based cart system keeps supplies grouped logically and cuts down on hunting time.
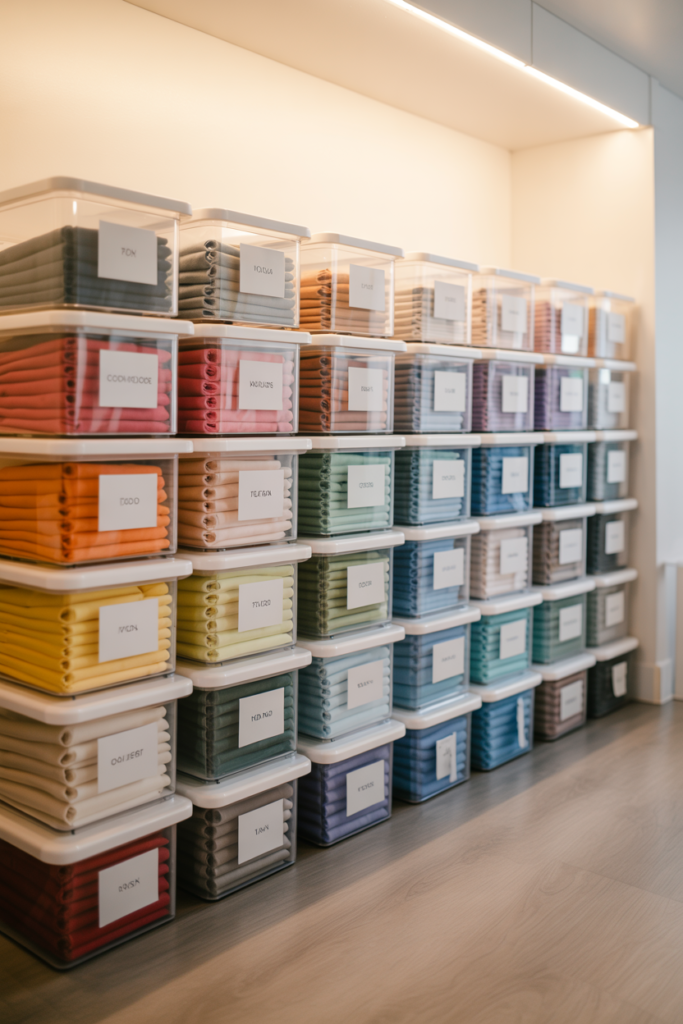
4. Use Clear Stackable Bins and Boxes to Store Fabric, Paper, and Bulky Craft Materials Neatly
Bulky supplies like fabric yardage, foam sheets, and large paper pads need proper containment, or they take over every surface in the room. Clear stackable bins solve this problem beautifully. You see what is inside without pulling everything out, and stacking them vertically saves floor space.
I sort fabric by color into separate bins and stack them along one wall. It looks tidy, stays accessible, and makes finding the right piece a ten-second job instead of a ten-minute dig. The same method works great for scrapbook paper sorted by color or theme.
Choose bins with secure lids if you live somewhere dusty or have pets. Uniform bin sizes make stacking cleaner and more stable. A label on the front of each bin adds one more layer of organization that saves time every single day.
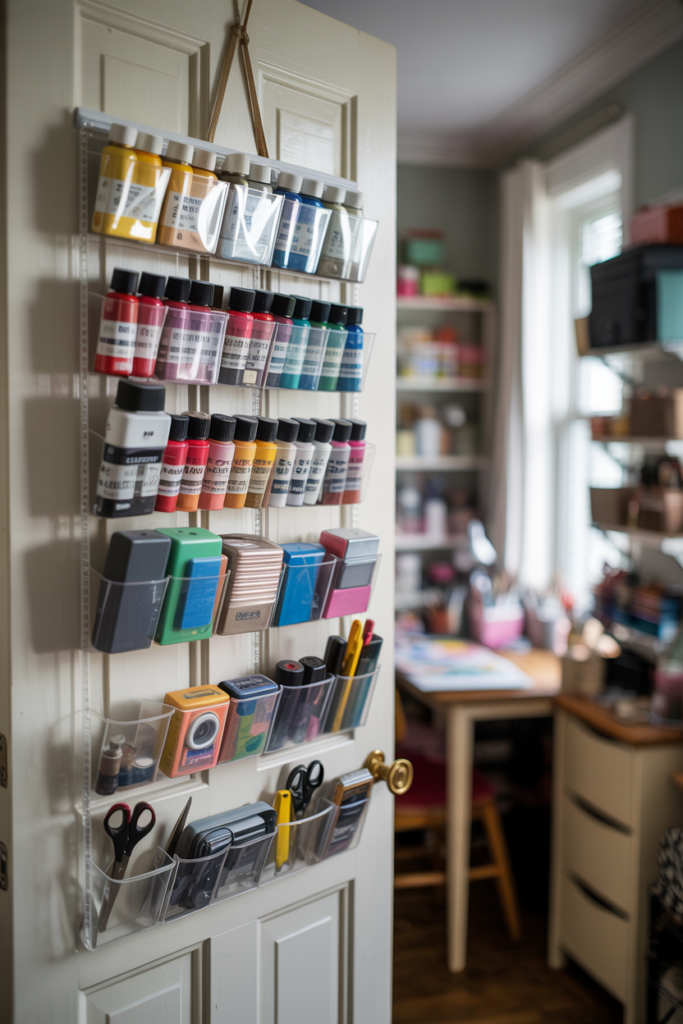
5. Hang an Over-the-Door Organizer to Squeeze Extra Craft Storage Out of Every Unused Space
The back of a door is one of the most overlooked storage spots in any craft room. An over-the-door organizer with clear pockets holds an impressive amount of small supplies without taking up any floor or wall space. I hung one on the back of my craft room door, and it now holds everything from paint tubes to stamps to adhesive refills.
Clear pocket organizers work best for craft rooms because visibility is key. You want to see what is in each pocket without pulling things out and dumping them on your desk. Choose a version with varied pocket sizes so you can fit both flat items and slightly bulkier supplies.
Shoe organizers work just as well as purpose-built craft versions and usually cost less. Some crafters hang one on every door in the room to maximize storage capacity. It is a simple addition that punches well above its weight in terms of organizational impact.
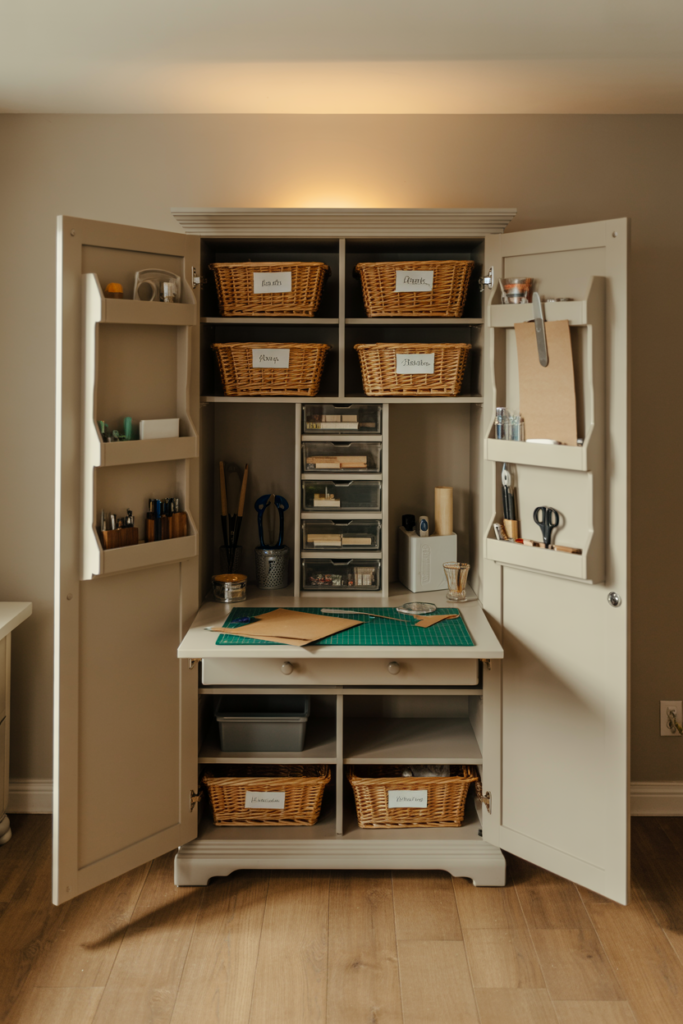
6. Build or Buy a Dedicated Craft Armoire to Hide All Your Supplies Behind Closed Doors
A craft armoire is the ultimate storage solution for crafters who want a tidy room that does not look like a supply store exploded. Everything tucks away behind two doors, and when you close them, the room looks completely put together. I love how an armoire gives the craft space a more intentional, furniture-forward feel.
Most craft armoires come with built-in shelves, drawers, and door pockets that hold an impressive range of supplies. You can customize the interior with small bins, magnetic strips, and hooks to fit your specific crafting style. The key is to assign every section a category so restocking stays consistent.
A craft armoire works especially well in shared spaces like a guest room or living room, where the craft setup needs to disappear after use. Look for ones with a fold-down work surface for a bonus. It is a storage and a workspace in one compact footprint.
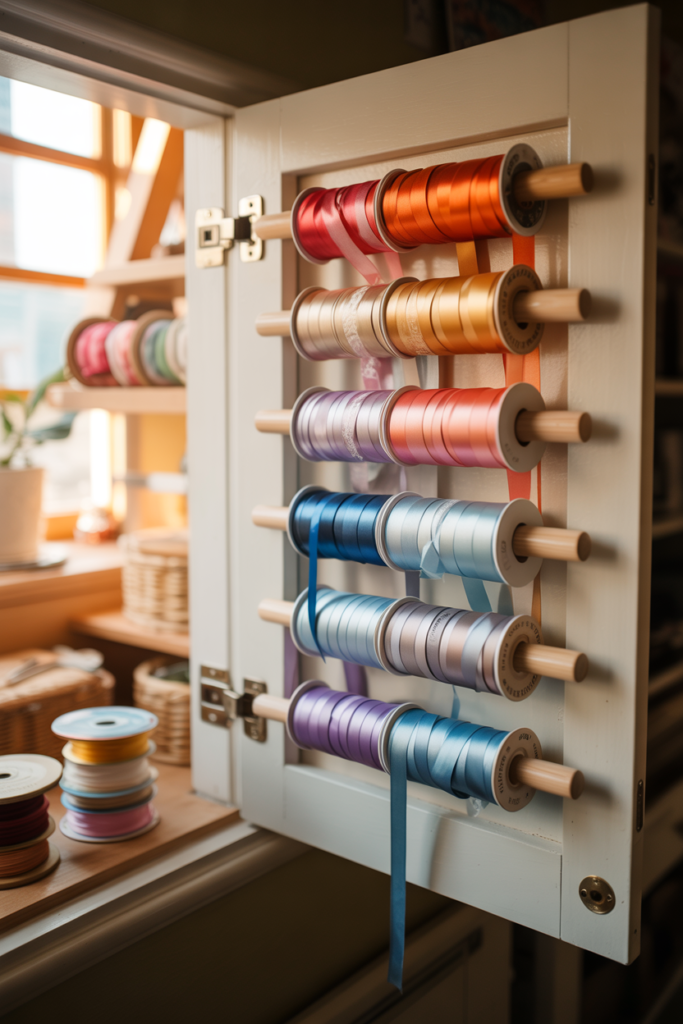
7. Mount a Ribbon Organizer or Dowel Rod System to Store Your Ribbon Collection Without Tangles
Ribbon storage is one of those problems that sounds minor until you have 40 spools tangled together in a basket. A mounted dowel rod system lets each spool spin freely so you can pull the exact length you need without unraveling the whole collection. I set one up on the inside of a cabinet door, and it made ribbon access so much smoother.
You can build a simple version with wooden dowels and two side brackets for almost no cost. Space the dowels far enough apart so the spools slide on and off easily. Sort by color family so finding the right ribbon takes just a glance.
Store-bought ribbon organizers with tension rods also work well and install in minutes. Some versions mount directly to a wall and double as a decorative display. Either way, keeping ribbon organized vertically saves a surprising amount of drawer and bin space.
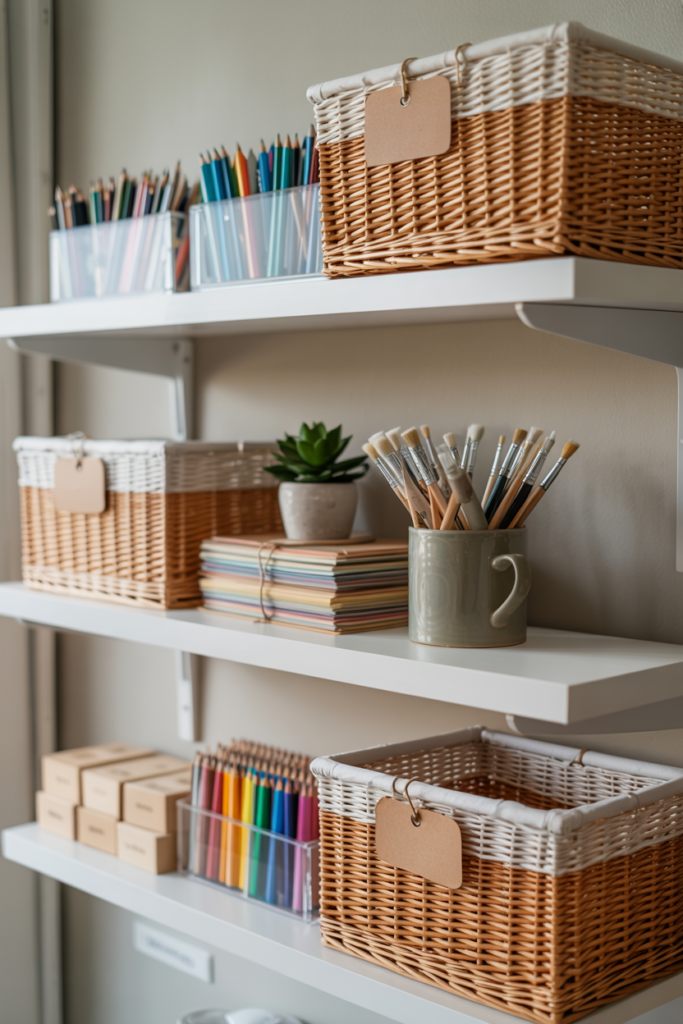
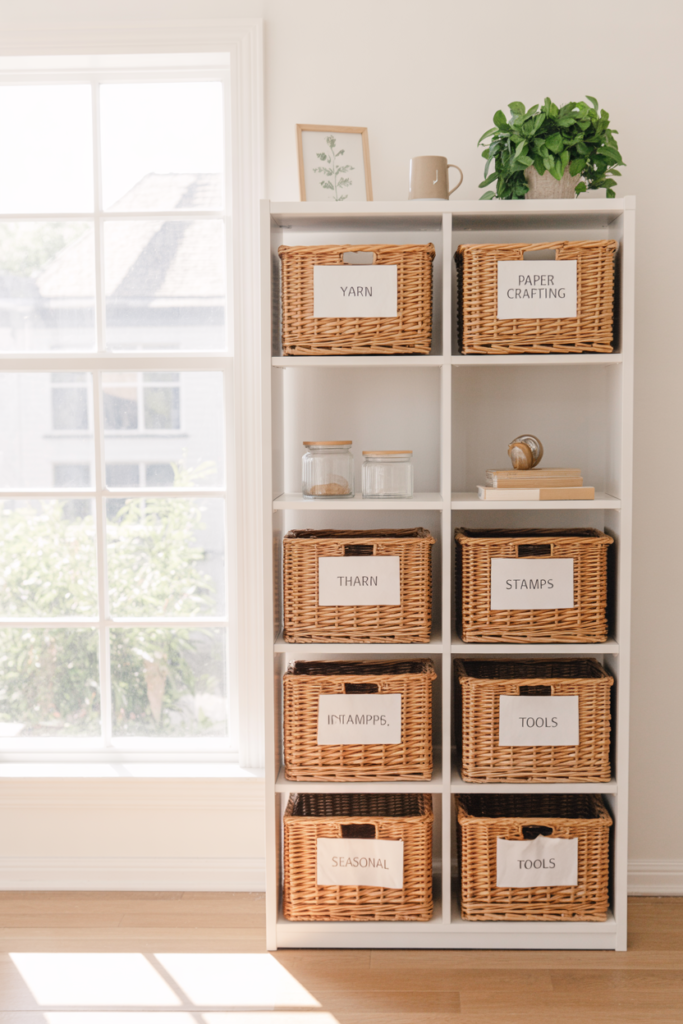
8. Use a Tall Bookcase With Labeled Baskets to Organize Every Category of Craft Supply You Own
A tall bookcase gives you a lot of vertical storage without claiming much floor space. Pair it with matching labeled baskets, and it becomes one of the hardest-working storage pieces in the entire craft room. I use a six-shelf bookcase along one wall, and it holds everything from yarn to paper punches to seasonal supplies.
The trick is to assign one basket per category and stick to it. When a basket gets full, that is your signal to edit and donate rather than buy a bigger basket. This habit keeps the bookcase from turning into a holding zone for things that have no real home.
Label the front of every basket clearly so anyone helping you clean up can put things back in the right spot. Wicker, fabric, and wire baskets all work well, depending on the weight of what goes inside. A consistent basket style across all shelves keeps the whole unit looking clean and cohesive.
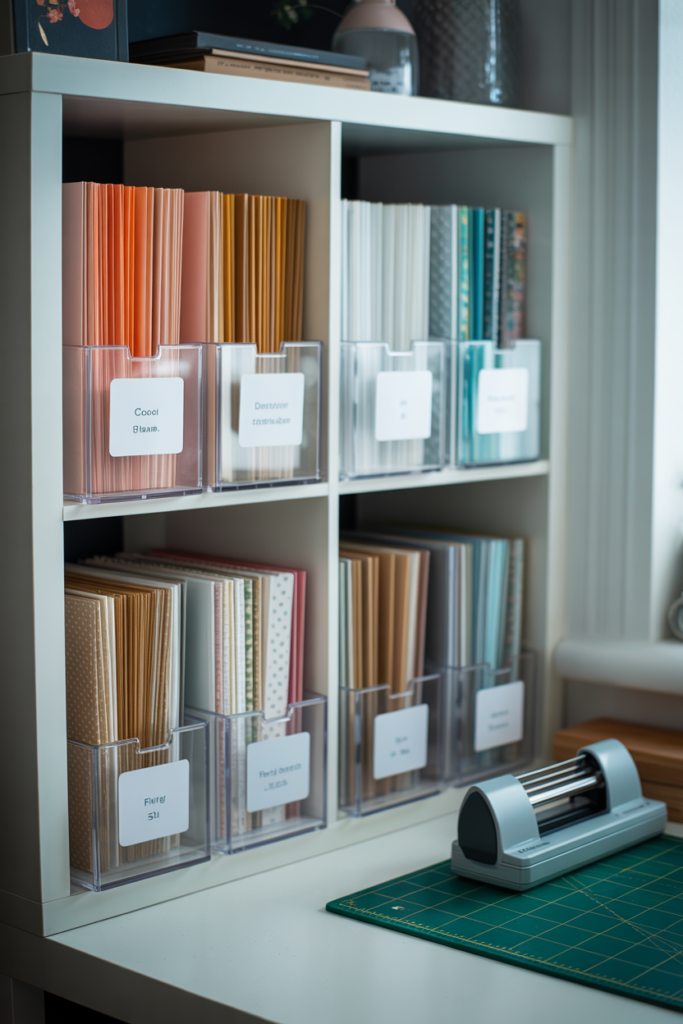
9. Set Up a Paper Crafting Station With Vertical File Holders to Keep Cardstock and Patterned Paper Sorted
Paper is one of the most space-hungry supplies in any craft room. Vertical file holders or magazine holders keep cardstock, patterned paper, and specialty sheets sorted by color or theme without flattening or warping the edges. I sort mine by color family and grab exactly what I need in seconds.
Place the file holders on a dedicated shelf or in a cube organizer, so they stay upright and stable. Label each one clearly on the spine so the sorting system holds up even after a busy crafting session. Acrylic file holders are especially nice because you can see the paper colors without reading the label.
Add a small cutting mat and paper trimmer nearby to complete the station. When the paper storage, cutting tools, and adhesives all live in the same zone, your workflow moves much faster. Keeping related supplies together by function is one of the smartest things you can do for your craft room layout.
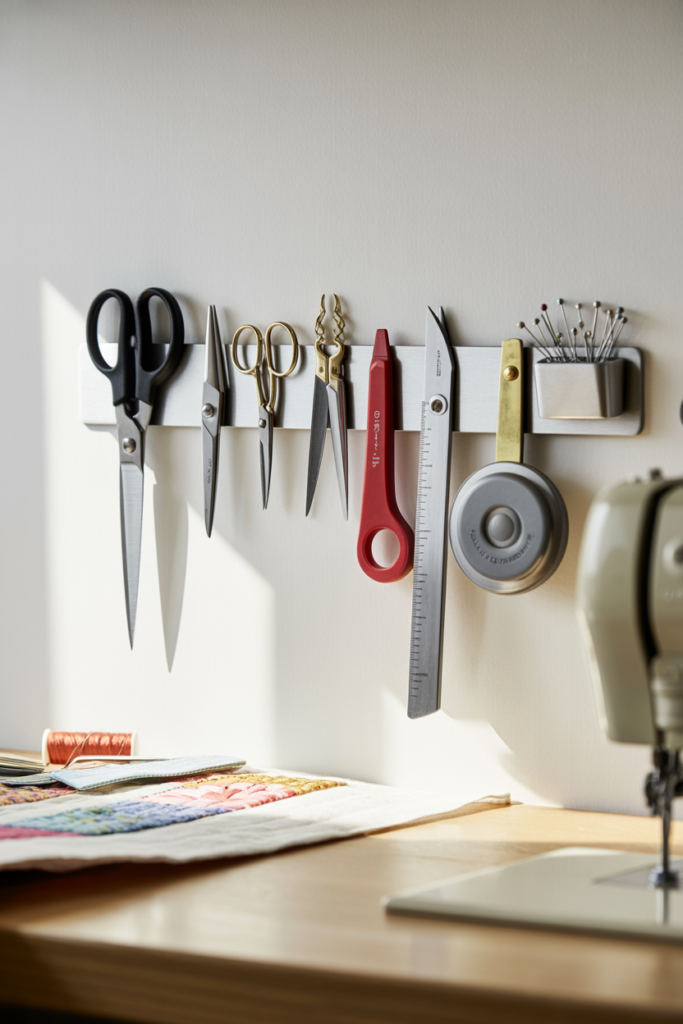
10. Hang a Magnetic Knife Strip or Magnetic Board to Store Small Metal Tools and Notions Securely
A magnetic strip is not just for kitchens. In a craft room, it holds scissors, rotary cutters, seam rippers, metal rulers, and even small tins of embellishments with no hooks or bins required. I mounted one right above my sewing area, and it keeps my most-used tools within arm’s reach at all times.
The strong magnetic grip means tools stay put even if the strip gets bumped. This is a huge upgrade from a cup holder where scissors and tools constantly fall over or poke your hand when you reach in. Magnetic storage also puts tools on display so you always know exactly where they are.
Look for strips with a strong enough magnet to hold heavier tools like rotary cutters without slipping. Some crafters mount two or three strips side by side to create a full tool wall. It is a clean, low-cost storage upgrade that looks sharp and works even better.
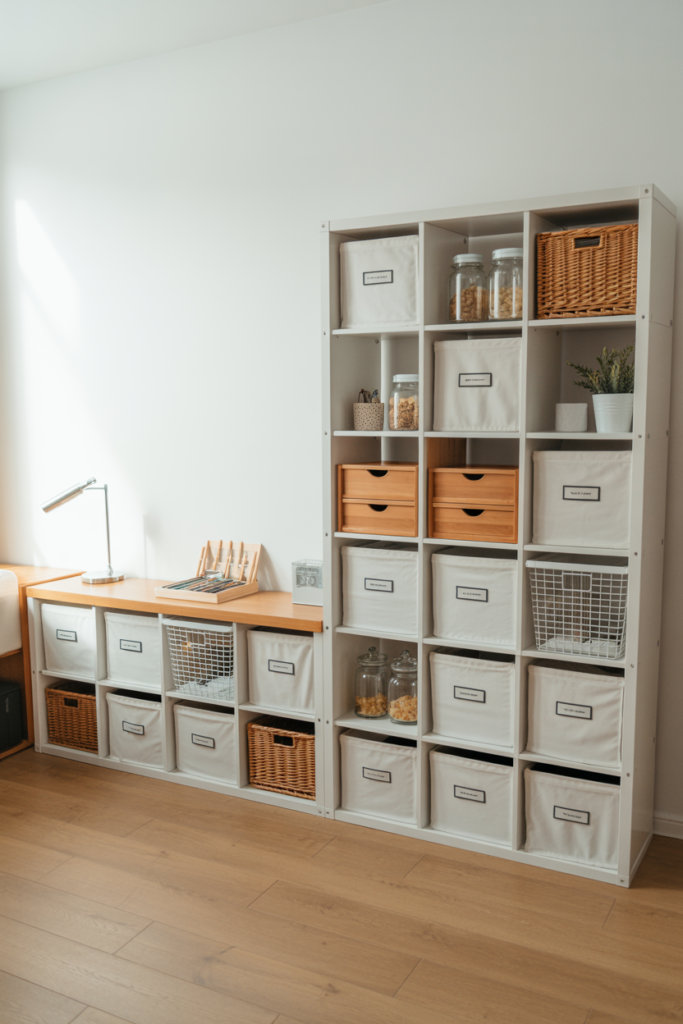
11. Install a Cube Organizer With Mix-and-Match Bins to Build a Flexible Craft Storage Wall
Cube organizers are one of the most popular craft room storage choices because they are affordable, modular, and endlessly customizable. You can fill cubes with fabric bins, open baskets, small drawers, or even a mini pegboard insert. I have a large cube unit along one wall, and it handles the bulk of my supply storage.
The real advantage of cube organizers is that you can reconfigure them as your needs change. Add more units as your collection grows or rearrange the bin types inside each cube to fit a new category. This adaptability makes them a smart long-term investment for any craft room.
Use a mix of closed bins for messy supplies and open cubes for items you grab constantly. A consistent color scheme for the bins keeps the whole wall looking intentional rather than chaotic. Add a countertop surface on top of a low cube unit, and you gain extra workspace at the same time.
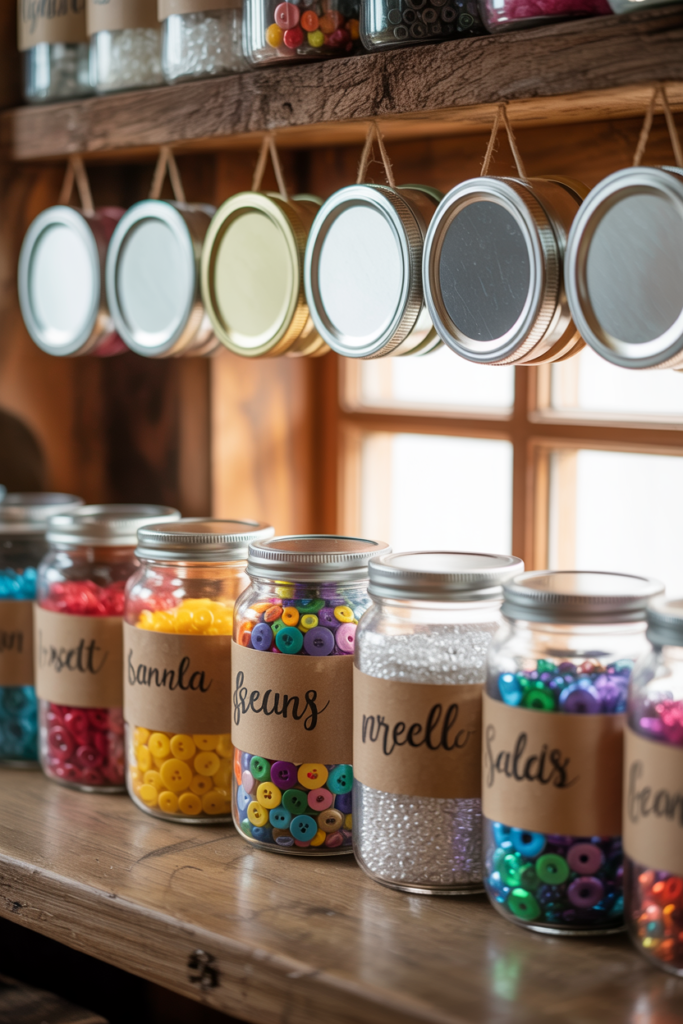
12. Repurpose Glass Jars and Containers to Store Small Craft Supplies in a Budget-Friendly Way
Glass jars are one of the most cost-effective storage options for small craft supplies like buttons, beads, brads, eyelets, and sequins. You can see exactly what is inside without opening anything, and they look genuinely nice sitting on a shelf or desktop. I started saving pasta jars and pickle jars years ago, and they are still in rotation in my craft room today.
Group jars by supply type and line them up on a shelf or inside a bin. Uniform jar sizes look tidiest, but mixing sizes works fine as long as the labels are clear. A label maker or even hand-lettered kraft labels give the whole setup a charming, intentional look.
For a more elevated version, mount jar lids under a shelf and screw the jars on from below. This hanging jar trick frees up surface space entirely and looks incredibly clever. It is one of those storage ideas that gets compliments every single time someone sees the craft room.
13. Add a Dedicated Thread and Yarn Storage System to Keep Fiber Supplies Tangle-Free and Visible
Thread and yarn storage is a category that deserves its own dedicated system. Loose spools tangle, yarn skeins unravel, and before long, the whole fiber collection is one giant knot. A purpose-built thread rack or yarn bowl system keeps everything organized and accessible without the frustration.
Wall-mounted thread racks hold dozens of spools and let you see every color at once for easy selection. For yarn, clear bins sorted by weight or color work well for smaller collections. Larger yarn stashes do better in open cubbies or a dedicated basket system where you can grab a skein without disturbing the rest.
Keep the current project yarn in a small decorative basket near your chair so active supplies stay separate from stored ones. This two-tier system of active versus stored keeps your workspace clear without burying supplies you are actively using. It is a small habit that makes a big difference in daily crafting sessions.

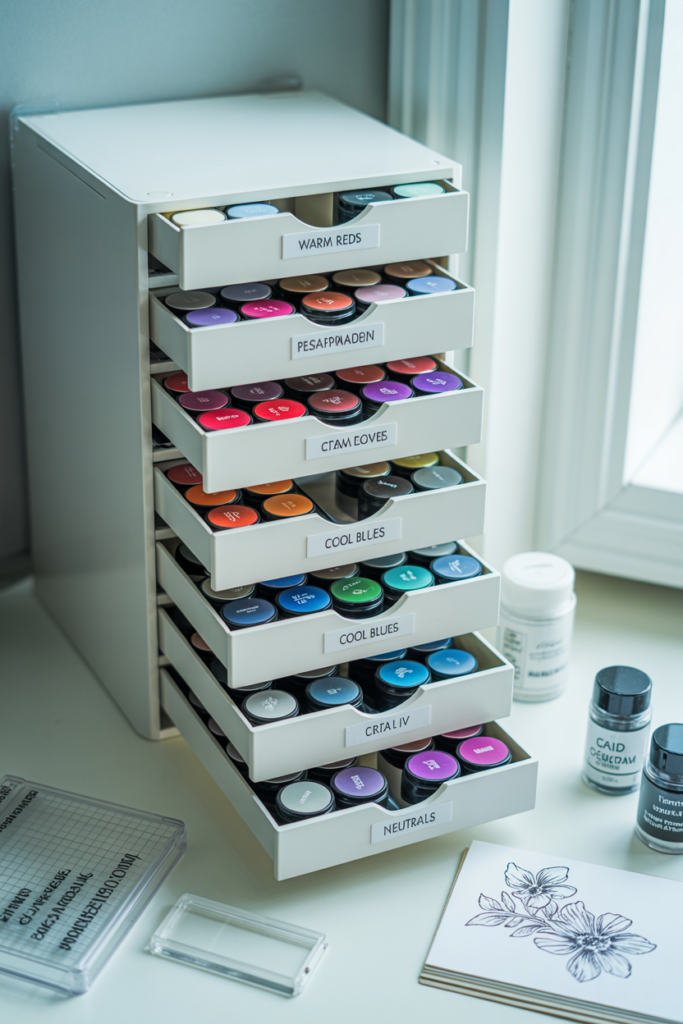
14. Use a Labeled Drawer Unit to Store Stamping Supplies, Inks, and Small Paper Crafting Tools
Stamping and ink supplies are notoriously hard to organize because they come in so many small, oddly shaped pieces. A labeled drawer unit with shallow drawers keeps ink pads, stamp sets, embossing powders, and tools sorted by type and easy to pull out without stacking and unstacking everything above them. I use a ten-drawer unit just for my ink and stamping collection, and it is one of the most satisfying parts of my craft room.
Shallow drawers work better than deep ones for this category because you can see everything in a single layer. Sort ink pads by color family so pulling the right shade takes one second. Store coordinating stamps in the same drawer as the ink colors they pair with most often.
Add a small label on the front of every drawer so the system stays consistent after busy sessions. Clear drawer fronts are even better if you can find them, since visibility beats labels every time. A tidy stamping station makes the whole creative process more enjoyable from start to finish.
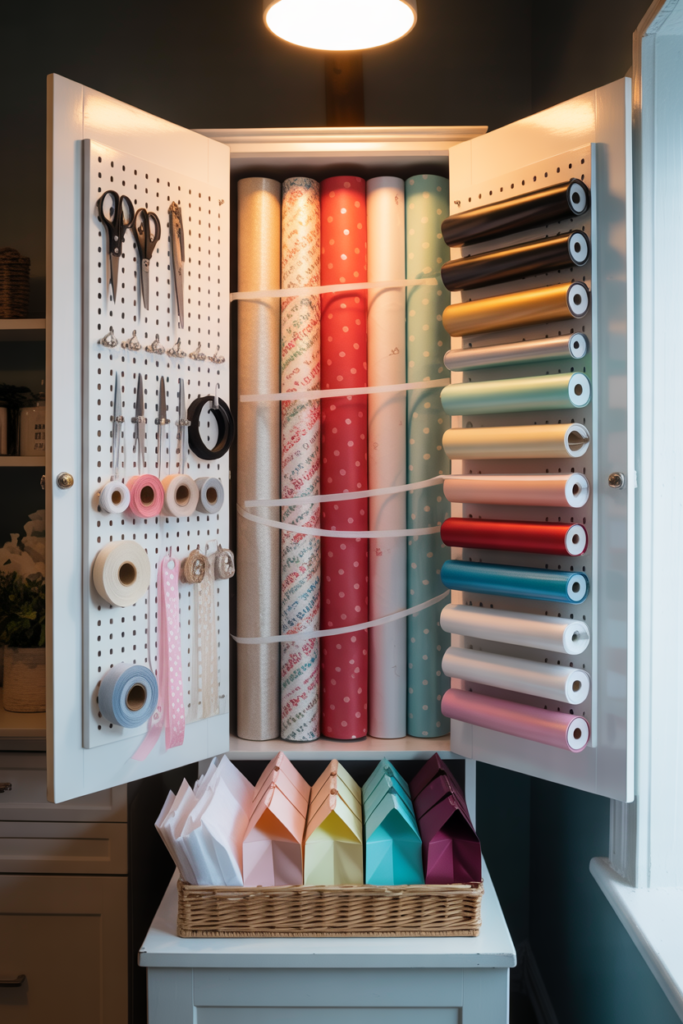
15. Create a Dedicated Wrapping and Gift Supply Station to Keep Seasonal Craft Materials Together
Wrapping paper, ribbons, gift bags, tissue paper, and gift tags tend to scatter across multiple closets and drawers until they become impossible to find. A dedicated gift wrapping station pulls everything into one spot, so holiday and gifting prep takes minutes instead of an afternoon of searching. I set mine up in a tall, narrow cabinet with a roll holder mounted on the inside of the door.
Use a tall wrapping paper organizer or repurpose a large umbrella stand to store rolls upright without crushing the ends. Hang a small pegboard or hooks nearby for ribbon and scissors so cutting supplies are always right there. A shallow drawer or bin for tags, tape, and tissue paper completes the station beautifully.
This kind of dedicated seasonal storage zone keeps gift supplies from bleeding into your everyday craft supplies. It also means you can pull everything out for a wrapping session and put it all back in one place when you are done. That alone saves more time than most people realize.
Quick Comparison of the Best Craft Room Storage Ideas by Type, Cost, and Best Use
| Storage Idea | Type | Estimated Cost | Best For |
| Pegboard Wall | Wall-mounted | $20 to $60 | Tools and daily supplies |
| Open Wall Shelving | Wall-mounted | $30 to $100 | Bins, baskets, and displayed items |
| Rolling Cart With Drawers | Freestanding | $25 to $80 | Mobile supply access |
| Clear Stackable Bins | Freestanding | $15 to $50 | Fabric, paper, and bulky items |
| Over-the-Door Organizer | Door-mounted | $10 to $30 | Small supplies and flat items |
| Craft Armoire | Freestanding | $150 to $500 | Full supply concealment |
| Ribbon Organizer | Wall or door | $10 to $40 | Ribbon and trim storage |
| Tall Bookcase With Baskets | Freestanding | $60 to $200 | Large category organization |
| Vertical File Holders | Shelf or cube | $10 to $30 | Cardstock and patterned paper |
| Magnetic Strip | Wall-mounted | $10 to $25 | Metal tools and scissors |
| Cube Organizer | Freestanding | $50 to $150 | Modular mixed storage |
| Glass Jars | Desktop or shelf | $0 to $20 | Beads, buttons, and small notions |
| Thread and Yarn System | Wall or shelf | $15 to $60 | Fiber and sewing supplies |
| Labeled Drawer Unit | Freestanding | $20 to $80 | Inks, stamps, and small tools |
| Wrapping Supply Station | Cabinet or corner | $20 to $100 | Seasonal and gifting supplies |
The Best Craft Room Storage Ideas Come Down to One Simple Rule: a Place for Everything
Getting your craft room storage right is not about buying the most expensive organizers or copying a picture-perfect setup from a magazine. It is about building a system that matches how you actually work and sticking to it. I have tried plenty of fancy solutions that looked great but fell apart within a week because they did not fit my real workflow.
The ideas in this list cover every type of crafter and every size of space. Whether you are working with a full dedicated room or a small corner of a spare bedroom, at least a handful of these storage solutions will make an immediate difference. Start with the areas that frustrate you most and build from there.
A well-organized craft room genuinely makes you more creative. When you are not fighting to find your supplies, your energy goes straight into the project in front of you. That is the whole point of good storage, and every single idea on this list gets you closer to that goal.
Frequently Asked Questions About Craft Room Storage Ideas
What is the best craft room storage idea for a small space?
A pegboard wall combined with a rolling cart gives you the most storage in the least floor space. Both solutions use vertical space or stay mobile, so they work well in tight areas. Over-the-door organizers are another great addition for small craft rooms.
How do I organize a craft room on a tight budget?
Glass jars, over-the-door shoe organizers, and repurposed bookshelves are all low-cost options that work beautifully. Thrift stores are a great source for baskets, jars, and drawer units at a fraction of retail price. A label maker and consistent bin colors go a long way toward making budget storage look intentional.
How do I keep my craft room storage system from falling apart over time?
The key is to assign a specific home for every single supply category and always put things back after each session. A quick five-minute tidy at the end of each crafting session keeps the system intact. If something consistently ends up in the wrong place, that is a sign its assigned home is not working and needs to change.
What is the best way to store fabric in a craft room?
Clear stackable bins sorted by color are one of the most practical fabric storage methods. Folding fabric into uniform rectangles and standing them upright like files makes it easy to see every piece without pulling the whole bin apart. Open cubbies work well for larger yardage pieces that do not fold neatly.
How do I organize craft supplies I only use seasonally?
Group seasonal supplies by holiday or season into labeled, clear bins and store them on the highest shelves or in a separate closet. Bring them down only when that season approaches and return them immediately after. Keeping seasonal supplies separate from everyday craft materials prevents them from cluttering your main storage system.
What type of storage works best for paper crafting supplies?
Vertical file holders for cardstock and patterned paper, shallow labeled drawers for inks and stamps, and a desktop organizer for tools and adhesives create a complete paper crafting zone. Keeping all paper-crafting supplies in one dedicated area of the room significantly speeds up projects. Clear acrylic organizers work especially well for this category because visibility is everything.
How many storage solutions do I actually need for a well-organized craft room?
There is no fixed number since it depends entirely on the size of your collection and your space. A good starting point is to audit every supply category you own and find a dedicated storage solution for each. Most well-organized craft rooms use a combination of wall-mounted, freestanding, and drawer-based storage to efficiently cover all supply types.