A stylish living room does not have to cost a fortune, and IKEA proves that every single day. Some of the most beautiful living rooms I have come across were built almost entirely around IKEA pieces that got a little creative treatment. The gap between “basic” and “beautiful” is smaller than most people think, and the price difference is even smaller.
IKEA living room hacks have taken over Pinterest, Reddit, and every home decor community worth following. People are combining flat-pack pieces, adding trim, swapping hardware, and painting their way to living rooms that look custom-built and carefully designed. The best part is that most of these hacks cost less than a single throw pillow from a boutique home store.
If your living room feels like it came straight off the showroom floor and never quite made it to “your space,” this list is for you. These 15 hacks cover storage, style, and everything in between. Every single one is doable on a real budget without needing a contractor, a design degree, or a suspiciously large inheritance.
Why IKEA Living Room Hacks Are the Smartest Way to Get a Stylish and Affordable Home Makeover
IKEA furniture is built on simplicity, and that is exactly what makes it so easy to hack. The clean lines, neutral finishes, and modular designs give you a foundation that works with almost any style direction. Whether you want Scandinavian minimal, warm maximalist, or somewhere comfortably in between, IKEA pieces adapt without fighting you.
The community around IKEA hacking is one of the most generous and practical design communities online. Real people share real results, real costs, and real mistakes, so you do not have to repeat them. That peer-tested knowledge base is something no interior design magazine can replicate, and it is completely free.
What makes these hacks especially worth exploring is how stackable the results are. One small change, like new hardware or a coat of paint, already improves a room noticeably. Add a few more hacks on top of that, and the cumulative effect is a living room that genuinely surprises people. Nobody needs to know it started with a BILLY bookcase and a can of paint.
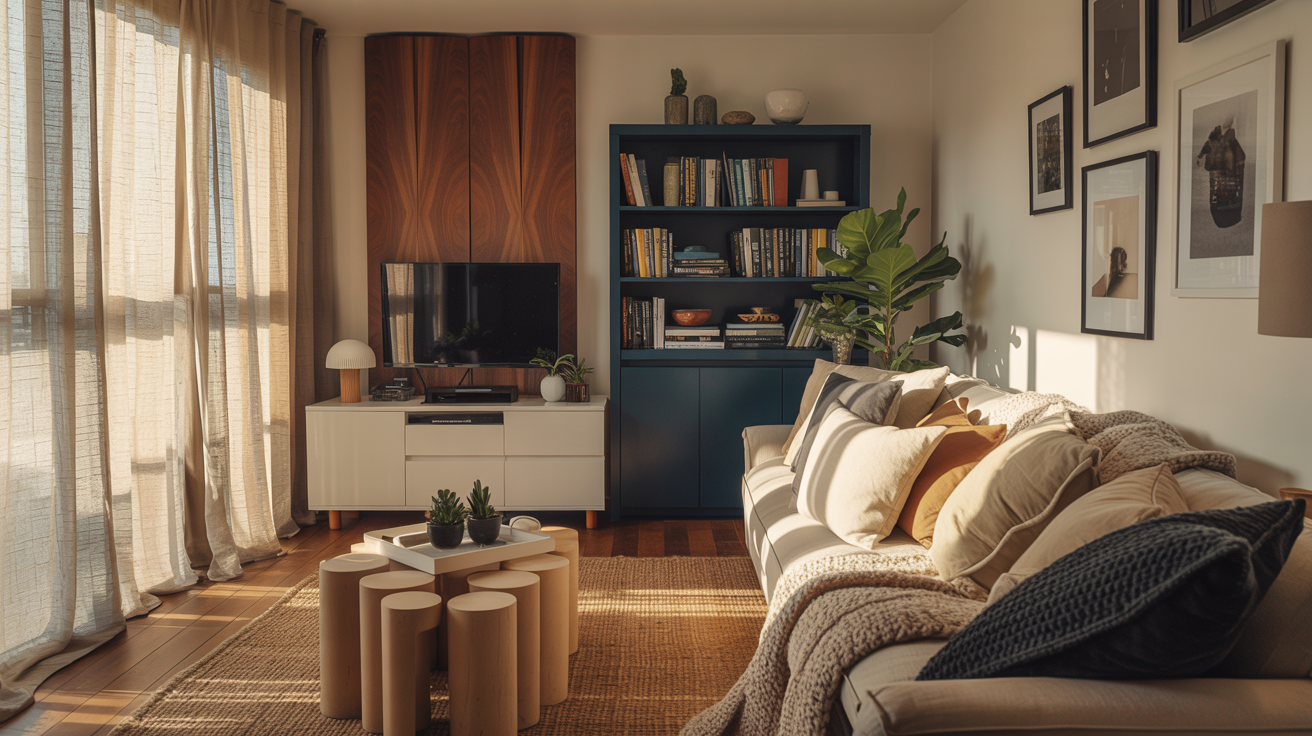
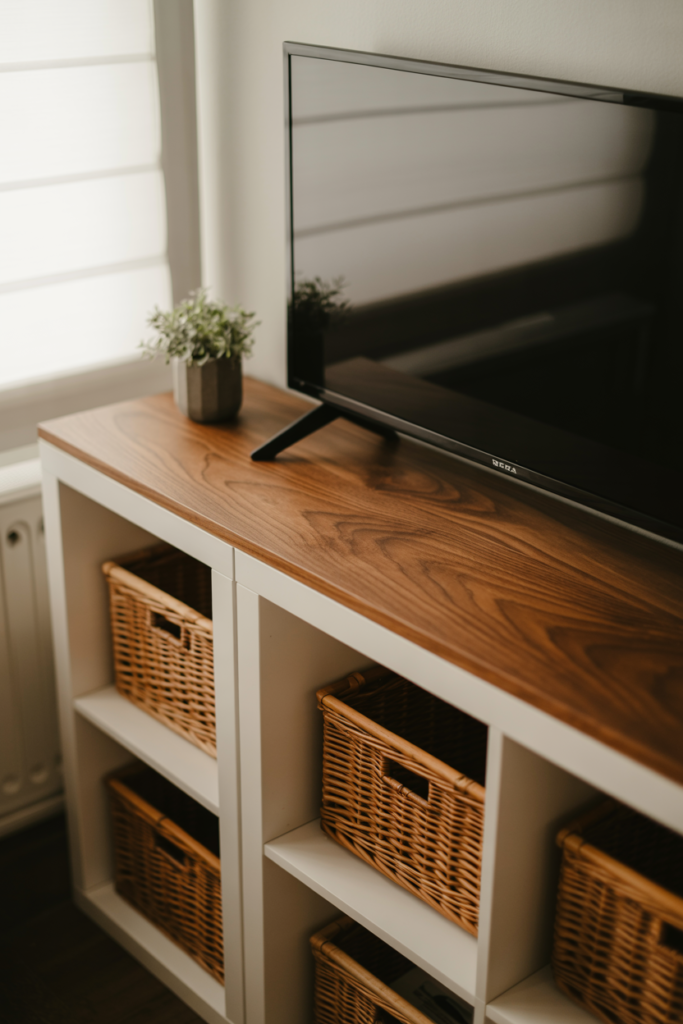
1. Build a Custom Media Console Using IKEA KALLAX Units Topped With a Solid Wood Panel
The KALLAX shelf unit is one of the most versatile pieces IKEA makes, and in the living room,m it works beautifully as a media console base. Place two or three units side by side, add a solid wood panel or a cut-to-size butcher block on top, and you have a media console that looks custom-built for the space.
I tried this with two four-cube KALLAX units in white and a pine panel stained in a warm walnut tone. The contrast between the white cubbies and the warm wood top looked genuinely considered and intentional. The total cost came in well under one hundred and fifty dollars, which is hard to argue with for a piece that anchors the entire room.
Use the cubbies for media storage with matching fabric or wicker baskets to keep things tidy. Mount your TV on the wall above rather than placing it on top for a cleaner, more streamlined look.
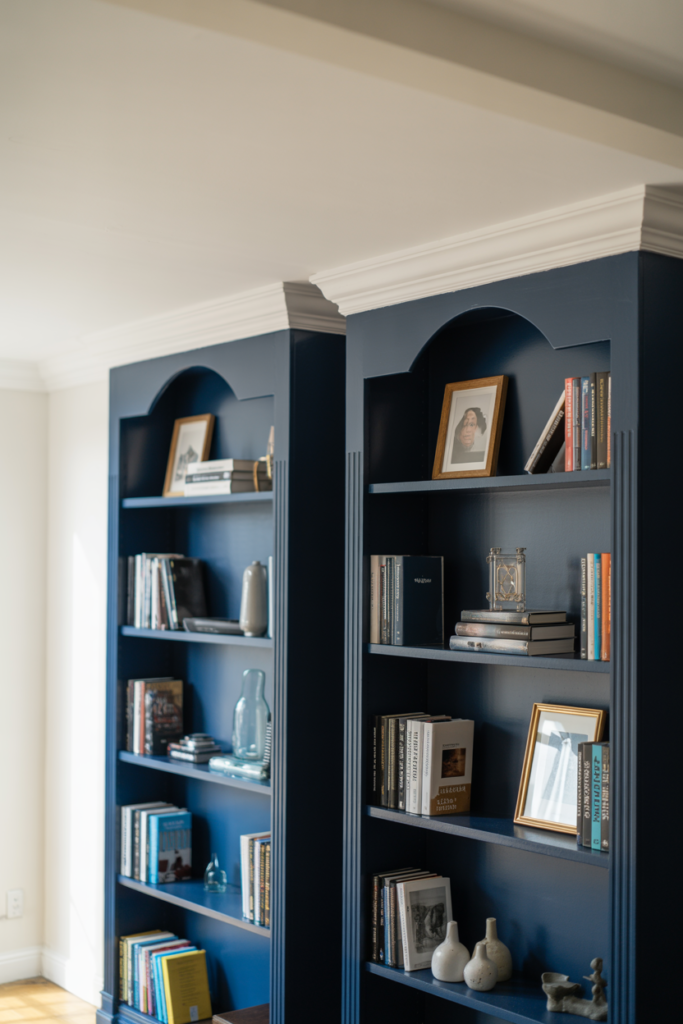
2. Add Crown Molding and Paint to the IKEA BILLY Bookcase for a Built-In Library Look
The BILLY bookcase is probably the most hacked piece of furniture in history, and for good reason. Add crown molding to the top, paint it in a rich color or the same shade as your walls, and the bookcase stops looking like a bookcase and starts looking like architectural built-ins that came with the house.
I painted two BILLY units in a deep navy and added simple pine crown molding along the top of each one. The bookcases went from background furniture to a focal point that completely changed the character of the room. Guests consistently assumed the shelving had always been there, which is exactly the reaction you want.
Anchor the units to the wall before adding the molding so everything feels solid and permanent. Fill the nail holes in the molding with wood filler before painting for a completely seamless finish.
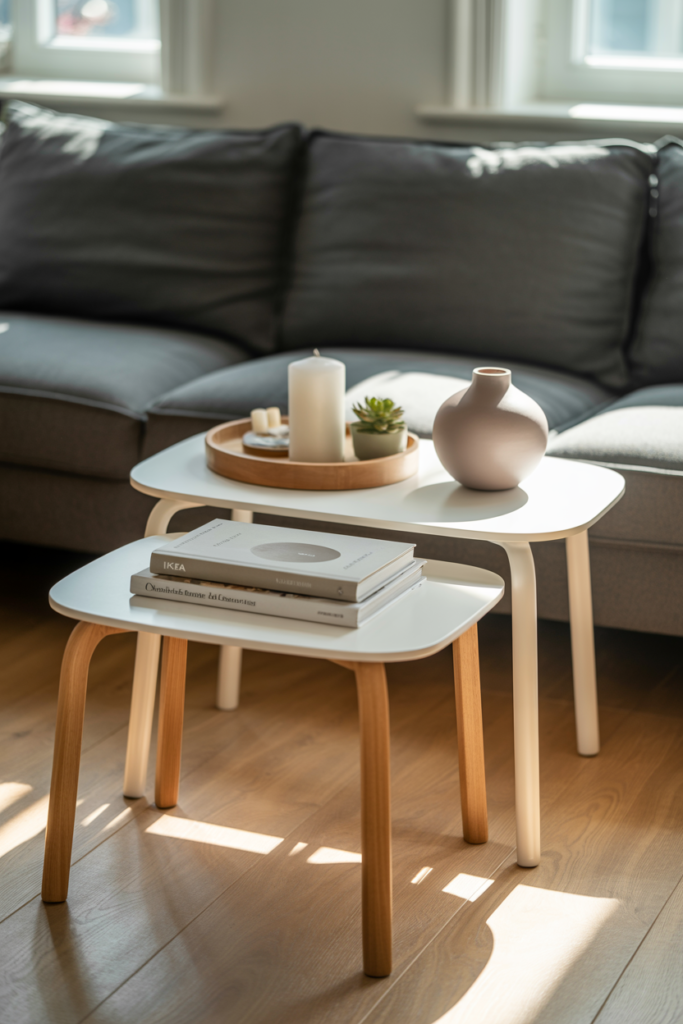
3. Use IKEA LACK Side Tables Stacked and Styled as a Budget Living Room Coffee Table
The LACK side table costs almost nothing and comes in a range of colors and finishes. Stack two of them at different heights, place them side by side, or cluster three together at varying levels for a coffee table arrangement that looks deliberately styled rather than budget-driven.
I grouped two white LACK tables and one in a wood finish together in front of a sofa, and the result looked like something from a curated home decor shoot. Each table held something different: a tray with candles on one, a stack of books on another, and a small plant on the third. The layered heights added visual interest that a single flat coffee table never could.
The combined cost of three LACK tables is still less than most entry-level coffee tables, and the arrangement gives you more flexibility to rearrange whenever the mood strikes.
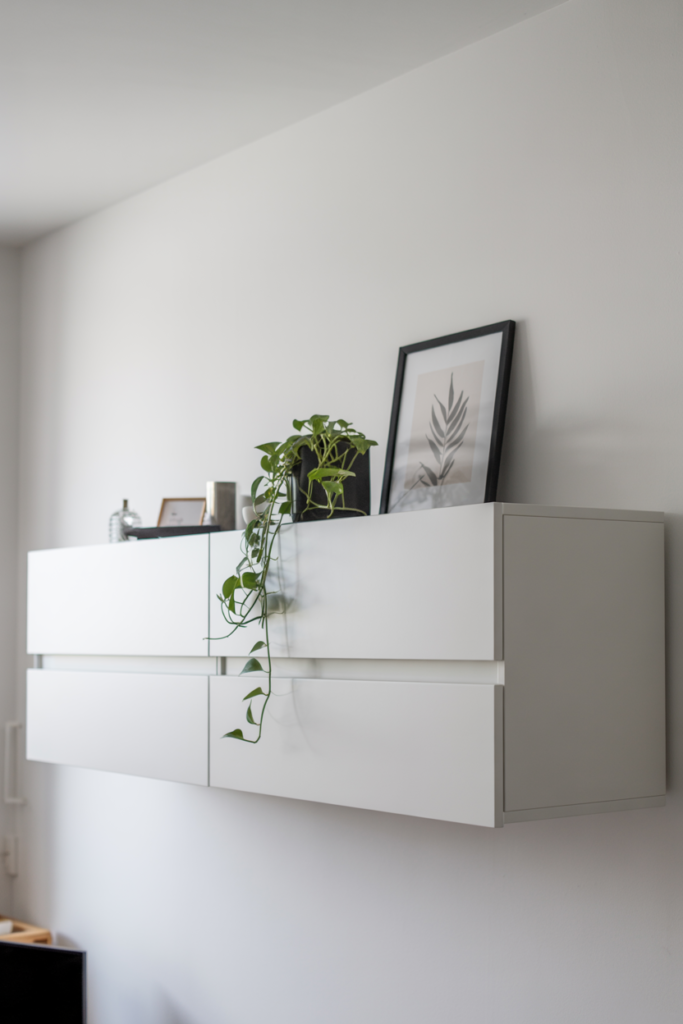
4. Mount IKEA BESTA Units High on the Wall for a Floating Living Room Storage Look
Wall-mounted BESTA units are one of the cleanest storage solutions you can put in a living room. When mounted higher up on the wall rather than sitting on the floor, they create a floating effect that makes the room feel larger, and the ceilings feel taller. The floor space underneath stays open, and the whole setup looks incredibly intentional.
I mounted two BESTA units at about chest height on a long living room wall and used them for book storage and decorative display. The wall below stayed clear, and the room immediately felt more open and less cluttered. It is one of those changes that seems small on paper but feels massive in person.
Use the BESTA with push-open doors for a completely clean front with no visible hardware. Style the top surface with a few carefully chosen objects rather than filling every inch for a polished, editorial result.
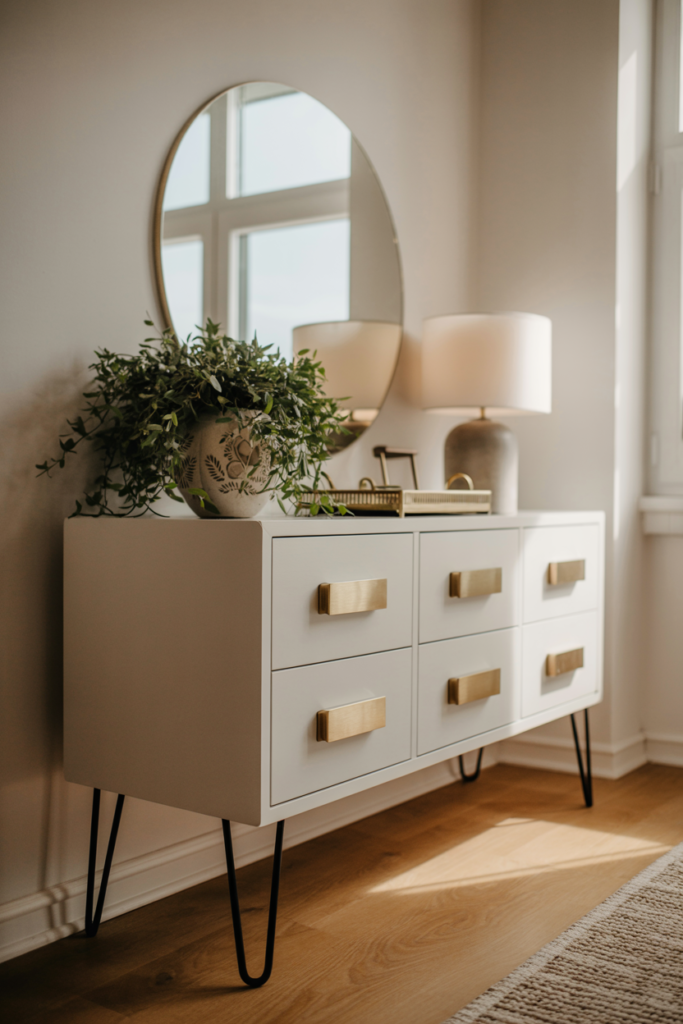
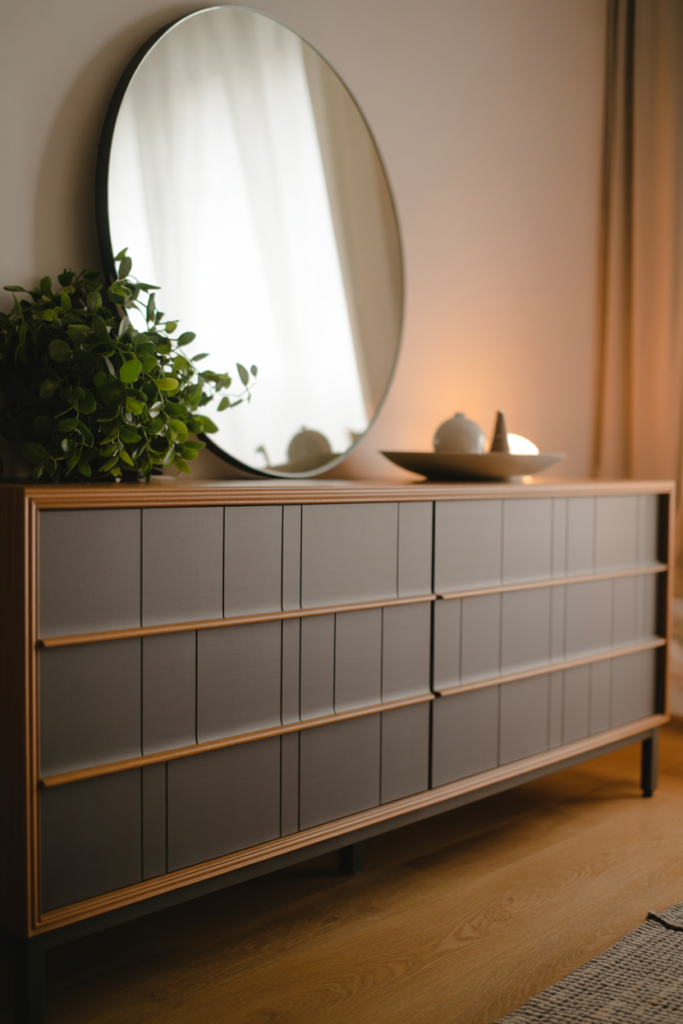
5. Hack the IKEA FINNBY or HEMNES Sideboard With New Legs and Hardware for a Stylish Console Table
A sideboard with new legs and updated hardware becomes an entirely different piece of furniture. The HEMNES sideboard in particular has great bones, and swapping the standard legs for something taller and more tapered instantly gives it a mid-century modern or Scandinavian feel,l depending on the finish you choose.
I swapped the legs on a HEMNES sideboard for hairpin legs in a matte black finish and replaced the original hardware with long brushed brass pulls. The sideboard went from looking like a basic storage piece to looking like something from a boutique furniture store. The total cost of the upgrades was under fifty dollars, and the difference was genuinely hard to believe.
Place the updated sideboard against a living room wall with a large mirror above and a few styled objects on top. That combination creates a vignette that anchors the room and gives it a sense of considered design.
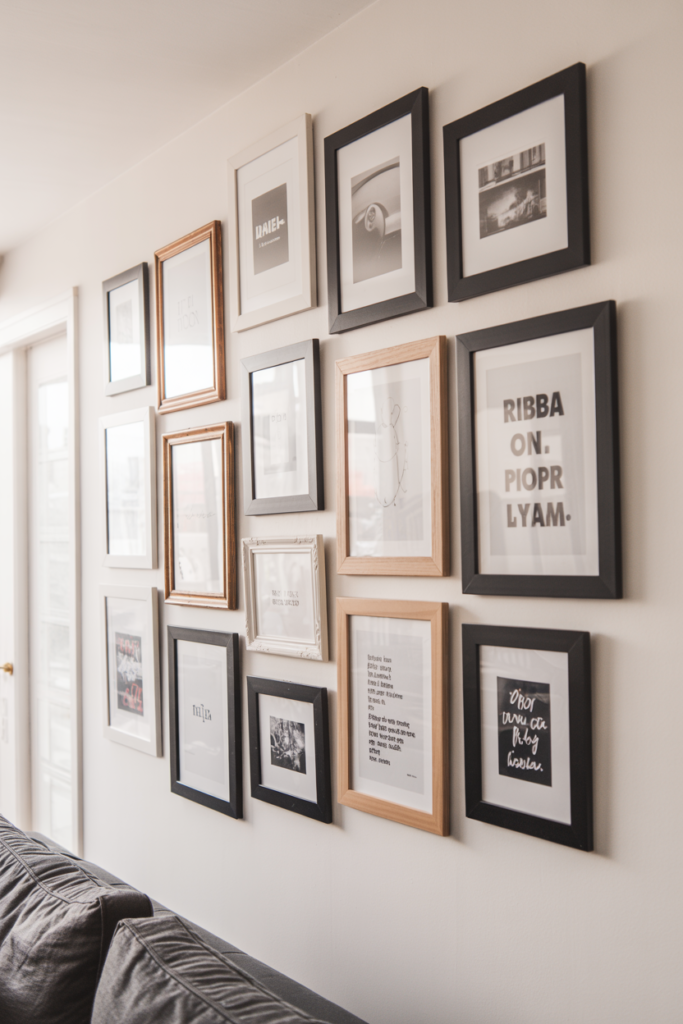
6. Create a Stylish and Affordable Gallery Wall Using IKEA RIBBA and YLLEVAD Frames
Gallery walls look expensive and time-consuming, but IKEA frames make them completely accessible. The RIBBA and YLLEVAD ranges offer clean, simple frames in multiple sizes that mix well together. Plan the layout on the floor first, then transfer it to the wall for a result that looks curated rather than chaotic.
I built a gallery wall in a living room using a mix of RIBBA frames in black and natural wood tones. I filled them with a combination of art prints, personal photos, and simple typographic designs printed at home. The whole wall cost under seventy dollars, including the prints, and looked like something that took months of careful curation.
The key to a gallery wall that works is keeping either the frame color or the content style consistent. Mix both, and it tips into chaos. Pick one variable to unify and let the other vary for a balanced, interesting result.
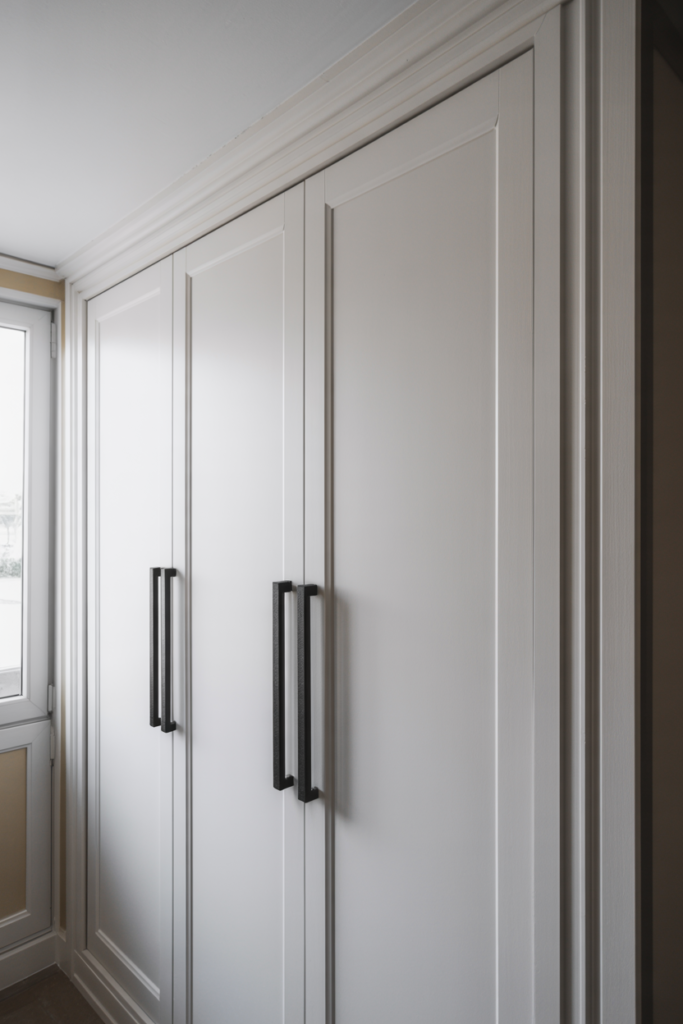
7. Turn IKEA PAX Wardrobe Units Into a Sleek and Functional Living Room Built-In Storage Wall
PAX wardrobes are not just for bedrooms. In a living room, a row of PAX units with matching doors creates a full wall of concealed storage that looks completely built-in. Add wood trim around the outside edges and paint everything to match the walls for a result that looks architecturally planned.
I used three PAX units with white GRIMO doors in a living room and framed the whole installation with simple MDF trim painted the same white as the walls. The living room gained an enormous amount of hidden storage and lost none of its sense of space. Nobody who visits ever guesses it is flat-pack furniture behind those doors.
This hack takes a full weekend to complete properly,y but the payoff is substantial. Concealed storage in a living room solves clutter problems that no amount of styling can fix, and this approach does it without the cost of custom joinery.
| PAX Living Room Hack Element | What It Adds | Approx. Cost |
| MDF trim framing | Built-in seamless look | $25-$50 |
| Matching wall paint | Fitted architectural feel | $15-$25 |
| New door handles | Polished high-end finish | $20-$60 |
| Interior LED lighting | Functional warm ambiance | $15-$30 |
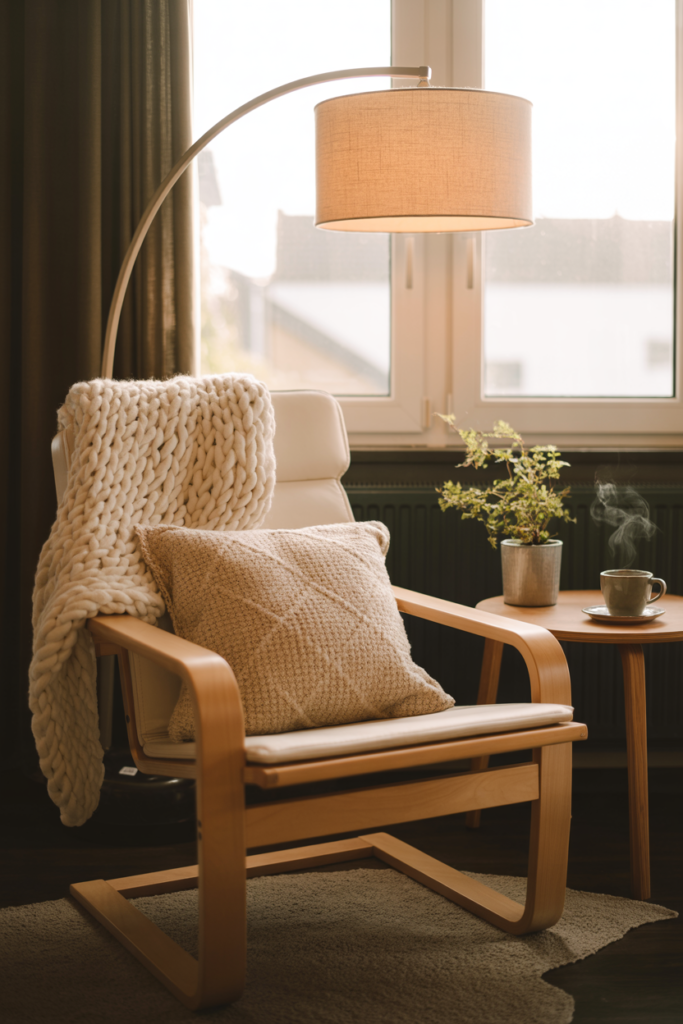
8. Style an IKEA POANG Chair With a Quality Throw and Cushion for a High-End Reading Nook Feel
The POANG chair is one of those pieces that divides opinion, but styled correctly, it looks genuinely considered. The bentwood frame has a natural warmth that works well in living rooms with organic textures and earthy tones. Add a high-quality chunky knit throw and a supportive cushion in a complementary fabric, and the chair looks far more expensive than it is.
I restyled a POANG in a living room corner by adding a boucle cushion cover and a thick cream wool throw draped over the arm. A small side table next to it and a floor lamp above completed the reading nook. The corner went from an underused space to the most inviting spot in the room.
The POANG replacement cushion covers from third-party sellers on Etsy and Amazon are worth exploring. Many of them offer fabric upgrades that completely change the look and feel of the chair for under thirty dollars.
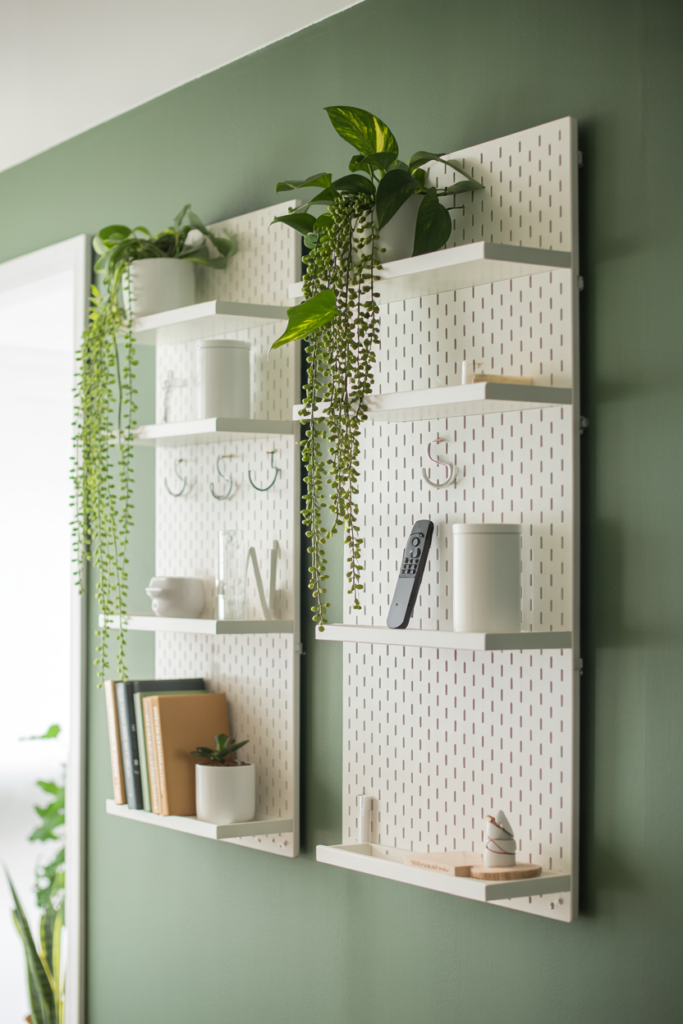
9. Use IKEA SKADIS Pegboards as a Stylish and Practical Living Room Organization Wall Panel
The SKADIS pegboard system is designed for offices and craft spaces but works brilliantly in a living room as a functional display wall. Mount one or two panels on a prominent wall and use the accessories to hold remotes, charging cables, small plants, and decorative objects in a way that looks organized rather than chaotic.
I mounted two SKADIS panels side by side on a living room wall and used a mix of shelves, hooks, and containers from the accessory range. The wall held everything that usually ended up scattered across the coffee table and side tables. The room felt calmer and more organized without losing any of its personality.
Paint the SKADIS panel in a color that complements your living room palette for a more intentional look. The standard white works well in most spaces, but a terracotta or sage green panel becomes a genuine design feature.
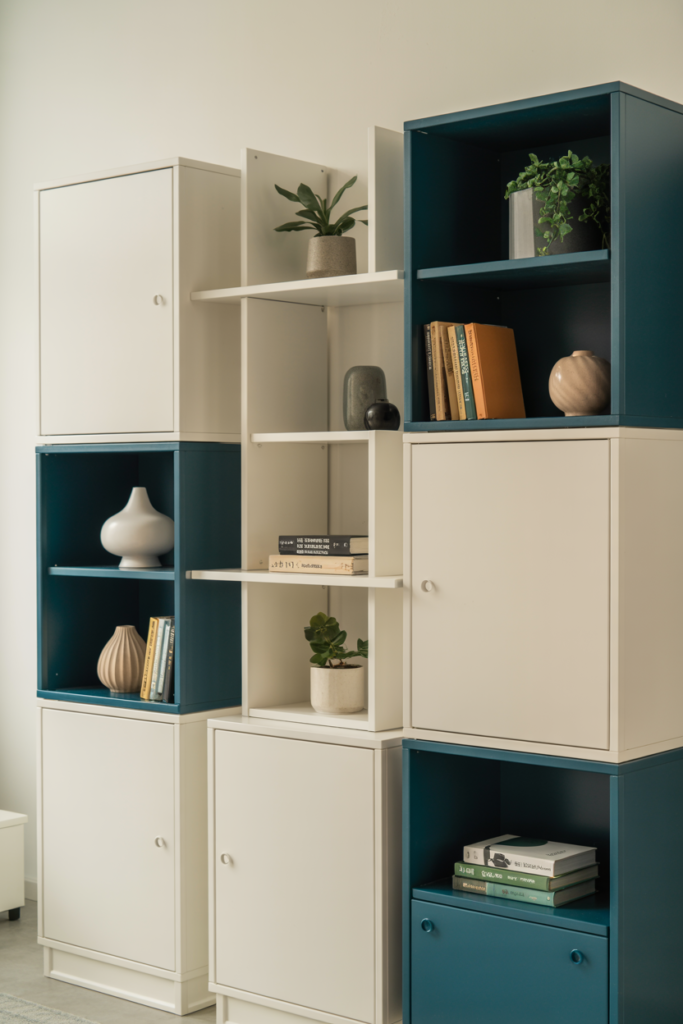
10. Combine IKEA EKET Wall Cabinets in a Modular Arrangement for Affordable Living Room Display Storage
The EKET cabinet system is one of IKEA’s most underrated ranges. The small square and rectangular cabinets mount directly to the wall and can be combined in any configuration you choose. A staggered arrangement of open and closed EKET units creates a display wall that looks completely custom and endlessly adjustable.
I arranged five EKET units in an asymmetric pattern on a living room wall, mixing open cubbies with closed door units. The open sections held plants and decorative objects, while the closed ones hid the less attractive but necessary items like routers and power strips. The whole installation cost under one hundred and twenty dollars and looked like a piece of designed furniture.
Choose two complementary colors across your EKET units for a playful but cohesive look. All white works for a clean, minimal feel, while a mix of white and a deep accent color adds personality without overwhelming the space.
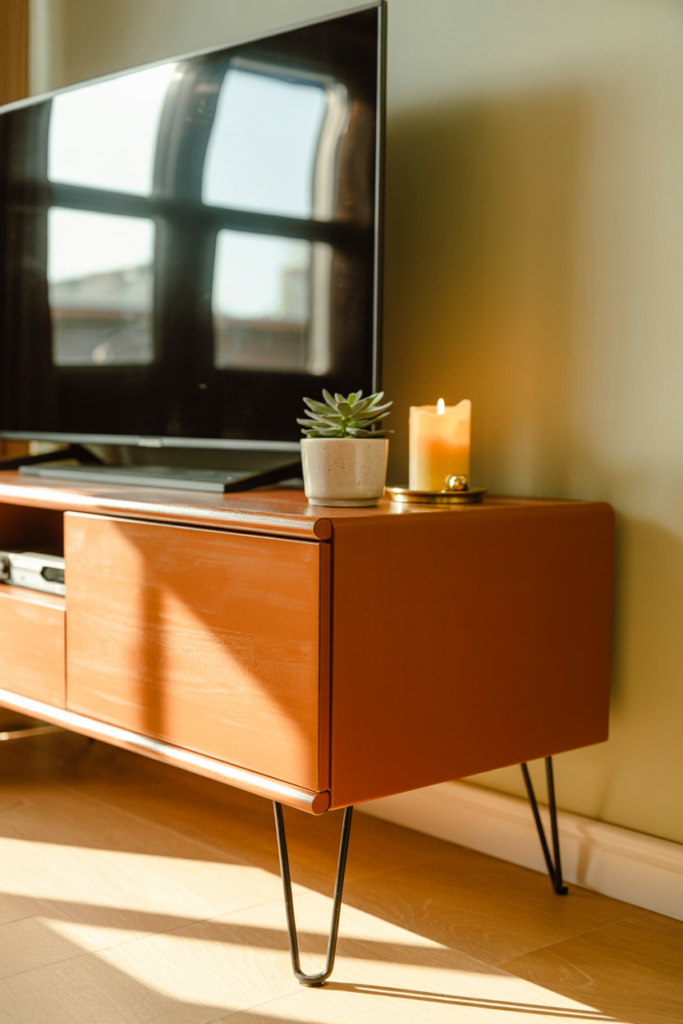
11. Upgrade an IKEA LACK TV Unit With Hairpin Legs and Bold Paint for a Retro Living Room Look
The LACK TV unit is one of the most basic pieces in the IKEA range, which makes it one of the best starting points for a hack. Remove the original legs, attach hairpin legs in a contrasting metal finish, and paint the body in a bold color for a retro-inspired TV console that looks nothing like its flat-pack origins.
I painted a LACK TV unit in a terracotta tone and fitted it with brass hairpin legs. The unit went from invisible background furniture to a genuine conversation piece. It cost under forty dollars to transform, and the result looked like something from a vintage furniture market.
Keep the styling on top minimal so the piece itself gets to be the focus. A small plant, a candle, and one decorative object are all it needs.
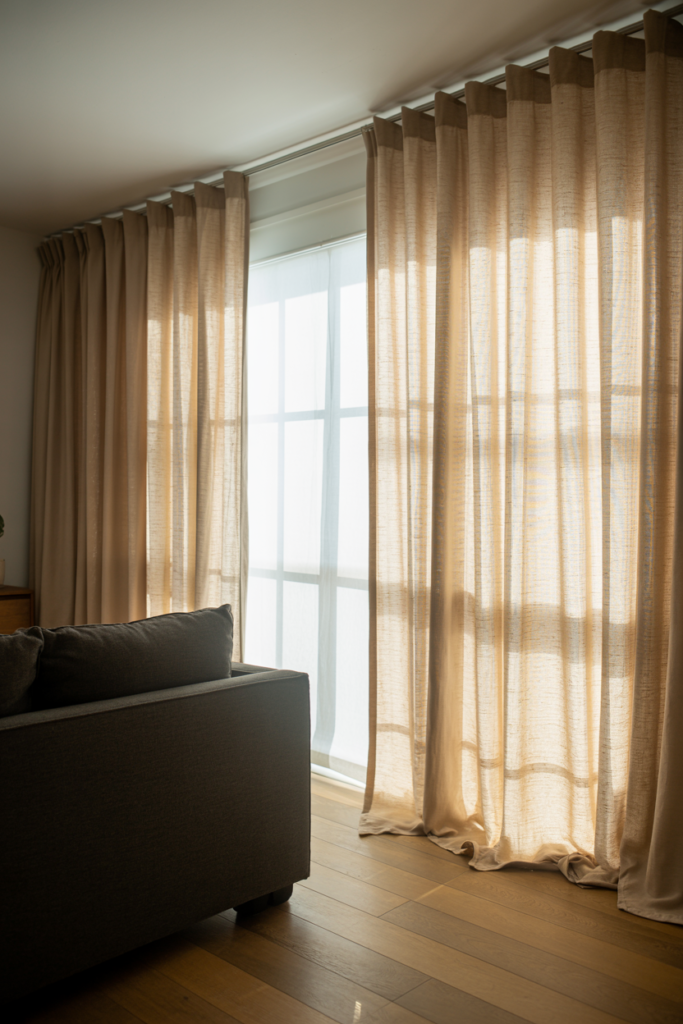
12. Hang IKEA KVARTAL or RÄCKA Curtain Rods at Ceiling Height for a Taller and More Luxurious Living Room
Ceiling-height curtains are one of the most effective ways to make a living room feel taller and more luxurious. IKEA’s curtain rod systems are affordable and easy to mount at ceiling level, and the difference they make to the perceived height of a room is significant.
I installed an IKEA curtain rod as close to the ceiling as possible in a living room with standard height ceilings and used floor-length linen curtains that pooled slightly on the floor. The room felt noticeably taller and softer from that single change. It is one of those hacks where the cost is minimal,l but the visual impact is disproportionately large.
Choose a curtain fabric that suits the light levels in your living room. Sheer panels work well in bright rooms where you want to diffuse light, while heavier linen or velvet-look fabrics add warmth and drama to darker spaces.
13. Add Trim and Paint to IKEA BESTA Cabinets for a Custom Built-In Living Room Sideboard Look
The BESTA cabinet system is already one of the more polished-looking ranges in the IKEA lineup, but adding simple wood trim to the door fronts and painting everything in a single color takes it to a completely different level. The result looks like a custom sideboard that was designed specifically for your space.
I added thin rectangular trim pieces to the flat door fronts of a BESTA unit and painted the whole thing in a warm charcoal grey. The transformation was significant enough that people who had seen the original piece did not recognize it as the same furniture. The trim materials cost under thirty dollars, and the paint another fifteen.
Use a foam roller for the smoothest possible finish on flat cabinet doors. Two coats of a good-quality furniture paint with a light sand between coats gives you a result that looks factory-finished rather than DIY.
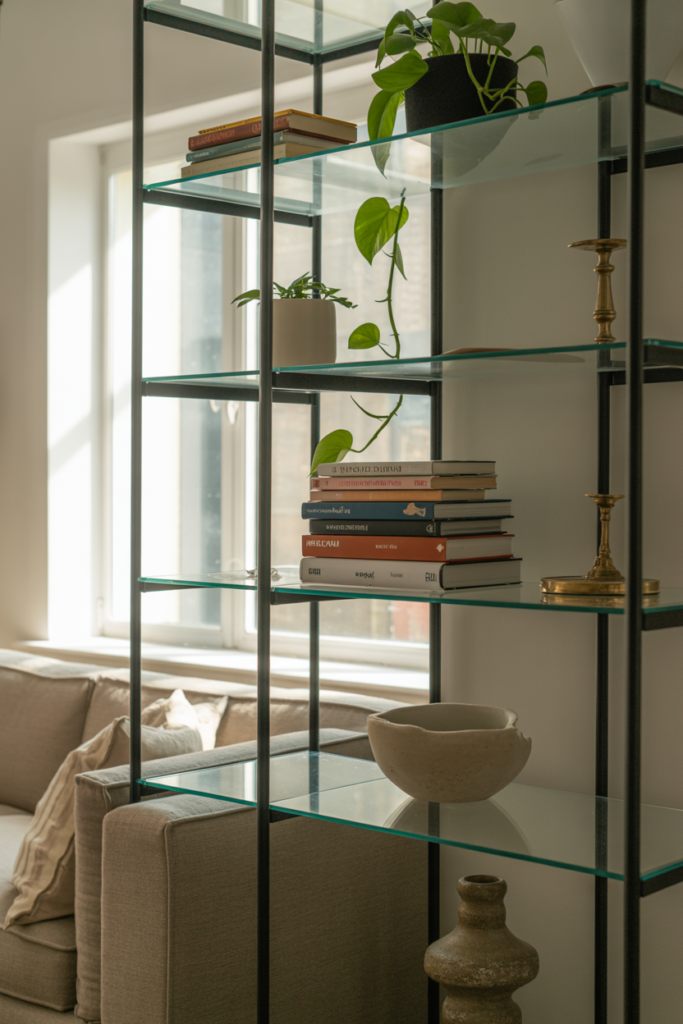
14. Style IKEA VITTSJÖ Shelving Units With Books, Plants, and Art for an Affordable Living Room Display
The VITTSJÖ shelving unit has a slim metal and glass frame that looks more expensive than it costs. In a living room, it works as a display shelf, a room divider, or a styled backdrop behind a sofa. The transparent quality of the glass shelves keeps the unit from feeling heavy even when fully styled.
I placed a VITTSJÖ unit behind a sofa as a low room divider between the living area and a dining space. I styled the shelves with a mix of books stacked horizontally, small trailing plants, and a few ceramic objects. The unit added definition to the space without blocking light or making the room feel divided.
The key to styling a VITTSJÖ well is layering at different depths. Place taller items at the back and shorter ones at the front so every shelf has visual dimension rather than sitting flat.
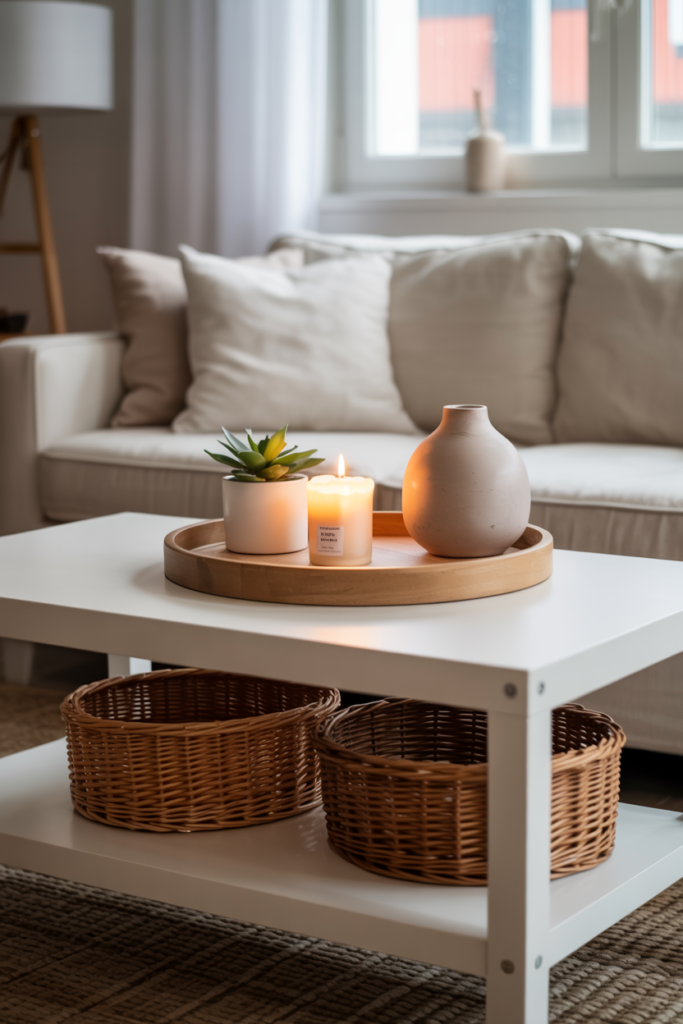
15. Use IKEA NORNÄS or HEMNES Coffee Table as a Styled Storage Centerpiece With Baskets and Trays
A coffee table that also offers storage is one of the most practical things you can have in a living room. The HEMNES coffee table with its lower shelf gives you a natural spot for baskets, books, and trays that keep everyday items accessible but organized. Styled well, it becomes the centerpiece of the room that is arranged around it.
I styled a HEMNES coffee table with a large round tray on top holding a candle, a small plant, and a decorative object. The lower shelf held two wicker baskets for blankets and remote controls. The table looked intentional and warm rather than cluttered, and the storage it provided reduced the visual noise in the rest of the room significantly.
Choose a tray that is large enough to hold three or four objects comfortably without crowding. That contained grouping on the table surface is what gives the whole arrangement a styled rather than scattered feel.
Quick Tips to Get the Best Results From Every IKEA Living Room Hack You Try
Getting consistently good results from IKEA hacks comes down to a few habits that make a real difference. Preparation is the most important one. Sanding surfaces before painting, anchoring wall-mounted units properly, and planning layouts on the floor before committing to drill holes all save time and frustration later.
Keeping a consistent color palette across your hacked pieces is what makes a living room feel designed rather than assembled. Choose two or three core colors and apply them across furniture, hardware, soft furnishings, and accessories. That kind of visual consistency is the difference between a room that looks curated and one that just looks busy.
The other thing worth keeping in mind is pace. You do not need to do every hack at once. Start with one or two of the simpler ones, see how the room responds, and build from there. Living rooms tend to reveal what they need as they evolve, and giving yourself time to observe between changes leads to better decisions overall.
Conclusion
IKEA living room hacks are one of the most practical and satisfying ways to get a home that looks thoughtfully designed without spending a significant amount of money. From floating BESTA units to built-in PAX storage walls, every hack on this list delivers a result that punches well above its price point. The living room is where most of us spend the majority of our time at home, and it deserves to look and feel like a space that was made for you specifically.
The best approach is to start with the hacks that solve your biggest current problem, whether that is storage, style, or just making the room feel more like yours. Build from there at whatever pace works for your budget and your schedule. Each change adds to the last, and the cumulative result is a living room that looks custom, feels personal, and costs a fraction of what people assume it does.
IKEA gives you the raw material. These hacks give you the direction. What you do with both of those things is entirely up to you, and that is honestly the most exciting part.
Frequently Asked Questions
Can IKEA living room hacks work in a rented home? Many IKEA hacks require minimal or no permanent changes to walls or floors. Options like LACK coffee table clusters, VITTSJÖ shelving, and styled KALLAX units work perfectly in rentals. For wall-mounted hacks, always check your tenancy agreement before drilling.
How much does the average IKEA living room hack cost? Simple hacks like hardware swaps or paint updates cost between fifteen and fifty dollars. Mid-range hacks like BESTA trim additions or BILLY bookcase built-ins typically run between fifty and one hundred and fifty dollars. Larger projects like PAX storage walls can reach two to three hundred dollars, but still cost far less than custom furniture.
What paint works best on IKEA living room furniture? Furniture paint or chalk paint adheres well to most IKEA surfaces after a light sanding. Always apply a topcoat or sealer on high-use pieces for durability. A foam roller gives the smoothest finish on flat surfaces like cabinet doors and drawer fronts.
Do IKEA hacks hold up well over time? Most IKEA hacks hold up well when the preparation steps are done properly. Sanding before painting, using quality paint with a topcoat, and anchoring wall-mounted pieces securely all contribute to longevity. Hardware upgrades in particular tend to last as long as the furniture itself.
Where can I find the best IKEA living room hack ideas? Pinterest and the r/ikeahacks community on Reddit are the two best places to start. The IKEAhackers.net website also has a large archive of documented hacks with detailed instructions and material lists from real people who have completed the projects.
Can I mix different IKEA ranges in the same living room? Absolutely. Mixing ranges like KALLAX, BESTA, and BILLY works well when you keep the color palette and hardware finishes consistent across all pieces. Consistency in finish and color is what ties different units together into a cohesive room rather than a collection of mismatched furniture.
Is it better to hack IKEA furniture or buy second-hand pieces to upgrade? Both approaches have merit, but IKEA hacks offer more predictability. The dimensions, materials, and finishes are consistent, which makes planning easier. Second-hand pieces can offer more character but require more guesswork around compatibility and condition.