
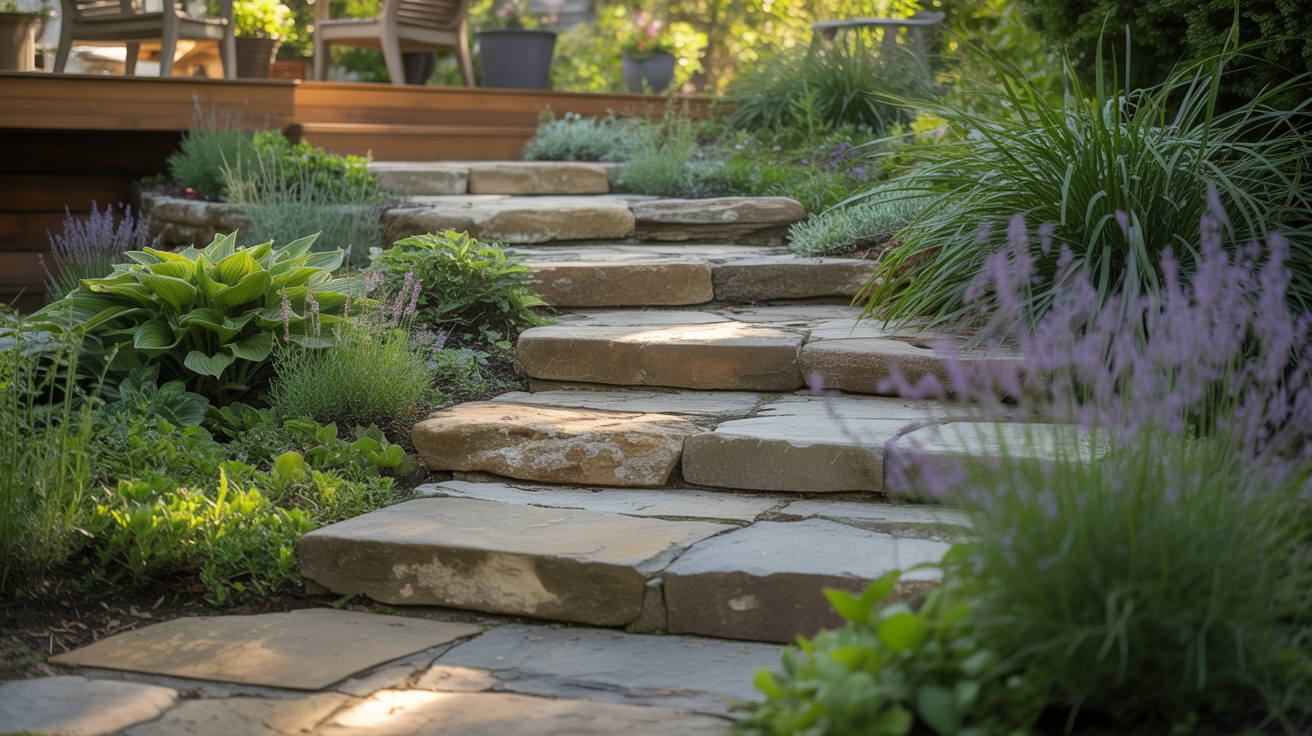
A sloped yard does not have to be a landscaping headache. The right garden stairs turn that awkward incline into one of the most charming features of your outdoor space. And the best part is that you do not need to hire anyone to make it happen.
I have seen so many sloped yards sitting there looking unfinished, like the homeowner just gave up halfway through a plan. A set of well-built garden steps changes everything. It adds structure, makes the space usable, and gives the whole yard a more intentional, designed feel.
Whether you are working with a gentle slope or a steep hillside, there is a DIY stair idea on this list that fits your yard, your budget, and your skill level. Some of these take a weekend, and some take an afternoon. None of them requires a construction crew.
Why DIY Garden Stairs Are Worth the Effort on a Sloped Yard
Garden stairs do more than just connect two levels of a yard. They create a natural flow that guides people through the space and makes the entire landscape feel organized. A sloped yard without steps often feels inaccessible, and that means a large portion of your outdoor space goes unused.
Building your own garden steps also gives you full control over the materials, style, and scale. You can match the stairs to your home’s exterior, blend them into the surrounding plantings, or make them a bold design feature on their own. That kind of customization is hard to get when someone else is making the decisions.
There is also a practical safety benefit that often gets overlooked. A sloped yard without proper footing is genuinely slippery, especially after rain. Well-built garden stairs give everyone in the family a safe, stable path to navigate the yard without the unplanned slip-and-slide experience.
1. Timber Sleeper Steps
Timber sleeper steps are one of the most popular DIY garden stair options, and honestly, it is easy to see why. They look warm, natural, and substantial, and they fit into almost any garden style from rustic to modern. Railway sleepers or landscape timbers work well here, and both are widely available at hardware and garden stores.
The basic build involves stacking sleepers horizontally into the slope and securing them with rebar or timber stakes driven into the ground. Fill the space behind each sleeper with compacted gravel or soil to form the tread. The result looks sturdy and intentional without requiring advanced carpentry skills.
I think timber sleeper steps age beautifully, especially when moss starts to creep along the edges after a season or two. That natural weathering gives the steps a settled, established look that blends seamlessly into the surrounding garden plantings.
2. Natural Stone Steps
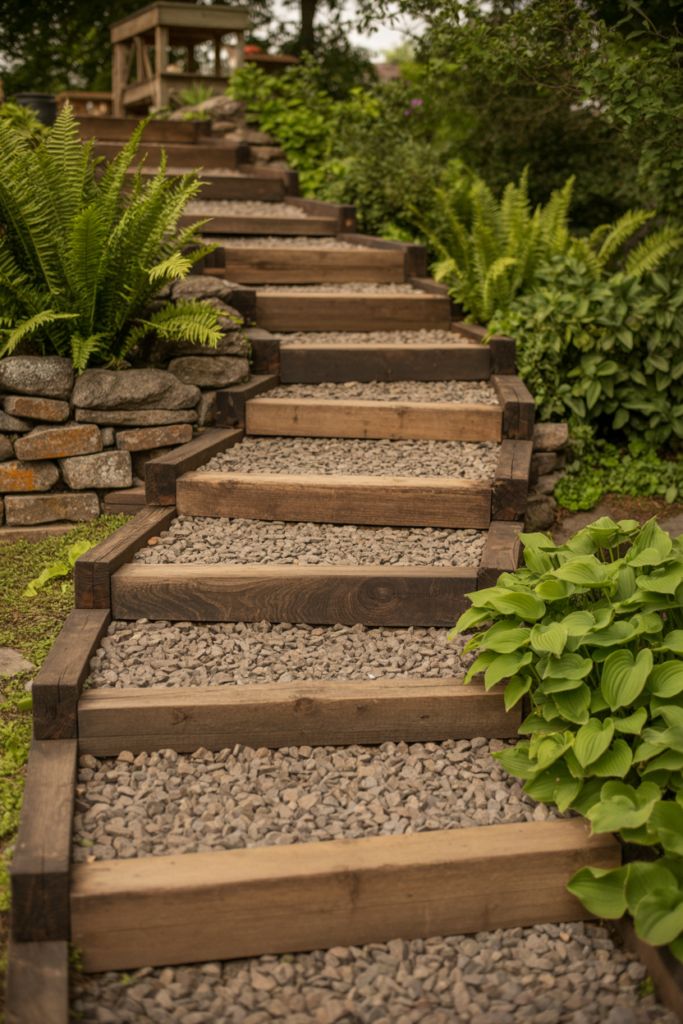
Natural stone steps have a timeless quality that suits almost every garden style. Flagstone, sandstone, and fieldstone are all popular choices, and each one brings a slightly different character to the space. The irregular edges and natural color variation make these steps look like they have always been part of the landscape.
Setting natural stone steps involves digging into the slope, creating a level base with compacted gravel, and setting each stone firmly so it does not rock underfoot. Larger, flatter stones work best for treads. The gaps between stones can be filled with gravel, soil, or planted with low ground covers like creeping thyme for a finished look.
What I love about natural stone steps is how they improve with age. The surface develops a patina, plants fill the gaps, and the whole thing starts to look less like a construction project and more like a natural feature of the yard.
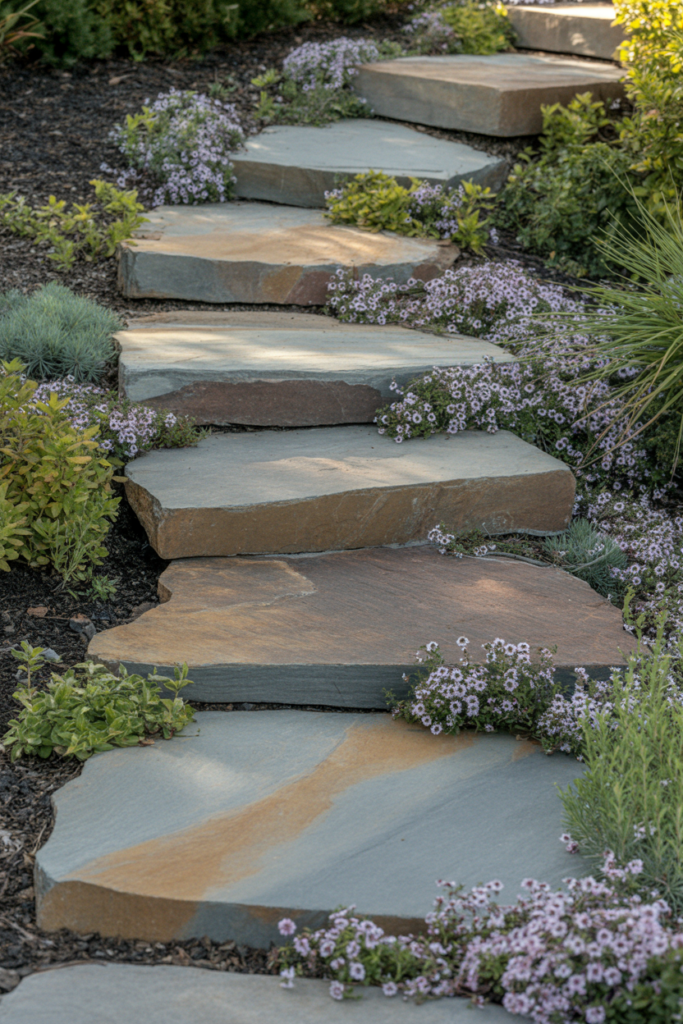
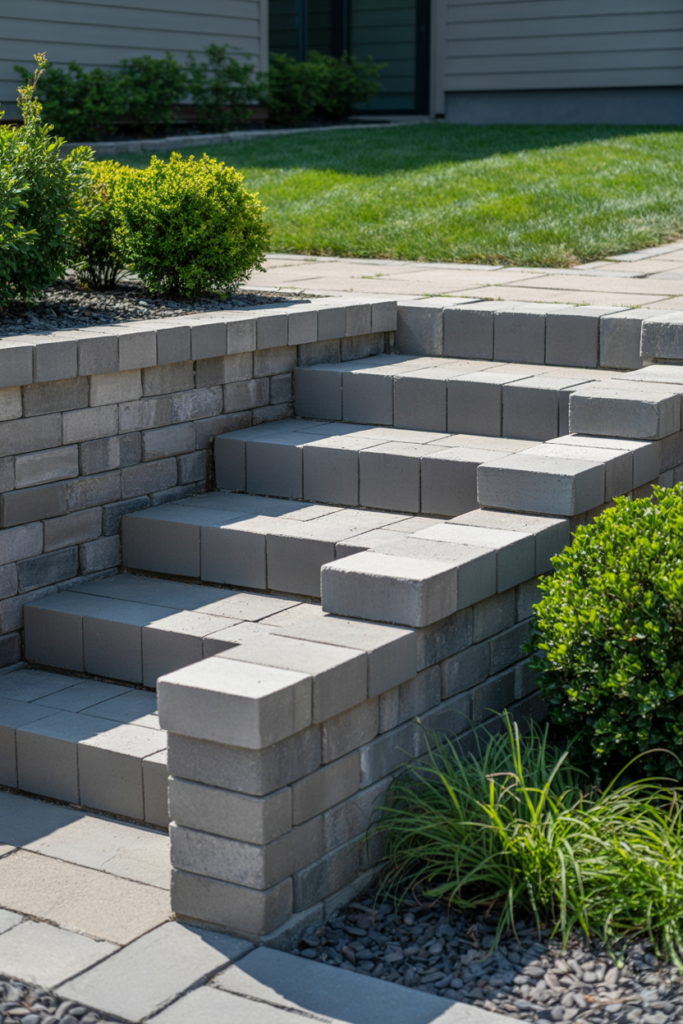
3. Concrete Block Steps
Concrete block steps are a budget-friendly option that delivers a clean, structured look without much complexity. Standard concrete retaining wall blocks stack easily, lock together securely, and come in a range of textures and finishes that can mimic stone or brick. They are also incredibly durable and handle weather well year after year.
The build process is straightforward. Dig into the slope, create a gravel base for drainage, and stack the blocks in a staggered pattern to form each riser and tread. No mortar is required for most dry-stack applications, which keeps the project manageable for a first-time builder.
Concrete block steps work particularly well in yards that need a more formal, geometric look. They pair nicely with clean lawn edges, trimmed hedges, and structured planting beds, giving the whole yard a tidy, organized feel.
4. Gravel and Timber Steps
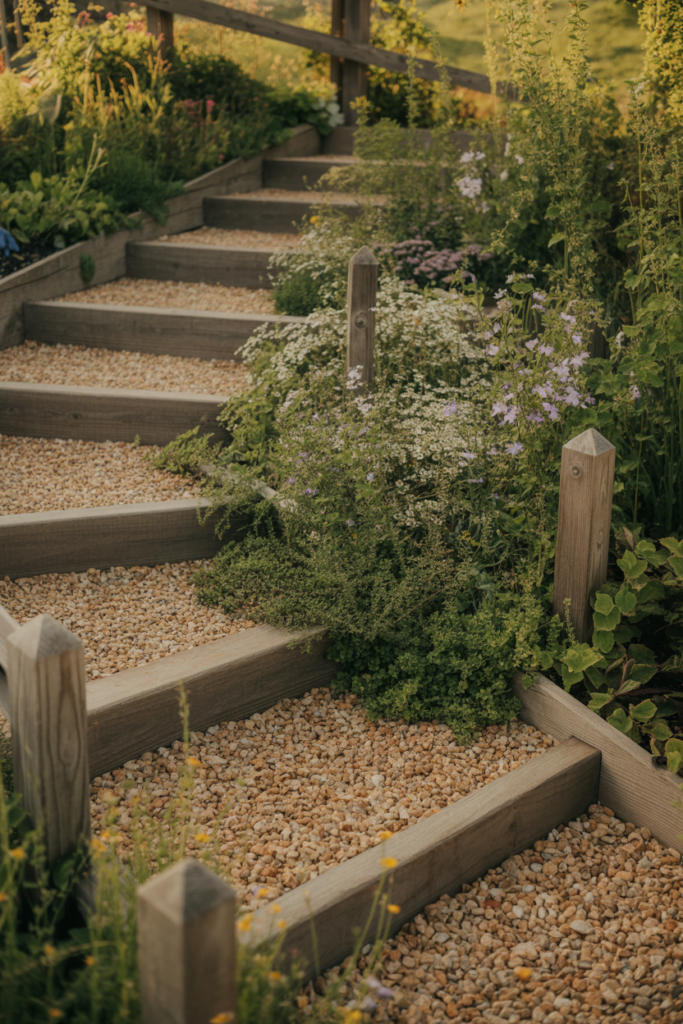
Gravel and timber steps combine two of the most accessible and affordable landscaping materials into one practical, attractive stair design. The timber frames each step, holding the gravel in place while giving the design a defined structure. The gravel fill provides good drainage and a natural, relaxed aesthetic.
To build these, you install horizontal timber risers into the slope, secure them with stakes, and fill the space between each riser with compacted pea gravel or crushed stone. The gravel needs a layer of landscape fabric underneath to prevent weeds from pushing through over time.
This style works especially well in informal cottage gardens or naturalistic landscapes. It looks relaxed and unfussy, which is sometimes exactly the right tone for a backyard garden path that winds down a gentle slope.
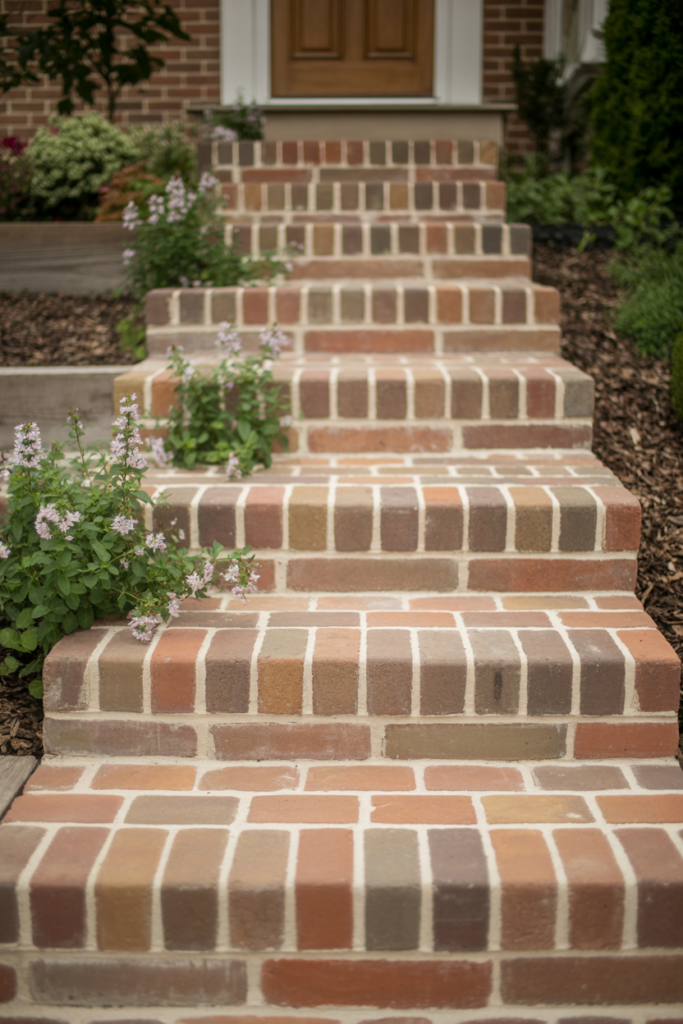
5. Brick Garden Steps
Brick steps bring a classic, traditional look to a sloped yard that is hard to replicate with any other material. They feel solid and permanent, and they suit a wide range of home styles from colonial to craftsman to modern farmhouse. Reclaimed brick adds even more character, with its worn edges and varied tones giving the steps an aged, handcrafted quality.
Building brick steps requires a bit more precision than some other options, but it is still very manageable as a DIY project. Each step needs a compacted gravel base, a mortar bed, and carefully laid bricks for both the riser and the tread. Taking the time to get each course level pays off in a finished result that looks genuinely professional.
Brick also holds up well over time, especially when sealed against moisture. A set of well-laid brick garden steps can easily last decades, which makes the extra effort in the building phase a genuinely worthwhile investment.
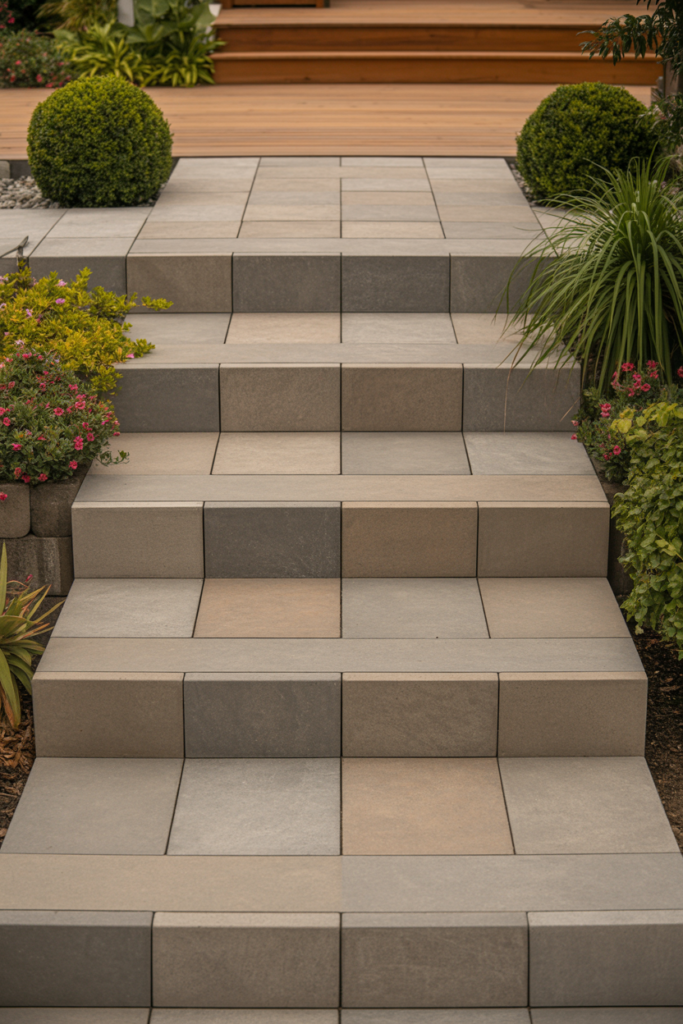
6. Paver Steps
Concrete pavers give you the look of stone or brick with a more consistent shape and size, which makes them easier to work with on a DIY project. They come in a huge range of colors, textures, and profiles, so matching them to an existing patio, driveway, or walkway is usually straightforward.
Paver steps work on a similar principle to natural stone steps. You dig into the slope, set a gravel base, and lay the pavers in a stable, level configuration for each tread. Larger format pavers create generous, comfortable treads that are easy to walk on and look proportionally strong in the landscape.
One of the things I appreciate most about paver steps is their consistency. Every tread ends up at the same height and depth, which makes the finished staircase feel safe and predictable underfoot. That consistency also gives the design a polished, intentional look that reads well from a distance.
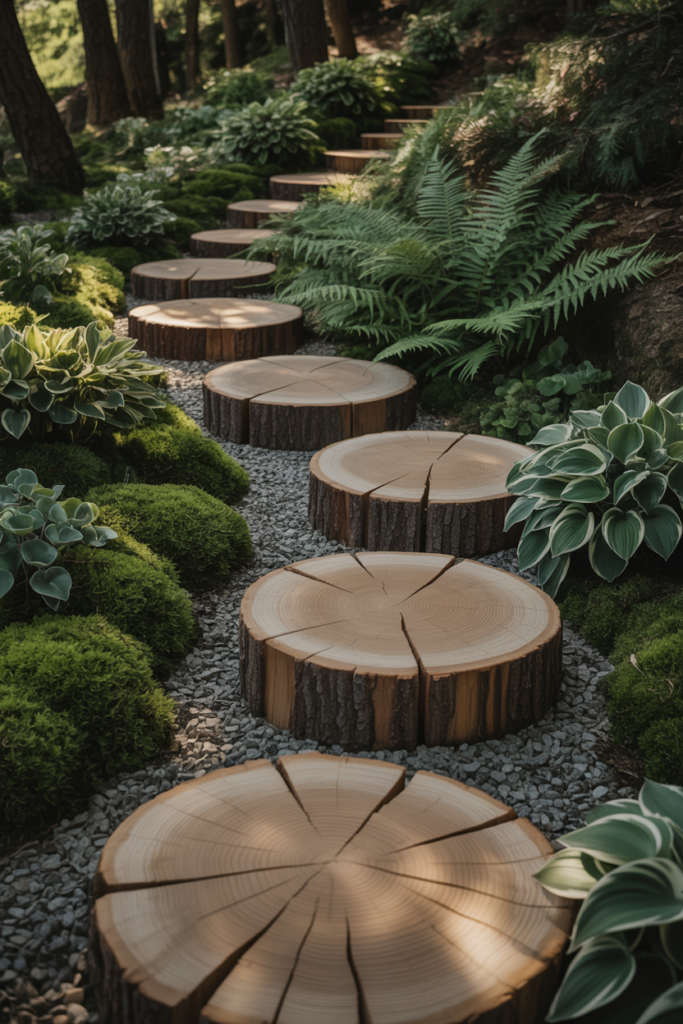
7. Log Slice Steps
Log slice steps are one of the more creative DIY garden stair options, and they work particularly well in woodland or naturalistic garden settings. Cross-sections of large logs are set into the slope as individual stepping platforms, creating a rustic, organic path that feels like it belongs in a forest garden.
The logs need to be set into a compacted base of gravel or crushed stone to keep them stable and promote drainage around the wood. Treat the cut faces with a wood preservative to slow weathering and extend the life of each slice. Hardwood species like oak or elm hold up best over time.
Log slice steps have a charm that is hard to manufacture with any other material. They look genuinely handcrafted and connect the built elements of the garden to the natural world in a way that more formal stair designs simply do not.
8. Gabion Steps
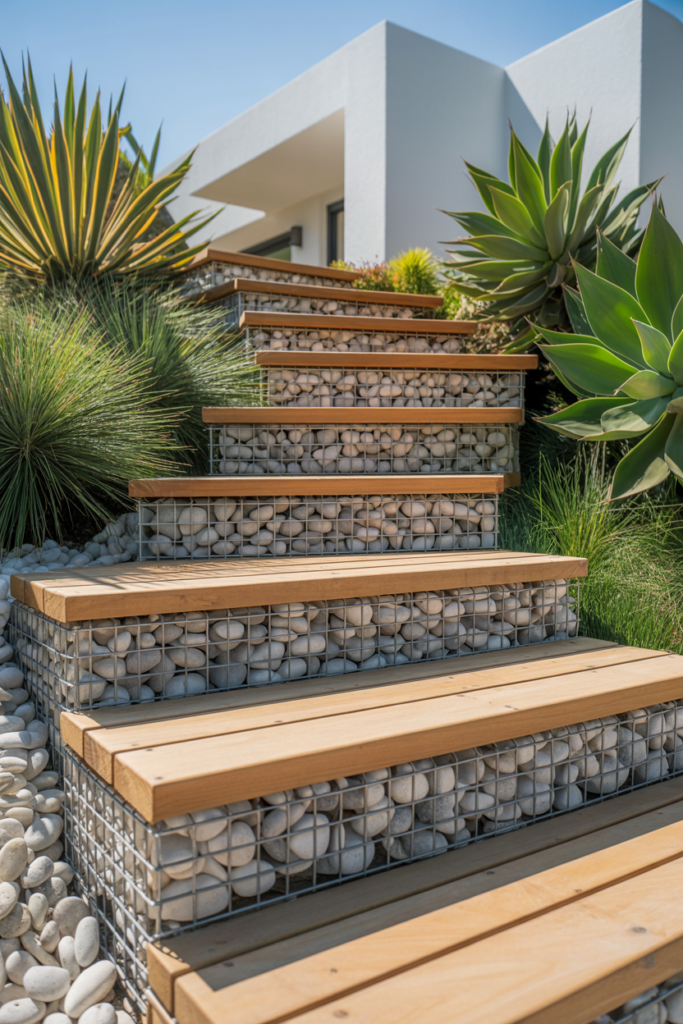
Gabion steps are one of those design ideas that look like they belong in a high-end landscape project, but are actually very achievable as a DIY build. Gabion baskets are wire cages filled with rocks, gravel, or even recycled materials, and they stack into solid, heavy retaining structures that double beautifully as stair risers. The industrial-meets-natural aesthetic suits modern and contemporary garden styles particularly well.
To build gabion steps, you set the wire cages into the slope, fill them with your chosen stone, and use the flat tops as treads or pair them with timber or paver treads laid across the top. The weight of the filled baskets keeps everything in place without the need for mortar or heavy anchoring. They are surprisingly stable once filled.
What makes gabion steps stand out is the texture. The visible rock fill creates a rich, layered surface that catches light differently throughout the day. You can also customize the fill material to complement your existing garden palette, using local stone, river pebbles, or even recycled brick chunks for a more personal touch.
9. Stepping Stone Path Steps
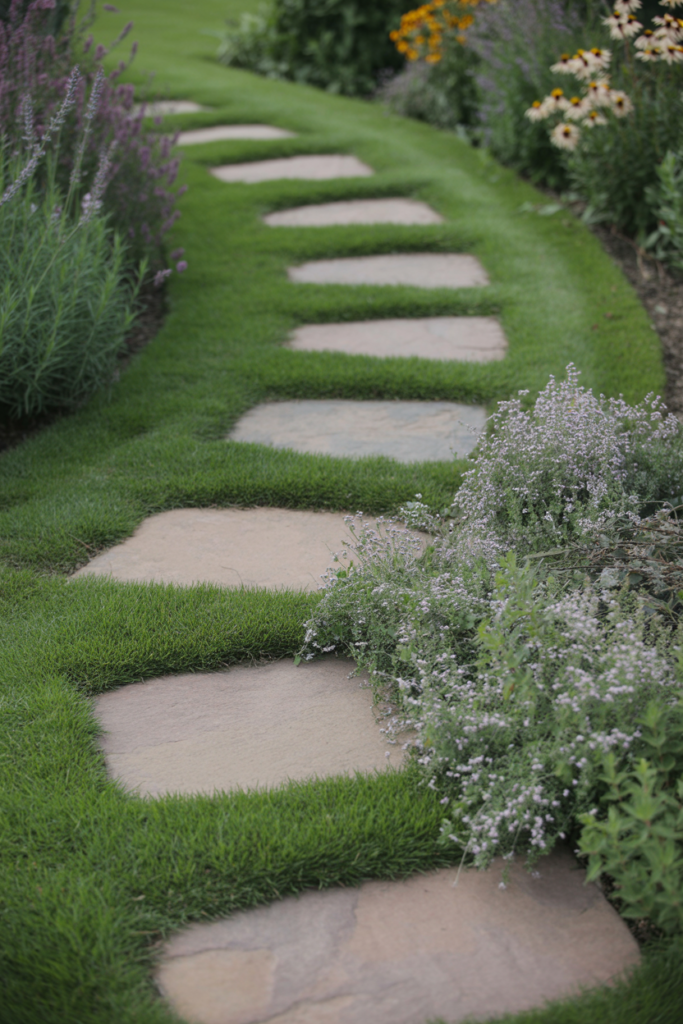
Stepping stone path steps work beautifully on gentle slopes where a full formal staircase would feel out of proportion. Large flat stones or concrete stepping pads are set into the slope at regular intervals, creating a casual, meandering path that guides you up or down the incline without feeling like a structured staircase. It is relaxed, natural, and surprisingly effective.
The installation is one of the more beginner-friendly options on this list. You dig out a flat pocket for each stone, set it on a bed of sand or fine gravel, and adjust until it sits level and firm. Spacing the stones at a comfortable stride length makes the path feel intuitive to walk without having to think about your footing.
Planting low ground covers like thyme, moss, or clover between the stones softens the edges and gives the whole path a lush, established look. Within a single growing season, the plantings fill in, and the stepping stone path starts to look like it has been there for years.
10. Recycled Concrete Steps
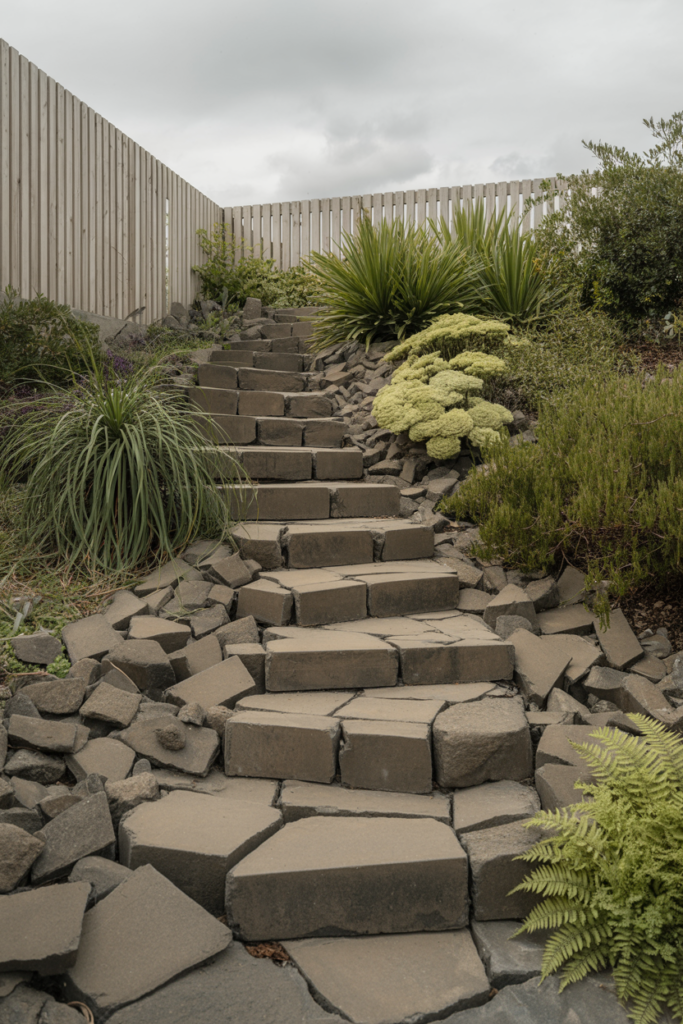
Recycled concrete steps, sometimes called urbanite steps, are made from broken chunks of old concrete slabs or sidewalks. They have a raw, industrial character that works surprisingly well in contemporary or industrial-style gardens. They are also one of the most budget-friendly options available since the material is often free if you know where to look.
Concrete demolition waste is commonly available through local classifieds, construction sites, or neighborhood groups where people give away materials from renovation projects. The irregular shapes actually work in your favor here. You stack and arrange the pieces like a puzzle, fitting them together to form stable risers and treads without needing precision cuts.
I find recycled concrete steps genuinely interesting as a design choice because no two sets look alike. The variation in texture, color, and edge profile gives the finished stairs a one-of-a-kind character that you simply cannot replicate with new materials.
11. Railroad Tie Steps
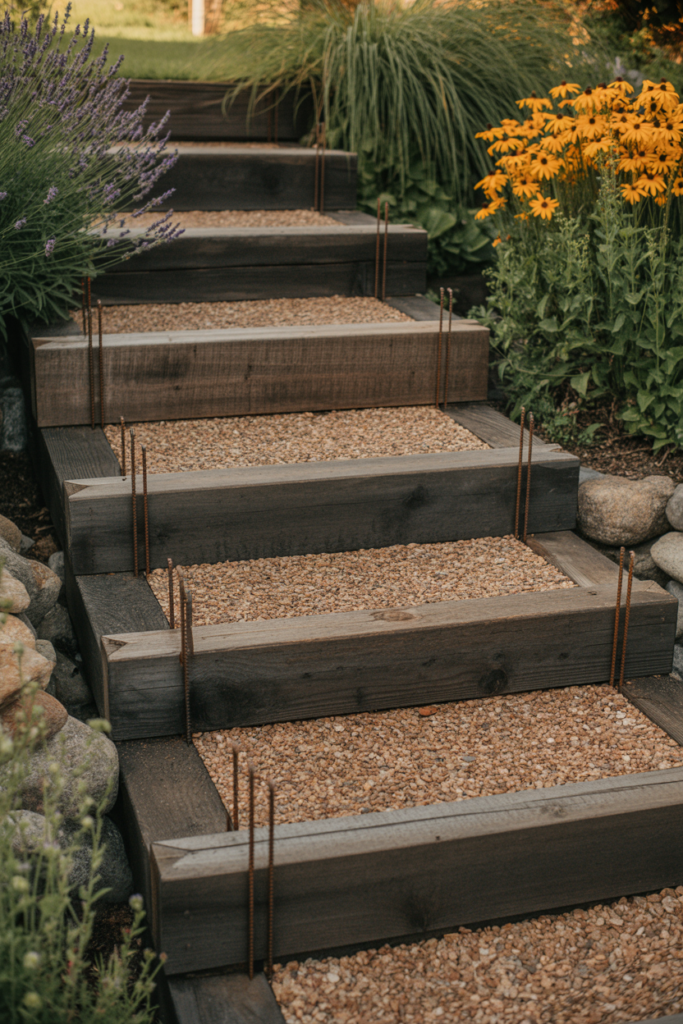
Railroad tie steps have been a backyard landscaping staple for decades, and they have held their popularity for good reason. They are heavy, durable, and naturally rot-resistant, which means a well-built set of railroad tie steps can last twenty years or more with very little maintenance. The dark, weathered timber look suits rustic, farmhouse, and naturalistic garden styles especially well.
Building with railroad ties involves digging into the slope and setting each tie horizontally as a riser, then securing it with rebar driven vertically through the tie and into the ground beneath. The tread area behind each tie gets filled with compacted gravel or crushed stone. The rebar anchoring is what gives these steps their impressive long-term stability.
One thing worth knowing is that older railroad ties were treated with creosote, which is a preservative that some gardeners prefer to avoid near edible plants. For a kitchen garden or food-growing area, newer pressure-treated landscape timbers are a cleaner alternative that delivers a very similar look.
12. Brick and Gravel Combination Steps
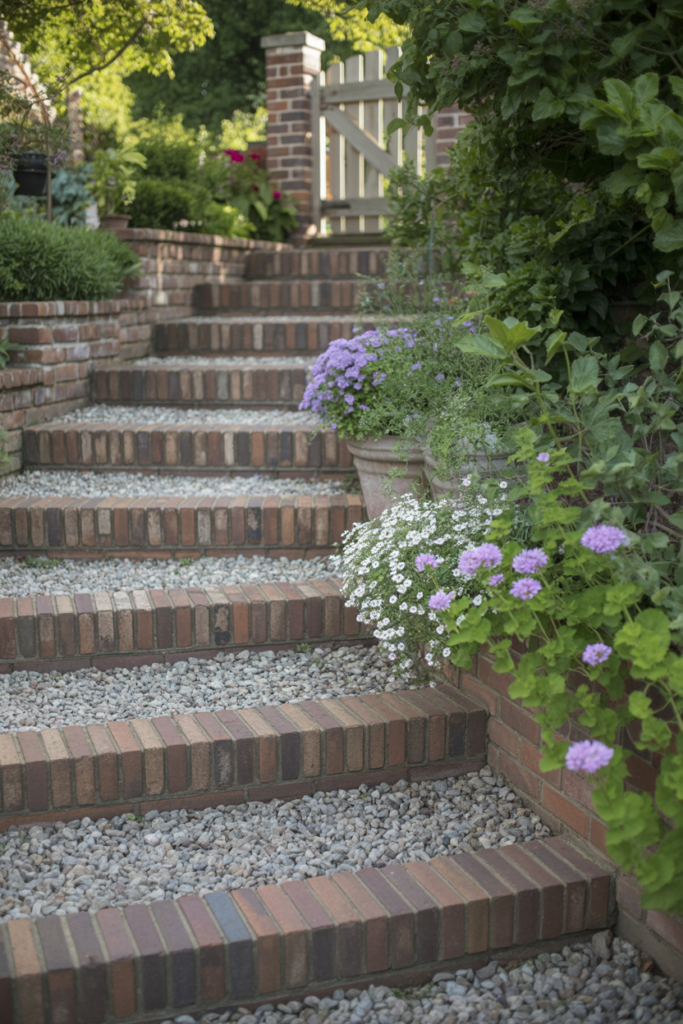
Brick and gravel combination steps blend the structure of brick risers with the relaxed, permeable quality of gravel treads. The result is a step design that looks intentional and designed without feeling overly formal. It works well in cottage gardens, English-style landscapes, and any yard where you want a traditional feel with a slightly softer edge.
The build involves setting brick risers into the slope in the same way as standard brick steps, then filling the tread area with compacted pea gravel or decomposed granite instead of laying a solid brick tread. A layer of landscape fabric under the gravel keeps weeds at bay and helps the gravel stay in place over time.
This combination also handles drainage better than a fully solid step design. Rainwater moves through the gravel treads rather than pooling on the surface, which reduces erosion on the slope and keeps the steps safe and slip-free even after heavy rain.
13. Moss and Stone Steps
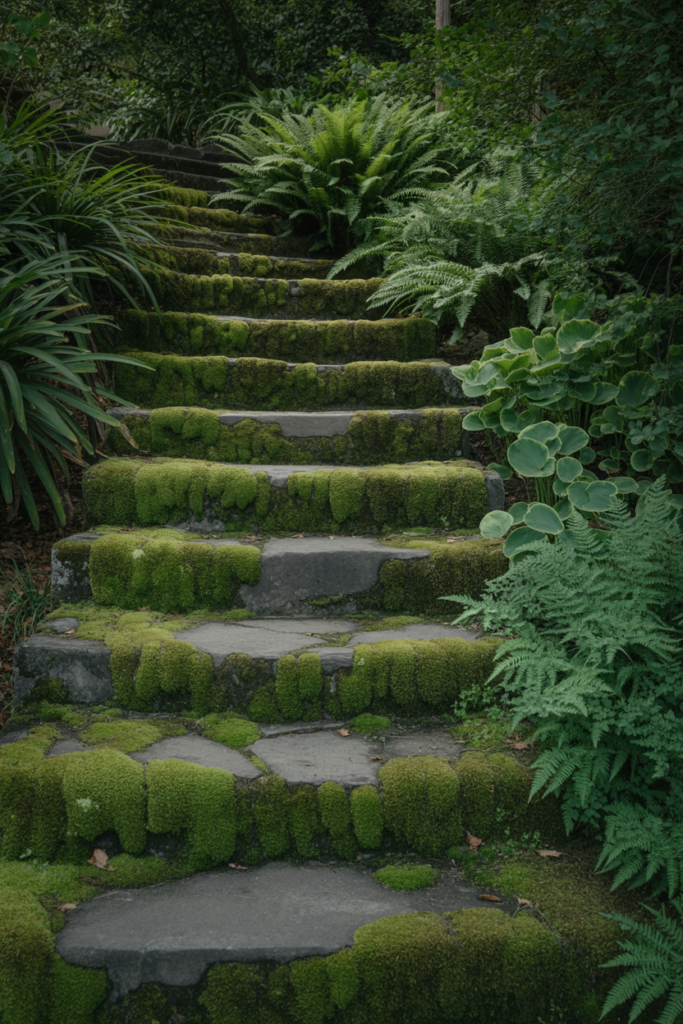
Moss and stone steps are the kind of garden feature that looks like it took years of careful cultivation to achieve, but with the right conditions, it comes together faster than you might expect. Flat stones form the structure of the steps, and moss is encouraged to grow across the surface and in the joints between stones, creating a soft, green, almost magical quality.
Moss establishes best in shaded, consistently moist spots. If your sloped yard has a shady corner, this step style is a natural fit. You can speed up the moss establishment by blending existing moss with buttermilk and brushing the mixture across the stone surface, a trick that gardeners have used for years with good results.
Once the moss takes hold, these steps require almost no maintenance. No mowing, no trimming, no weeding between joints. They just sit there looking quietly beautiful, which is honestly the best outcome any garden feature can deliver.
14. Concrete and Pebble Steps
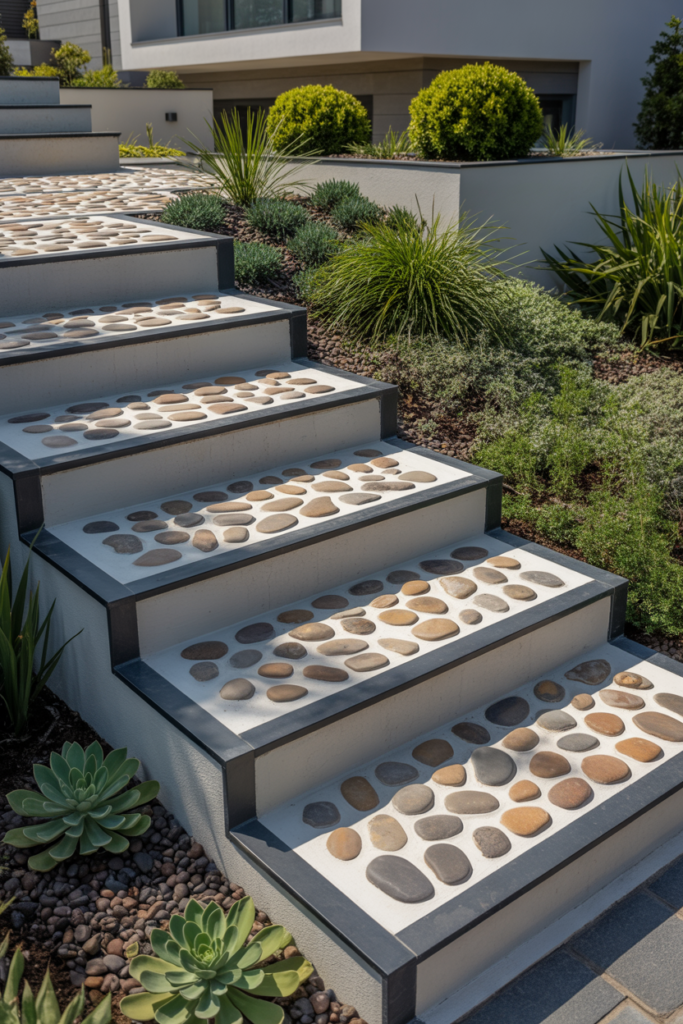
Concrete and pebble steps combine the structural reliability of poured concrete with the decorative texture of embedded pebbles or river stones. The pebbles press into the wet concrete surface before it sets, creating a slip-resistant, visually interesting tread that looks far more finished than plain concrete alone.
Pouring concrete steps requires building simple timber formwork to hold the concrete in place while it cures. Once the concrete is poured and leveled, you press the pebbles into the surface in a pattern of your choice before the concrete sets. Simple grid patterns and random natural arrangements both look great, depending on the overall garden style.
The finished surface is genuinely durable and handles outdoor conditions well. The pebble texture also provides natural grip underfoot, which is a practical bonus on a slope that gets wet during rain. For a step design that is both functional and decorative, this combination delivers well on both fronts.
15. Wooden Deck Steps
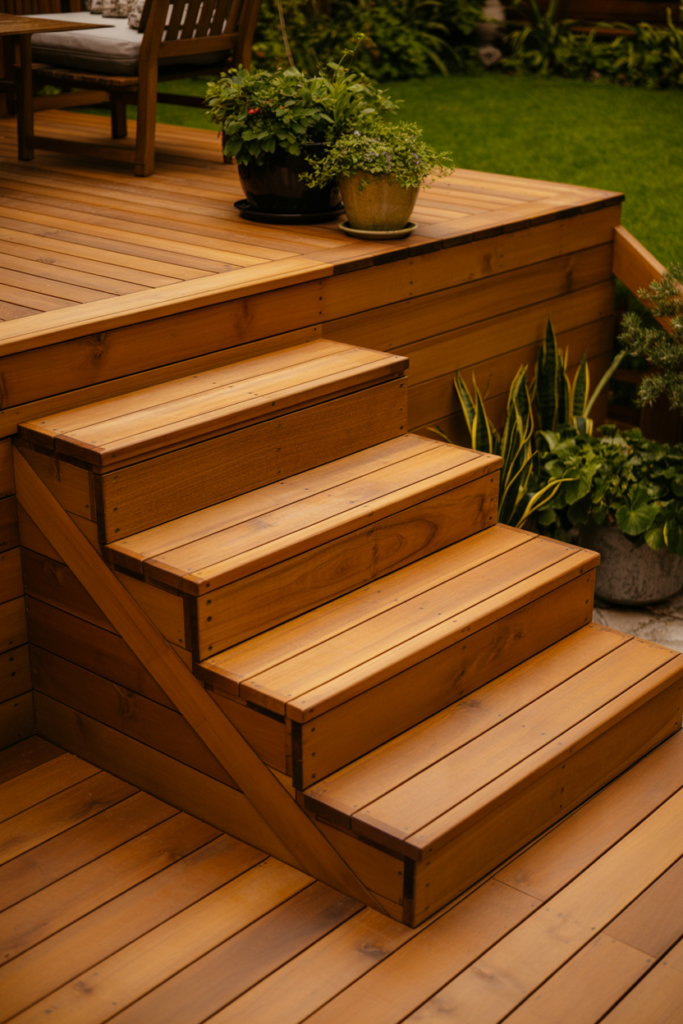
Wooden deck steps bring a warm, residential quality to a sloped yard that connects outdoor living spaces across different levels. They work especially well when you already have a timber deck, pergola, or garden structure nearby, as the matching material creates a cohesive, designed feel throughout the outdoor space.
Building wooden deck steps involves constructing a simple timber frame with stringers, risers, and treads in the same way you would build steps on a house deck. Pressure-treated lumber is the practical choice for ground contact, while cedar or redwood offers a more attractive natural finish that weathers gracefully over time.
I think wooden deck steps are one of the most versatile options on this list because they can be scaled to fit almost any slope. A gentle incline might need just two or three steps, while a steep drop can accommodate a longer staircase with a landing platform halfway up for a more comfortable climb.
Quick Comparison of All 15 DIY Garden Stair Ideas
| Stair Idea | Skill Level | Approx. Cost | Best Style Match |
| Timber Sleeper Steps | Beginner | Low | Rustic, Natural |
| Natural Stone Steps | Intermediate | Medium | Timeless, Traditional |
| Concrete Block Steps | Beginner | Low | Modern, Formal |
| Gravel and Timber Steps | Beginner | Very Low | Cottage, Informal |
| Brick Garden Steps | Intermediate | Medium | Classic, Traditional |
| Paver Steps | Intermediate | Medium | Modern, Versatile |
| Log Slice Steps | Beginner | Very Low | Woodland, Rustic |
| Gabion Steps | Intermediate | Medium | Contemporary, Industrial |
| Stepping Stone Path | Beginner | Low | Casual, Natural |
| Recycled Concrete Steps | Beginner | Very Low | Industrial, Contemporary |
| Railroad Tie Steps | Intermediate | Low | Rustic, Farmhouse |
| Brick and Gravel Steps | Intermediate | Medium | Cottage, Traditional |
| Moss and Stone Steps | Beginner | Low | Woodland, Shaded |
| Concrete and Pebble Steps | Intermediate | Medium | Modern, Decorative |
| Wooden Deck Steps | Intermediate | Medium | Residential, Versatile |
How to Choose the Right DIY Garden Stair Style for Your Yard
Choosing the right garden stair style comes down to three things: your yard’s conditions, your budget, and the overall look you are going for. A shaded, damp slope calls for something different than a sunny, dry hillside, and a rustic cottage garden needs a different stair style than a clean modern landscape.
Think about the materials already present in your outdoor space before committing to a stair design. If you have a stone patio, natural stone or paver steps will tie everything together beautifully. If your yard leans more casual and naturalistic, timber sleeper steps or gravel and timber combinations will feel right at home without looking forced.
Also consider the long-term maintenance commitment each material requires. Timber needs occasional sealing or staining. Gravel treads need topping up every few years. Natural stone and concrete block steps are about as close to set-and-forget as outdoor construction gets. Matching the material to your lifestyle is just as important as matching it to your garden style.
Conclusion
A sloped yard is not a problem to solve. It is an opportunity to add one of the most character-rich features a garden can have. Every stair idea on this list turns an awkward incline into something that genuinely improves the look and usability of your outdoor space.
From the warmth of timber sleeper steps to the bold texture of gabion baskets, there is a DIY garden stair style here for every yard, every budget, and every skill level. The materials are accessible, the builds are achievable, and the results speak for themselves once the project is done.
The most important step, if you will excuse the expression, is simply picking one and starting. A sloped yard with well-built garden stairs looks intentional, finished, and genuinely inviting. That transformation is absolutely worth a weekend of work.
Frequently Asked Questions
What is the easiest DIY garden stair idea for beginners? Stepping stone path steps, gravel, and timber steps are all excellent starting points for beginners. Both require minimal tools, no advanced skills, and materials that are easy to source and work with. You can complete either project in a single weekend with basic preparation.
How do I stop my DIY garden steps from sinking over time? A compacted gravel base under each step is the most reliable way to prevent sinking. Gravel drains water away from the base material and stays stable under weight. Skipping this base layer is the most common reason DIY garden steps shift or settle unevenly after the first wet season.
What materials last the longest for outdoor garden stairs? Natural stone, concrete block, and brick are the most durable options for outdoor garden stairs. All three handle moisture, temperature changes, and heavy foot traffic without deteriorating quickly. With basic care, a well-built set of stone or concrete steps can last several decades.
Can I build DIY garden stairs on a steep slope? Yes, steep slopes are very buildable, but they require more planning around step height and depth. Each step should have a riser height of no more than 7 inches and a tread depth of at least 12 inches for comfortable, safe climbing. Gabion steps, railroad tie steps, and timber sleeper steps all work particularly well on steeper inclines.
Do I need planning permission to build garden stairs? In most residential settings, small garden stairs do not require planning permission. However, rules vary depending on your location, property boundaries, and the scale of the project. It is always worth checking with your local council or municipality before starting any structural outdoor build.
How do I make DIY garden steps safer in wet weather? Choosing naturally textured materials like rough stone, brick, or pebble-embedded concrete gives steps built-in grip even when wet. You can also add metal anti-slip strips to timber treads or apply a gritty non-slip sealant to smoother surfaces. Keeping steps clear of fallen leaves and moss growth also makes a significant difference to wet-weather safety.
What plants work well alongside DIY garden stairs? Creeping thyme, mind-your-own-business, and Irish moss all grow well between and around garden steps without overwhelming the structure. Ferns and hostas work beautifully alongside shaded stone or moss steps. For sunnier stair settings, lavender, catmint, and ornamental grasses planted at the edges soften the look and add seasonal color.