
Building a mud kitchen at home does not have to cost a fortune. With a few recycled materials and a free afternoon, you can put together something kids will absolutely love. I built one for my backyard last summer, and honestly, it was one of the best decisions I made for outdoor play.
Kids are naturally drawn to mud, water, and pretend cooking. A mud kitchen gives them a safe, dedicated space to explore all of that without destroying your actual kitchen. It keeps them busy for hours, and that alone is worth every penny you spend or save.
The best part? You do not need to be a carpenter or spend hundreds of dollars on a fancy store-bought set. Most of the materials are things you probably already have sitting in your garage or backyard. This guide walks you through everything, from planning to the finishing touches.
Why a DIY Mud Kitchen Is Worth Every Bit of Effort
A homemade mud kitchen is more than just a fun weekend project. It is an outdoor learning station where kids develop creativity, motor skills, and even early math concepts through play. Research from early childhood education consistently shows that sensory play builds stronger cognitive connections in young children.
When you build it yourself, you also get full control over the size, layout, and features. You can design it to fit a small patio or a large backyard, and you can adjust the height to match your child’s age. That kind of customization simply does not come with a ready-made kit.
There is also something genuinely satisfying about watching your kid play on something you built with your own hands. It does not have to be perfect. Kids do not care if the wood is rough around the edges. They just want to mix mud, pour water, and pretend they are running a five-star restaurant in the garden.
What You Need Before You Start Building
Before you grab a hammer, it helps to have a clear plan. Think about where the mud kitchen will sit in your yard, how much space you have, and how old your kids are. These three things will shape almost every decision you make during the build.
You also want to gather your materials ahead of time so you are not running to the hardware store mid-build. The good news is that most of what you need can be sourced for free or very cheap. Old pallets, leftover timber, and secondhand kitchen items are your best friends here.
Here is a basic list of materials most people use for a budget mud kitchen:
| Material | Where to Find It | Estimated Cost |
| Wooden pallets | Freecycle, local businesses | Free |
| Old pots and pans | Thrift stores, garage sales | $1 to $5 |
| Plastic bowls and cups | Dollar store | $1 to $3 |
| Timber offcuts | Hardware store scraps | Free to $10 |
| Outdoor screws and nails | Hardware store | $5 to $8 |
| Sandpaper | Hardware store | $2 to $4 |
| Old sink or basin | Facebook Marketplace | Free to $10 |
Step-by-Step: How to Build a Budget Mud Kitchen at Home
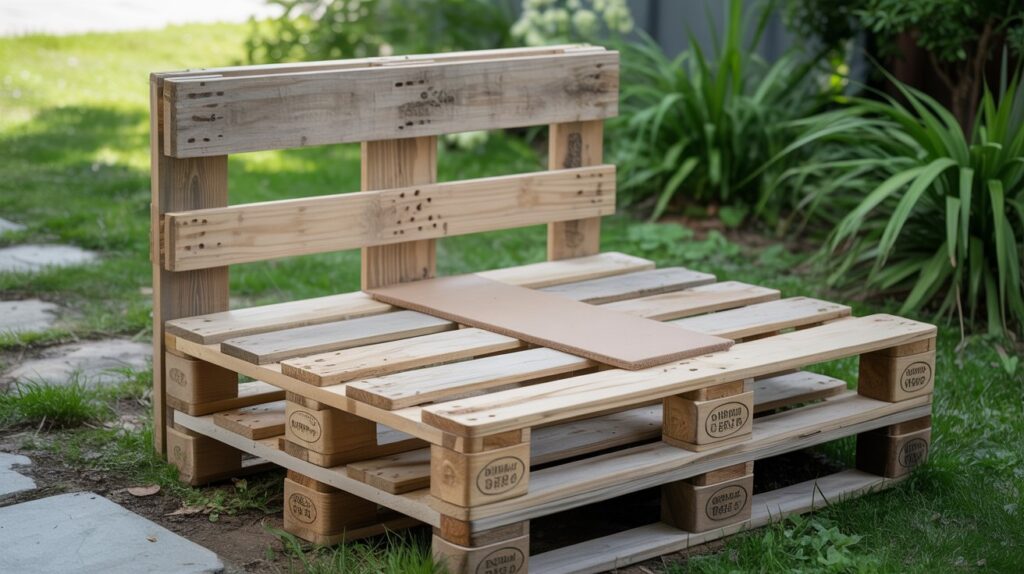
1. Start With a Simple Pallet Base
Wooden pallets are hands down the most budget-friendly base for a mud kitchen. You can find them for free outside grocery stores, garden centers, or on local Facebook Marketplace groups. I picked up two solid ones from a nearby plant nursery without spending a single dollar.
Stand one pallet upright as the back frame and lay another flat as the work surface. Secure them together with outdoor screws to keep everything stable. This basic L-shape already gives you a solid structure to build on.
Sand down any rough edges before your kids get anywhere near it. Splinters are no fun, and a quick sand takes only about ten minutes. A child-safe outdoor sealant on the wood also helps it last through rain and muddy little hands.
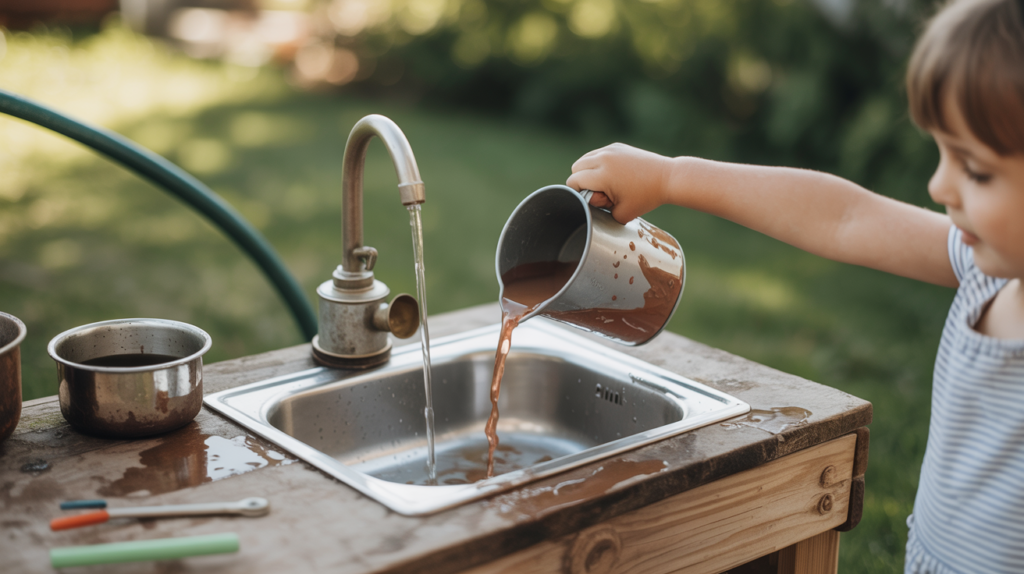
2. Add a Sink or Basin for Water Play
No mud kitchen feels complete without a water station. An old plastic basin, a secondhand metal sink, or even a large mixing bowl works perfectly. I found a small stainless steel sink on Facebook Marketplace for around $5, and it made the whole setup look surprisingly professional.
Cut a hole in your work surface that fits the basin snugly, or simply rest it on top if cutting is not your thing. Either way, kids will use it endlessly to mix water with mud, leaves, and whatever else they find outside. Water play adds a whole new sensory layer to the mud kitchen experience.
If you want to go the extra mile, run a simple outdoor hose connection nearby. It does not need to be a plumbing job. A basic garden hose propped at the right height is more than enough for little chefs to fill their pots and pans.
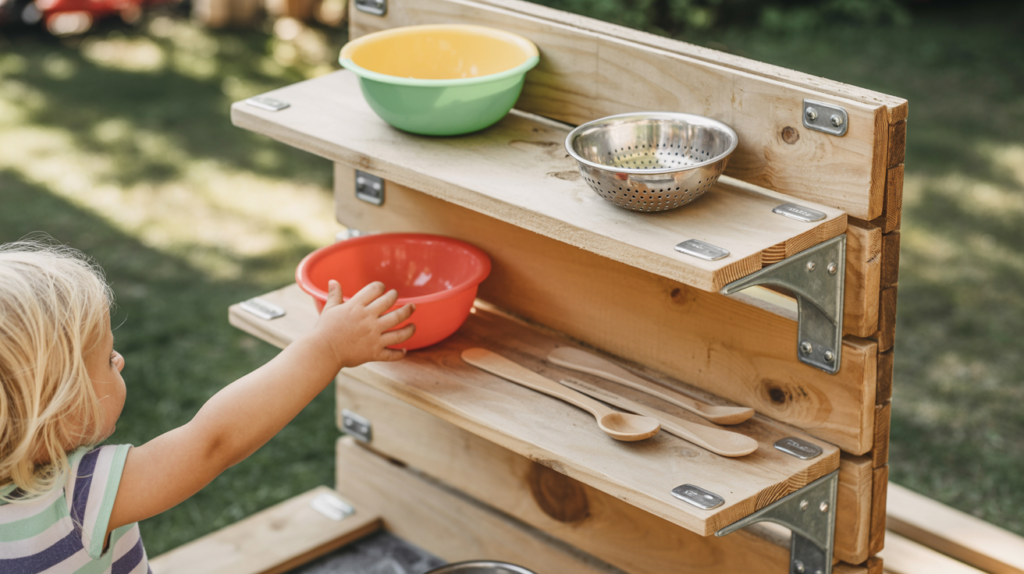
3. Build Simple Shelves for Storage and Display
Every good kitchen needs storage, and a mud kitchen is no different. Adding one or two small shelves keeps the play area organized and gives kids a place to display their mud pies and potions. I used leftover timber offcuts for mine, and it cost me almost nothing.
Attach the shelves directly to the back pallet using L-brackets from the hardware store. Space them at a height your child can comfortably reach without stretching or climbing. The goal is to make the kitchen feel real and functional from a kid’s perspective.
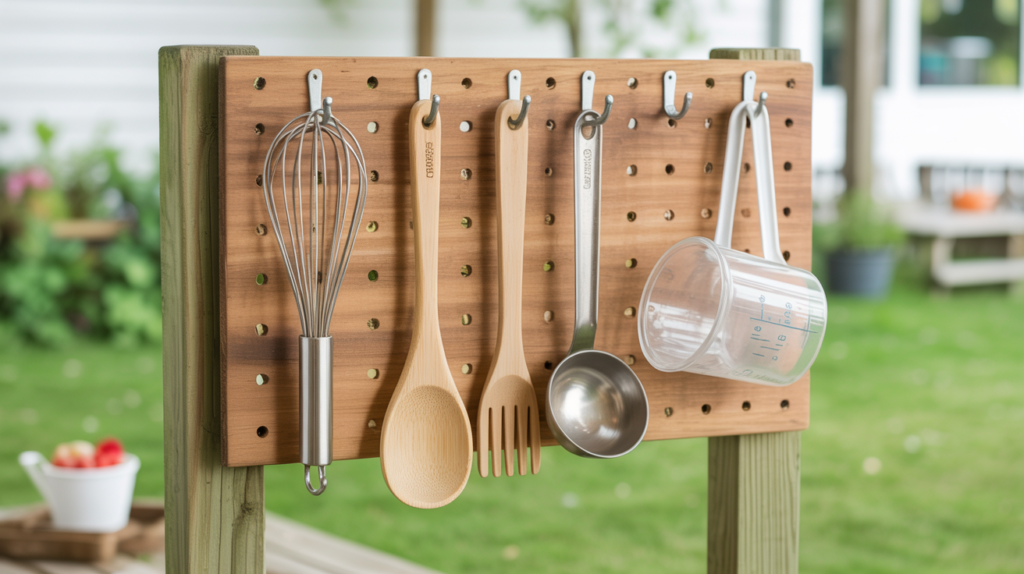
You can also add small hooks to hang pots, spoons, and ladles. This small detail makes the mud kitchen look like a proper outdoor cooking station. Kids love having their tools within easy reach, just like a real chef would.
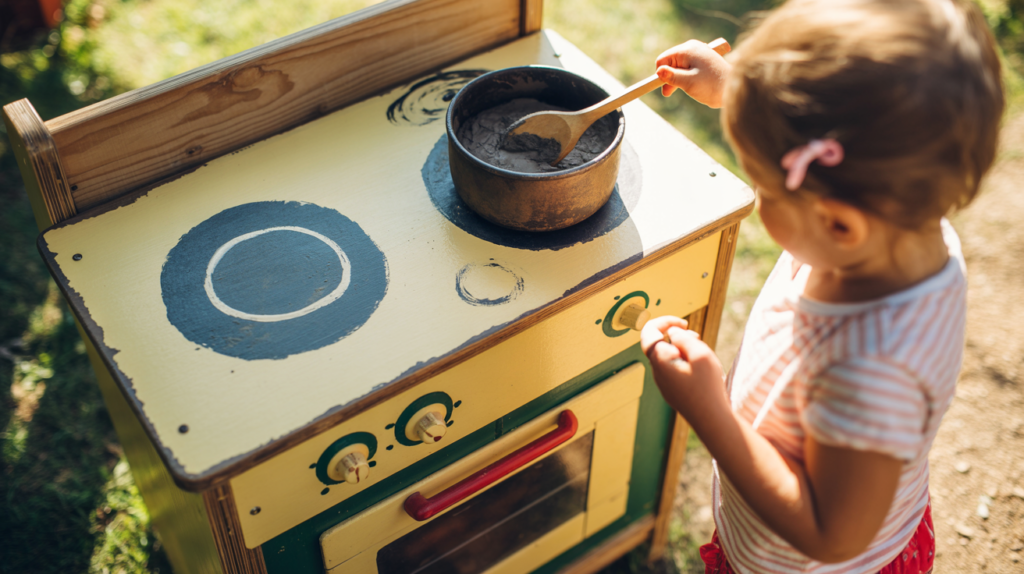
4. Create a Stovetop With Painted Circles
This one is my personal favorite because it costs almost nothing and kids absolutely love it. Take a flat piece of plywood or an old chopping board and paint on two or three circles to represent stovetop burners. Use outdoor paint so it holds up in all weather conditions.
Attach this painted board to the top of your pallet frame using screws. It instantly transforms a plain wooden surface into a proper mud kitchen cooker. You can even paint on knobs or dials to make it look more realistic.
Kids take their pretend cooking very seriously once they have a “stove” in front of them. I watched my own child spend an entire afternoon carefully stirring mud soup on those painted circles. It is genuinely one of the cheapest and most effective additions you can make.
5. Use a Pegboard or Old Crate for Tool Organization
Keeping mud kitchen tools organized makes playtime smoother and tidier. A small pegboard screwed onto the back pallet works brilliantly for hanging spoons, whisks, and measuring cups. You can find pegboards cheaply at hardware stores or sometimes free at garage sales.
Old wooden crates are another great option for storing larger items like bowls and buckets. Stack two crates on the side of your kitchen frame and secure them so they do not tip over. This creates extra storage without adding bulk or cost to your build.
Labeling the storage spots with simple picture labels is a nice touch if your kids are young. It encourages them to tidy up after play, which is always a win. It also adds to the realistic kitchen feel that makes imaginative play so engaging.
6. Add a Chalkboard Panel for Menus and Creativity
A chalkboard panel is one of those additions that costs very little but adds enormous play value. Pick up a small sheet of chalkboard-painted MDF from a hardware store, or simply paint a section of your pallet back with chalkboard paint. Either way, you are looking at under $10.
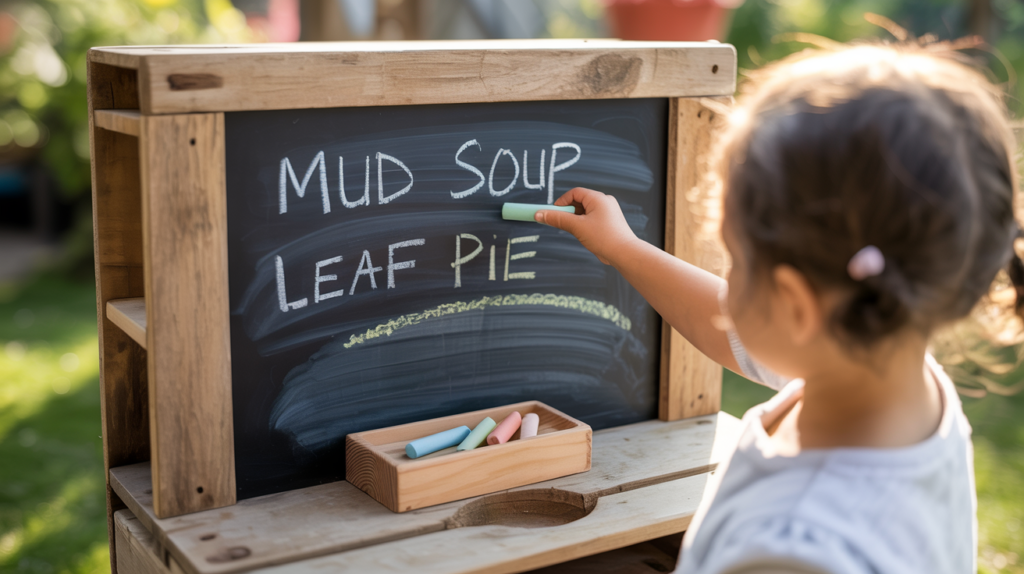
Kids use the chalkboard to write their menus, take pretend orders, and draw pictures of their recipes. It adds a literacy and creativity angle to the play that goes well beyond just mixing mud. I was surprised at how much my child used this feature compared to everything else.
Fix the chalkboard panel to the back of the mud kitchen at eye level for your child. Include a small tray at the bottom to hold chalk and an eraser. That tiny detail makes the whole setup feel intentional and well thought out.
7. Personalize It With Paint and Decoration
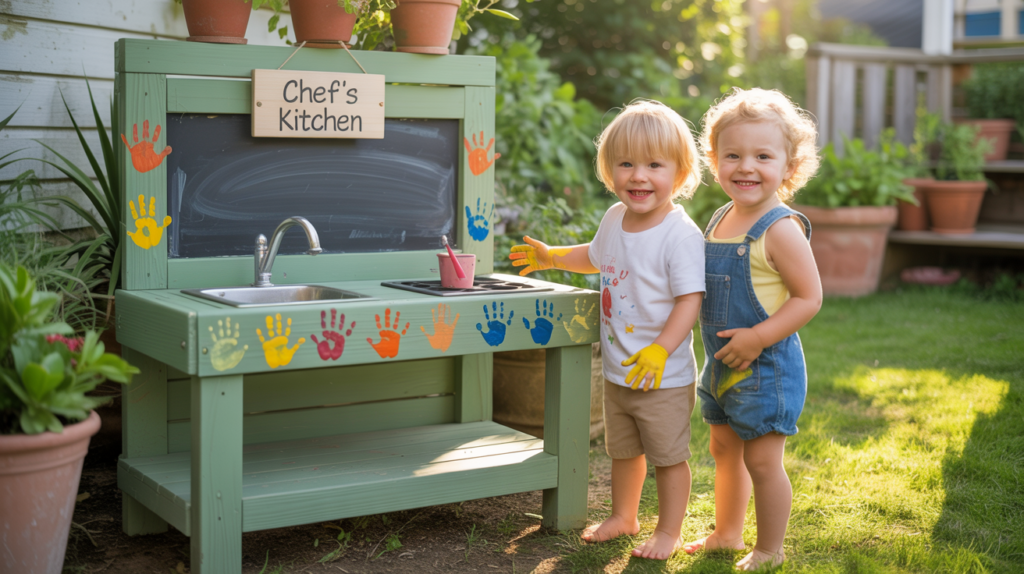
Once the structure is complete, the fun part begins. Let your kids pick a color and paint the whole mud kitchen together. Outdoor paint is inexpensive and widely available, and this step turns the build into a family activity rather than just a solo parent project.
Add their names, hand prints, or fun patterns to make it truly theirs. You can stencil on flowers, stars, or even a little sign that says something like “Chef’s Kitchen.” These personal touches make kids feel ownership over their space, which means they will use it more.
Do not stress about making it look perfect. A mud kitchen is meant to be played with, splashed on, and enjoyed. A few drips of paint or a slightly wonky shelf only add to the charm of a handmade outdoor kitchen.
What to Stock Your Mud Kitchen With for Maximum Fun
Once the build is done, filling it with the right supplies takes the play to a whole new level. You do not need to buy anything new for this part. A quick trip through your kitchen cupboards or a visit to a thrift store will give you everything you need.
Here are some of the best items to stock a mud kitchen with:
| Item | Why Kids Love It |
| Old pots and pans | Perfect for mixing and “cooking” mud |
| Measuring cups and spoons | Encourages counting and pouring |
| Muffin tins | Great for making mud pie portions |
| Plastic jugs | Ideal for water play and pouring |
| Colanders and strainers | Fun for sifting soil and sand |
| Wooden spoons and whisks | Classic cooking tools kids recognize |
| Small bowls and plates | For serving up mud masterpieces |
Natural loose parts add even more play value. Collect pinecones, pebbles, leaves, flowers, and sticks from your garden and keep them in a small crate nearby. Kids use these as ingredients, garnishes, and decorations for their mud creations. It is free, endlessly renewable, and genuinely extends playtime.
How to Keep Your Mud Kitchen in Good Shape All Year
A well-built mud kitchen can last for several years with just a little basic maintenance. At the end of each season, give the wood a light sand and apply a fresh coat of outdoor sealant. This keeps moisture from seeping in and prevents the wood from warping or rotting over winter.
Store metal pots and pans indoors during heavy rain or winter months if you can. Rust is the main enemy of secondhand kitchenware, and a quick wipe-down and dry storage goes a long way. Plastic items are generally fine to leave outside year-round.
Check the screws and brackets every few months to make sure nothing has come loose. Kids are enthusiastic users, which means the structure takes a fair amount of leaning, climbing, and general abuse. A quick tighten here and there keeps everything safe and sturdy.
Conclusion
Building a mud kitchen at home on a budget is one of the most rewarding outdoor projects you can take on as a parent. It costs very little, uses materials you likely already have, and gives kids a dedicated space for open-ended, imaginative play. From a simple pallet base to a chalkboard menu panel, every element adds real play value without stretching your budget.
The seven steps covered in this guide take you from a bare pallet to a fully functional outdoor kitchen your child will use again and again. You get to control the size, the features, and the finish, which means the result suits your space perfectly. And the look on your kid’s face when they see it for the first time? Completely priceless.
Mud kitchens are not just a trend. They are a genuinely useful outdoor learning tool that supports creativity, sensory development, and imaginative play. Start simple, personalize it as you go, and do not be afraid to add new features over time. Your backyard is about to become the most popular spot in the neighborhood.
Frequently Asked Questions
1. What is the cheapest way to build a mud kitchen?
The cheapest way is to use free wooden pallets as the base structure. Pair them with secondhand pots and pans from a thrift store and you can build a functional mud kitchen for under $20. Most families spend far less once they raid their own garage.
2. What age is a mud kitchen suitable for?
Mud kitchens work well for children between 18 months and 8 years old. Younger toddlers enjoy the sensory experience of touching mud and water, while older kids use the space for more complex imaginative play. You can adjust the height of the kitchen as your child grows.
3. Is it safe for kids to play in a mud kitchen?
Yes, mud kitchens are very safe when built correctly. Sand down all rough wood edges and check for loose screws regularly. Use child-safe outdoor paint and avoid treated wood that may contain harmful chemicals.
4. How long does it take to build a mud kitchen?
Most budget mud kitchens take between 2 and 4 hours to build from start to finish. If you are adding extra features like shelves, a sink, or a chalkboard panel, set aside a full afternoon. The build itself is straightforward even for beginners.
5. Can a mud kitchen stay outside in all weather?
Yes, with proper sealing and maintenance a mud kitchen handles most weather conditions well. Apply outdoor wood sealant before use and reapply each season. Bring metal accessories indoors during heavy rain or winter to prevent rust.