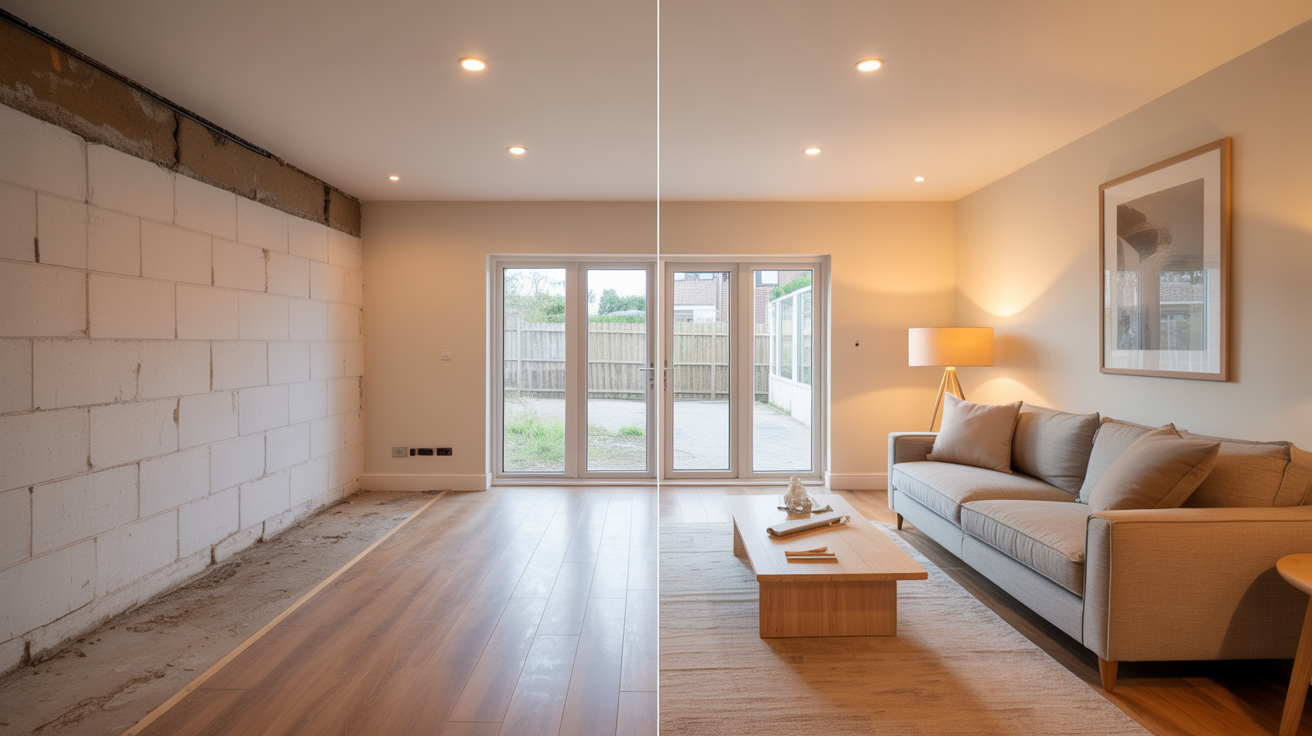
Converting a garage into a living room is one of the smartest ways to add usable space to your home without paying for an extension. Most single garages sit at around 150 to 200 square feet, which is a perfectly workable size for a comfortable living area. The best part is you can do this project in stages, spending as you go rather than facing one massive bill all at once.
I’ve seen garage conversions done for as little as $3,000 and others that crept past $30,000. The difference almost always comes down to planning, prioritizing, and knowing where you can cut costs without cutting corners. A budget garage conversion done well looks just as good as an expensive one, and in many cases, nobody can tell the difference once the room is finished and furnished.
This guide walks through every step of converting a garage into a living room on a budget, from the groundwork to the finishing touches. Each step covers what actually matters, what you can skip, and where spending a little more upfront saves you money later.
What to Sort Out Before You Start Your Garage Conversion
Planning permission requirements vary depending on where you live. In many countries, a basic garage conversion that doesn’t change the external footprint of the building falls under permitted development and doesn’t need formal planning approval. Always check with your local authority before starting work, because getting this wrong can cause serious problems when you come to sell the property.
Building regulations are a separate matter from planning permission, and most garage conversions do require building control sign-off. This covers things like insulation standards, fire safety, ventilation, and structural integrity. Hiring a building inspector to check your work at key stages is genuinely worth the cost, and in many areas it’s a legal requirement rather than an optional extra.
It’s also worth having a quick structural assessment done if your garage shares a wall with the main house or if you plan to remove the garage door entirely and replace it with a wall and window. A structural engineer can tell you in an hour whether any of your plans need additional support, and that hour of professional advice can prevent expensive problems down the line.
Step-by-Step Guide to Converting a Garage Into a Living Room on a Budget
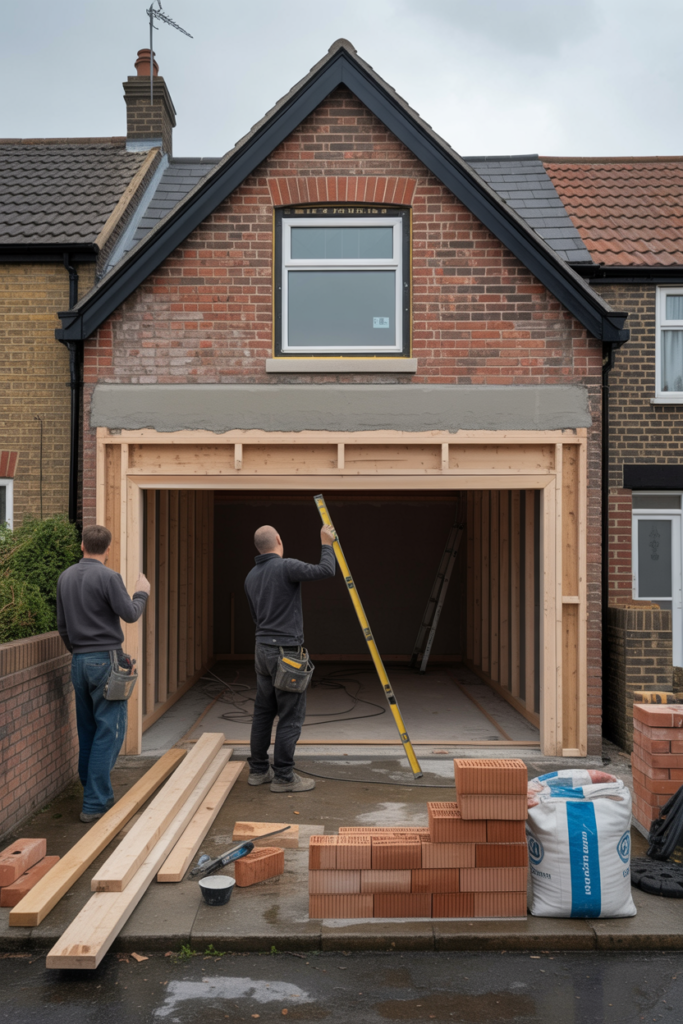
Step 1: Remove the Garage Door and Frame the New Wall
Removing the garage door is the first physical step, and it immediately makes the space feel like a room rather than a storage unit. Most standard single garage doors can be removed without specialist equipment if you’re reasonably handy. The opening then needs a new wall built to close it off, which typically includes a window and sometimes a door depending on your layout.
Framing the new front wall with timber studs and then finishing it with brick or block to match the existing exterior is the most common approach. If budget is tight, timber frame with external cladding works well and costs less. The key is making sure the wall meets your local building regulations for thermal performance and structural stability.
For the window, choose a size that brings in enough daylight to make the room feel genuinely bright. Garage conversions can feel dark if the window is undersized, so go as large as your budget allows here. A well-lit room feels more expensive and more comfortable, and natural light is free once the window is in.
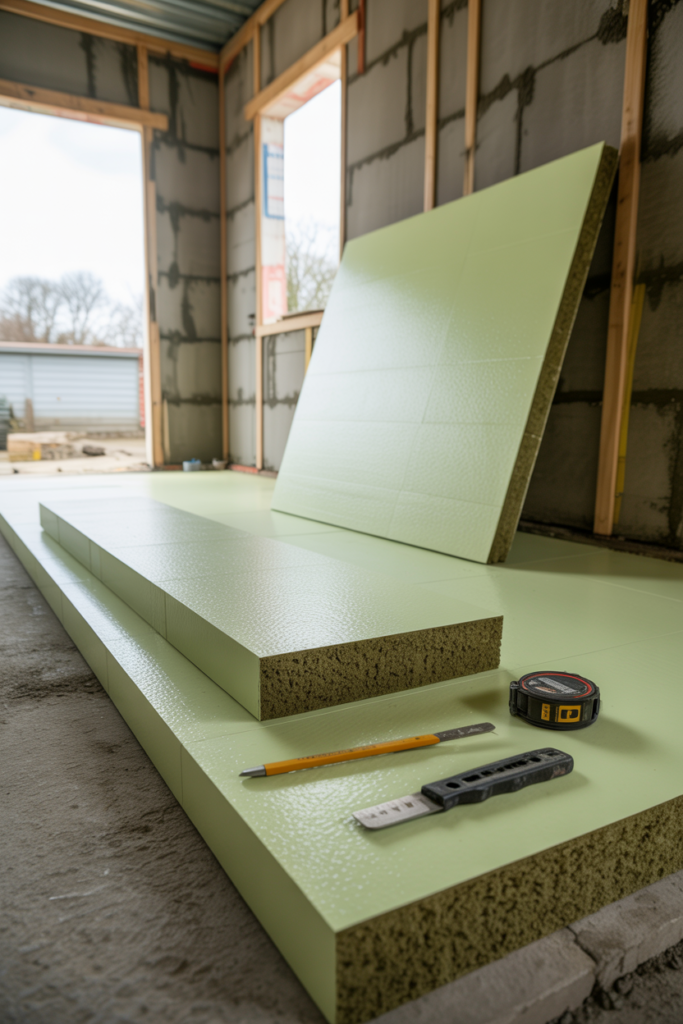
Step 2: Insulate Properly to Keep Costs Down Long Term
Insulation is the step where budget conversions most often go wrong. Skimping on insulation to save money upfront leads to a cold, damp room that costs a fortune to heat and feels uncomfortable to use. Good insulation is one of the areas worth spending properly on.
The walls, floor, and ceiling all need insulating in a garage conversion. For walls, rigid insulation boards fixed directly to the masonry and then boarded over with plasterboard is the most cost-effective method for a DIY approach. For the floor, a layer of rigid foam insulation under a new screed or floating floor boards makes a noticeable difference to how warm the room feels underfoot.
Roof or ceiling insulation depends on whether you have a flat or pitched roof above the garage. Blown cellulose or batt insulation between the joists works well for pitched roofs. For flat roofs, rigid boards laid above the existing roof deck are the most effective solution, though this is usually a job for a roofer rather than a DIY project.
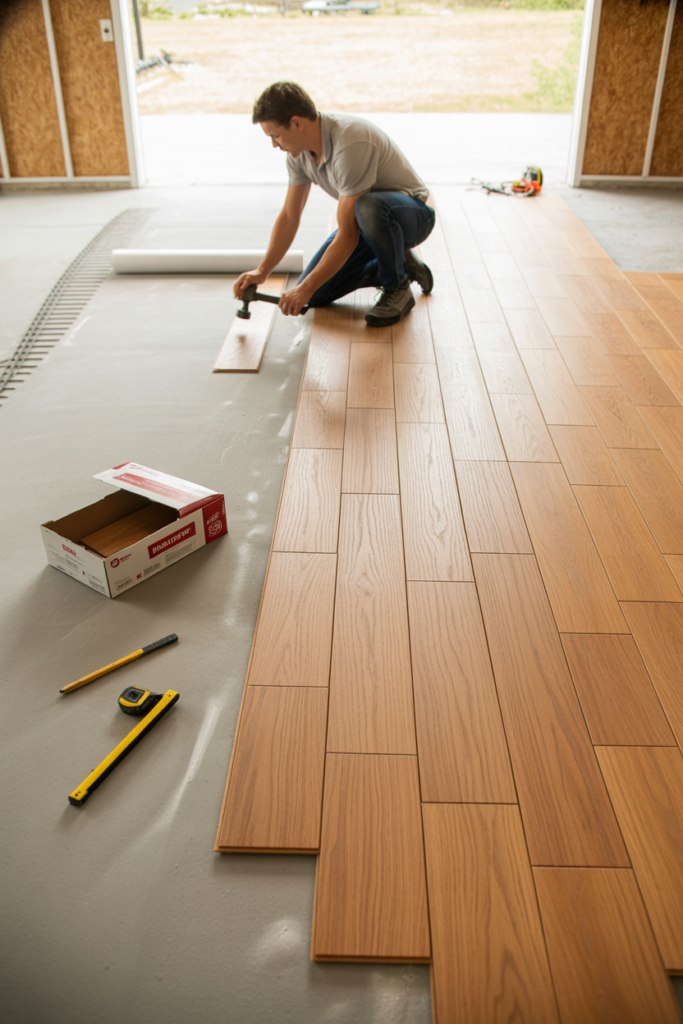
Step 3: Sort the Flooring Early in the Process
Flooring goes in after insulation and before the final plastering in most garage conversions. The concrete floor of a garage sits at a lower level than the house floor in many properties, so you may need to build up the level before laying your chosen flooring. A self-leveling compound over the concrete base is a quick, affordable way to create a smooth, even surface to work from.
Laminate flooring is the most popular budget choice for garage conversions and for good reason. It’s warm underfoot when laid over foam insulation, it comes in a huge range of finishes that look like real wood, and it’s straightforward to lay yourself over a weekend. Luxury vinyl plank is another strong option if you want something more water-resistant and durable.
For a slightly more premium feel without a premium price, engineered wood flooring looks and feels like real hardwood but costs significantly less and handles temperature fluctuations better. Garages can be prone to slight humidity changes during the conversion period, and engineered wood handles that more forgivingly than solid wood.
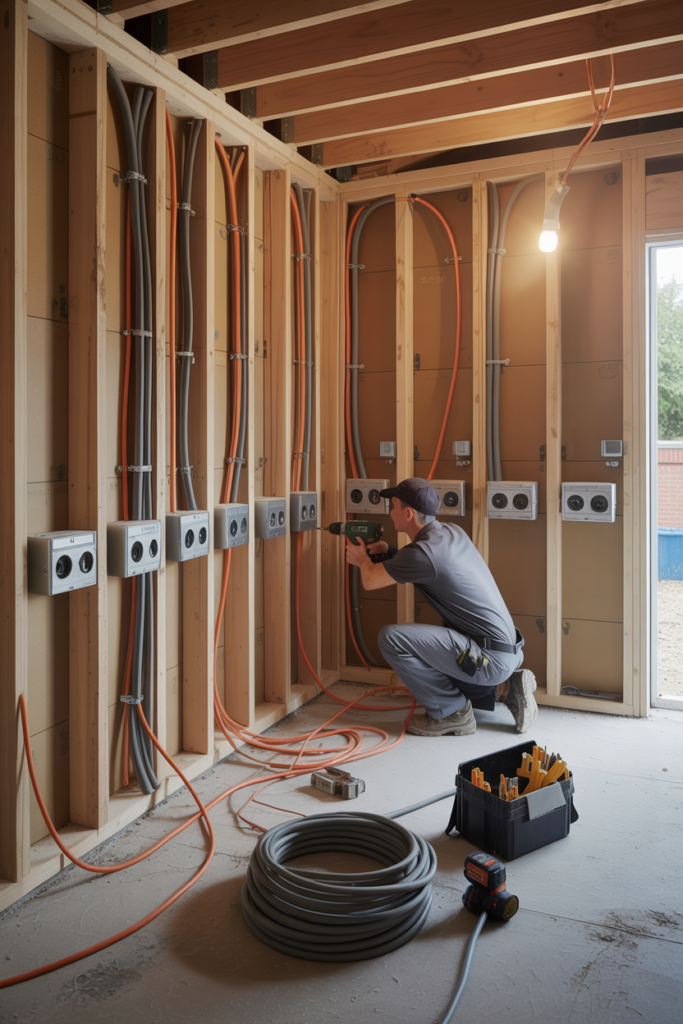
Step 4: Get the Electrics Right Before the Walls Go Up
Electrical work in a garage conversion needs planning before the plasterboard goes on the walls, because rerouting cables after plastering is expensive and messy. Most garage conversions need a new consumer unit circuit or a connection back to the main house consumer unit, and this work must be done by a qualified electrician in most countries.
Plan where you want your sockets, light switches, and any fixed lighting points before the electrician comes in. More sockets than you think you need is always the right call. A living room needs sockets on multiple walls for lamps, media equipment, and everyday use, and adding extras during the rough-in stage costs almost nothing compared to adding them after the walls are plastered.
If you plan to use the room as a home office or media room, think about ethernet cabling at this stage too. Running a few cat6 cables while the walls are open costs very little and gives you a far more reliable internet connection than wifi in a room that may be further from your router.
Step 5: Plastering and Painting on a Budget
Plastering the walls yourself is a skill that takes practice, and a poor plaster job is very visible under paint. If your budget is tight, consider using plasterboard dry lining with taped and jointed seams instead of a full wet plaster skim. Done carefully, taped and jointed plasterboard takes paint extremely well and looks smooth and professional.
For paint, a good quality primer followed by two coats of mid-sheen emulsion gives a durable, cleanable finish that suits a living room. I’d always recommend spending slightly more on paint quality rather than buying the cheapest tin available. Better paint covers in fewer coats, which saves time and usually balances out the cost difference.
Light, neutral wall colors make a garage conversion feel bigger and brighter than it is. Warm whites, soft greiges, and pale sage greens all work well. Save bolder accent colors for a single feature wall rather than all four walls, especially in a smaller conversion where too much color can feel overwhelming.

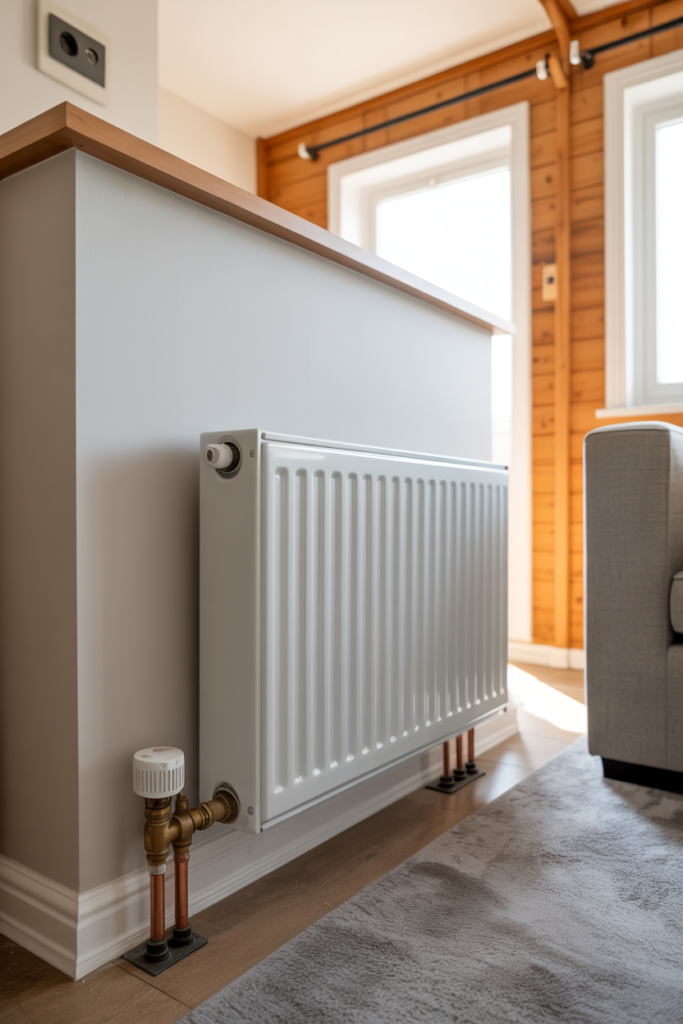
Step 6: Heating Solutions That Won’t Break the Budget
Heating a garage conversion efficiently is important because these spaces often sit slightly outside the existing central heating zone of the house. Extending the existing central heating system with an additional radiator is the best long-term solution if your boiler has enough capacity. A plumber can assess this fairly quickly and it’s usually the most cost-effective heating method to run day to day.
Electric panel heaters are a lower upfront cost option if extending the central heating isn’t feasible. Modern electric panel heaters with programmable timers are much more efficient than older storage heaters and work well in a well-insulated space. They cost more to run than gas central heating over time, but the installation cost is minimal.
Underfloor heating is worth considering if you’re already lifting the floor during the conversion. Electric underfloor heating mats are affordable to buy and straightforward to install under tile or stone flooring. For a living room with softer flooring, a warm insulated base and a good radiator usually does the job just as well.
Step 7: Lighting Design That Makes the Room Feel Bigger
Lighting is one of the most underrated parts of a garage conversion and one of the easiest places to make a big visual impact on a small budget. Relying on a single ceiling light in the center of the room is the fastest way to make a converted garage feel like a converted garage. Layer your lighting instead.
Recessed downlights across the ceiling give a clean, modern look and distribute light evenly across the room. Add a floor lamp or two in corners, and consider under-shelf or cabinet lighting if you’re adding storage. These layers of light make the room feel larger, warmer, and more considered without requiring a large budget.
Dimmer switches are a small addition that makes a noticeable difference to how the room feels in the evenings. They cost very little to add during the electrical stage and give you real flexibility between bright working light and relaxed ambient light depending on how you’re using the space.
| Conversion Step | Estimated Budget Cost | DIY Possible? | Priority Level |
|---|---|---|---|
| Remove garage door and frame new wall | $800 to $1,500 | Partly | High |
| Insulation (walls, floor, ceiling) | $500 to $1,200 | Yes | High |
| Flooring (laminate or LVP) | $400 to $900 | Yes | High |
| Electrical work | $600 to $1,500 | No | High |
| Plastering or dry lining | $300 to $800 | Partly | Medium |
| Heating (radiator extension) | $400 to $1,000 | No | High |
| Lighting design and fixtures | $200 to $600 | Yes | Medium |

Budget-Saving Tips That Actually Work for Garage Conversions
Buying materials in bulk from a builder’s merchant rather than a DIY superstore saves a surprising amount on things like plasterboard, insulation, and flooring. Merchant prices are consistently lower than retail, and most merchants will sell to the public without requiring a trade account.
Doing as much of the work yourself as you realistically can makes a significant difference to the total cost. Painting, flooring, and basic carpentry are all manageable for a reasonably capable DIYer. Reserve the budget for the jobs that legally or practically require a professional, such as electrics, gas work, and structural modifications.
Sourcing furniture and decor secondhand once the room is complete keeps the final cost down without compromising on style. Marketplace apps and charity shops regularly turn up quality sofas, coffee tables, and shelving at a fraction of retail prices. A well-furnished converted garage living room doesn’t need to look like a compromise.
Conclusion
Converting a garage into a living room on a budget is absolutely achievable with the right approach and a clear plan. The key steps are sorting permissions first, insulating properly, getting the electrics planned before the walls go up, choosing cost-effective flooring, and layering the lighting to make the room feel like a proper living space rather than a DIY project.
The biggest savings come from doing the groundwork well, buying materials smart, and handling the jobs you genuinely can do yourself. The steps that require professionals, mainly electrics, structural work, and gas connections, are non-negotiable, but everything around them offers real flexibility for a budget-conscious approach.
A garage conversion done thoughtfully adds genuine value to a home and creates a room that feels completely intentional. Start with the structural and thermal basics, build the room in stages if needed, and furnish it carefully at the end. The result will look far more expensive than it actually was.
Frequently Asked Questions
How much does it cost to convert a garage into a living room on a budget? A basic budget garage conversion typically costs between $3,000 and $8,000 if you handle some of the work yourself. Costs rise significantly if you hire out all labour or need extensive structural work done.
Do I need planning permission to convert a garage into a living room? In many countries, a basic internal garage conversion falls under permitted development and doesn’t require planning permission. Always check with your local authority first, as rules vary by location and property type.
How long does a garage conversion take? A straightforward single garage conversion typically takes between two and four weeks if work progresses steadily. Larger conversions or those requiring significant structural work can take six to eight weeks or longer.
Can I convert a garage into a living room myself? You can handle many parts of the conversion yourself, including insulation, flooring, painting, and basic carpentry. Electrical work, gas connections, and structural modifications should always go to qualified professionals.
What is the best flooring for a garage conversion living room? Laminate and luxury vinyl plank are both excellent budget choices for garage conversions. They handle slight temperature and humidity variations well, install easily, and look great in a finished living room.
Does a garage conversion add value to a home? A well-finished garage conversion typically adds between 10 and 15 percent to a property’s value in most markets. The conversion must meet building regulations and be properly documented for it to count positively during a property valuation.
How do I heat a converted garage living room cheaply? Extending your existing central heating with an additional radiator is the most cost-effective long-term heating solution. Good insulation dramatically reduces running costs regardless of which heating method you choose.